In the beginning of December I finally build some shelves under the kitchen cabinets to house Mo’s collection of Moomin cups. Something Mo almost gave up on as it took forever to get to this project. But now it is in place, it really dresses up the kitchen.
The rest of the month went by in a blink. It also helped we had a little holiday with Loeke en Carla in the Czech republic.
The Moomin cupsBoth shelves really dress up the kitchen
While cleaning up the attic of the garage we came across the upper shelves of the old kitchen. It made sense to hang them in the garage kitchen so we have more useful space and more unity.
In between I made a few holders for the french cleat wall and I arranged a bench for the home gym, which starts to look more complete.
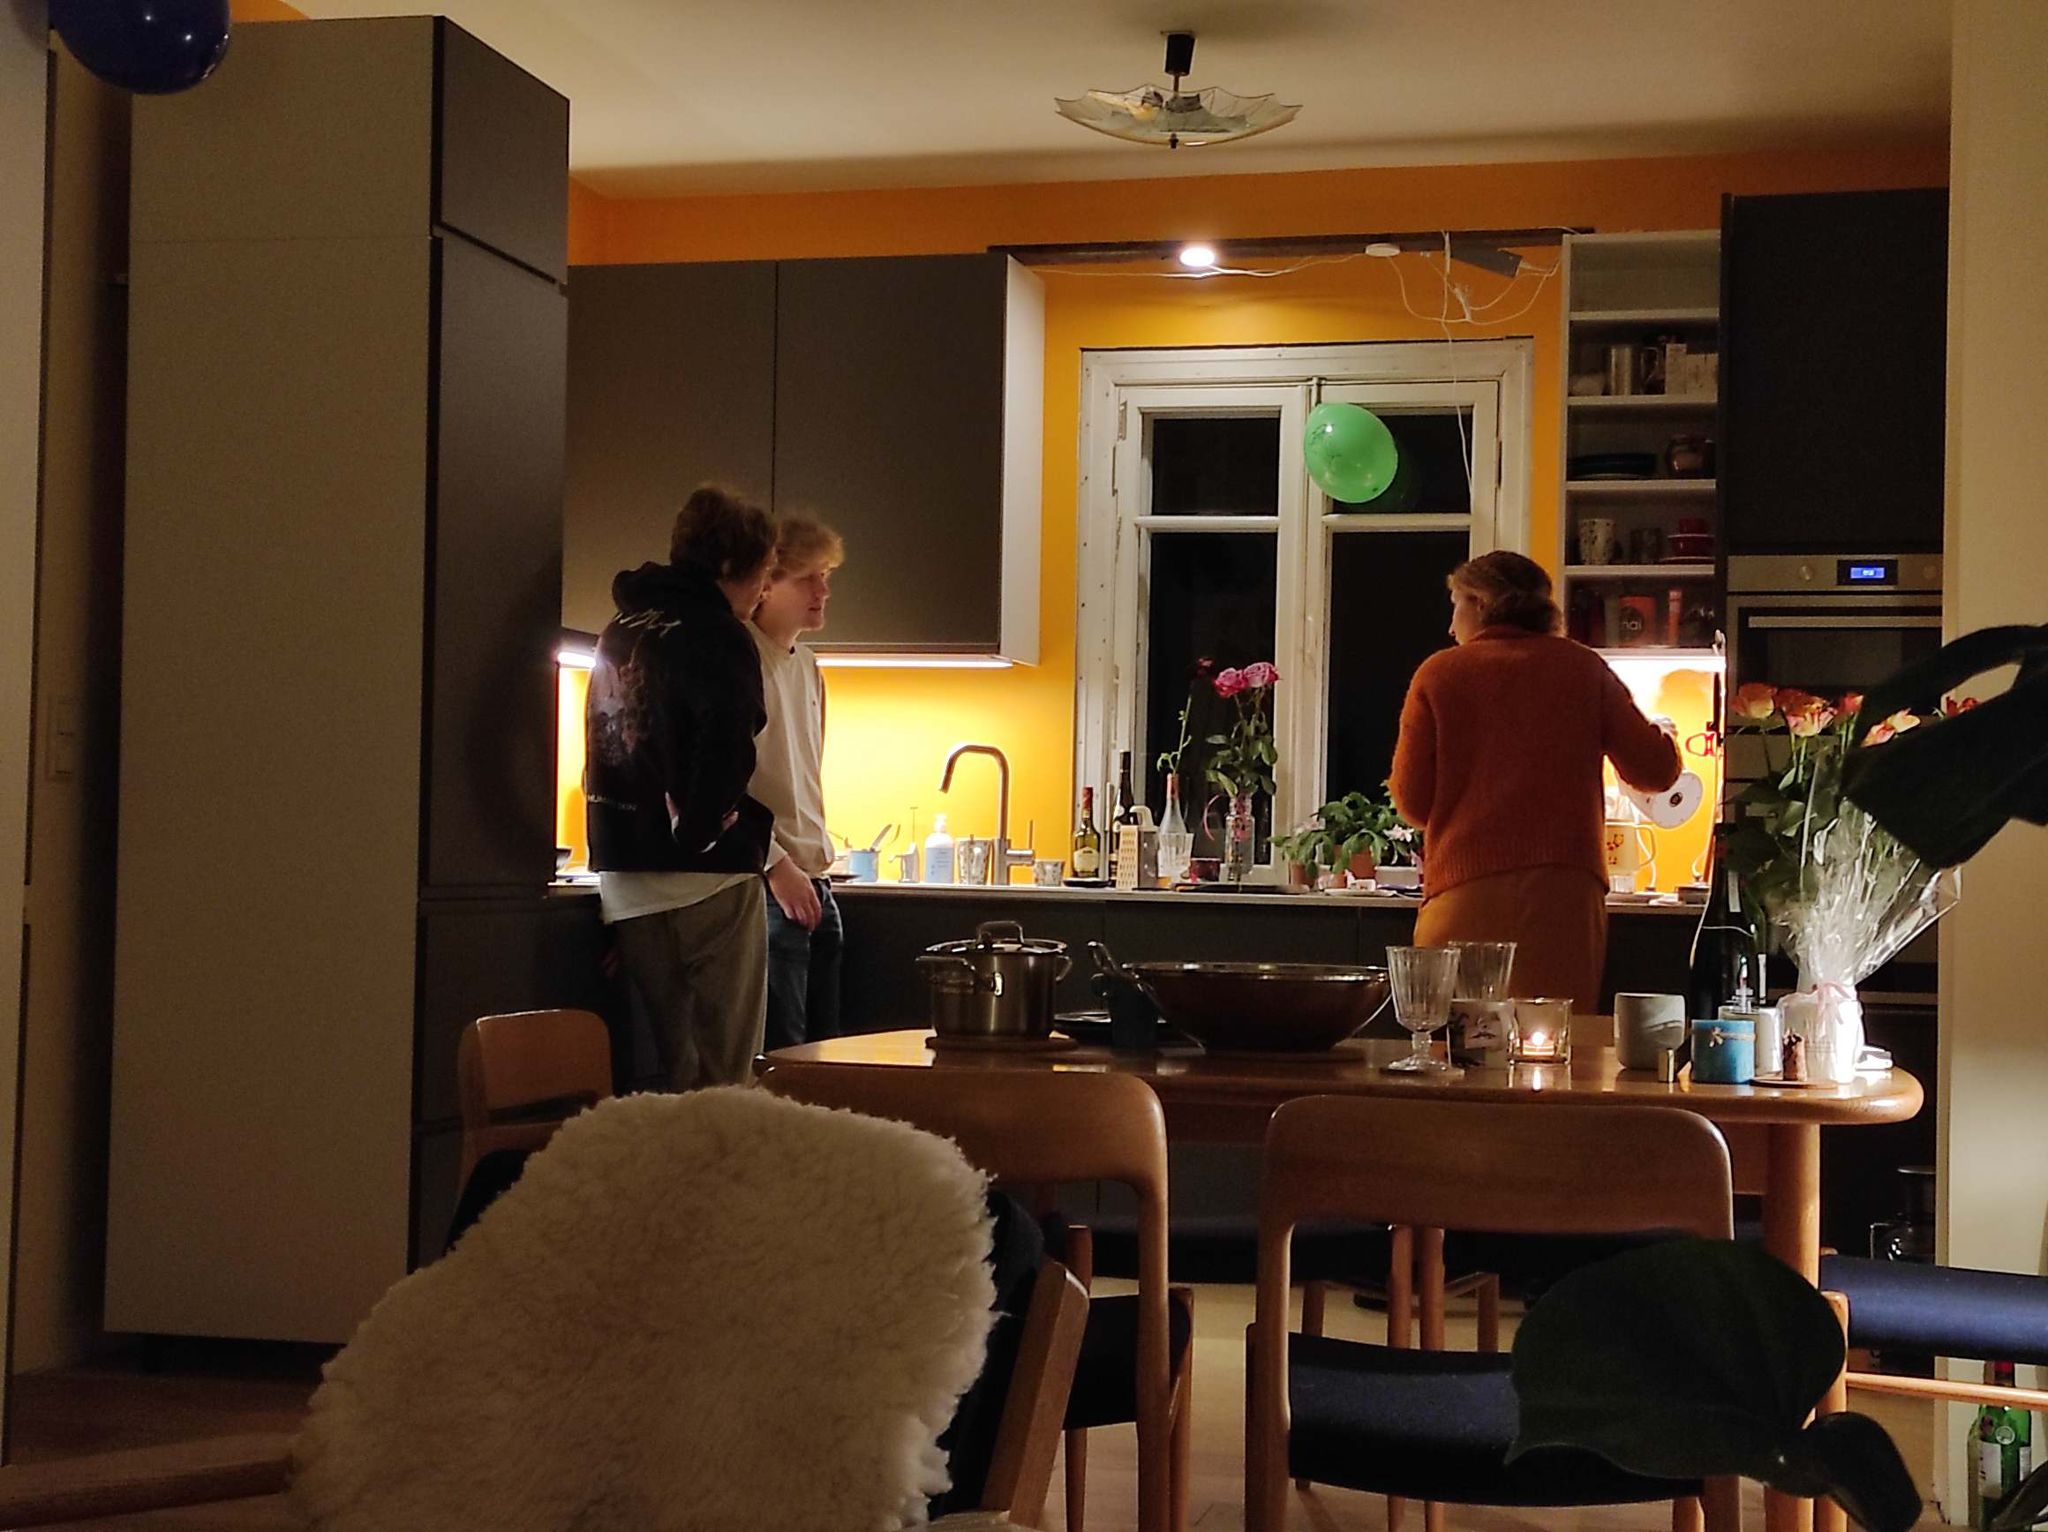
November is also the month Mo has her birthday. As long as I know here she never celebrated it much but this year she planned a real party in combination with an exhibition of some of her art. The art rails really showed their purpose and even the bathroom was brightened up with a fitting work. This also was a good excuse to refit the kitchen sink and finally move my standing desk and office chair from Mo’s studio to my office. This involved building up scaffolding so we could move it in there through the window. For the party I spend a day in the kitchen making beautiful and tasty snacks for the party, which gave me nice memories to the time I worked in the big kitchen of Amsterdam Rai.
We also visited Mo’s mother, who had an issue with a toilet pot that was leaking. It turned out to be an easy fix by replacing the bold that connects the water reservoir and the pot.
Bench addedTop shelvesAdditional tools hangingReapplying the sinkHouse of artFinally my desk and chair upstairsWhen I don’t rebuild housesPretty clear what needed replacement
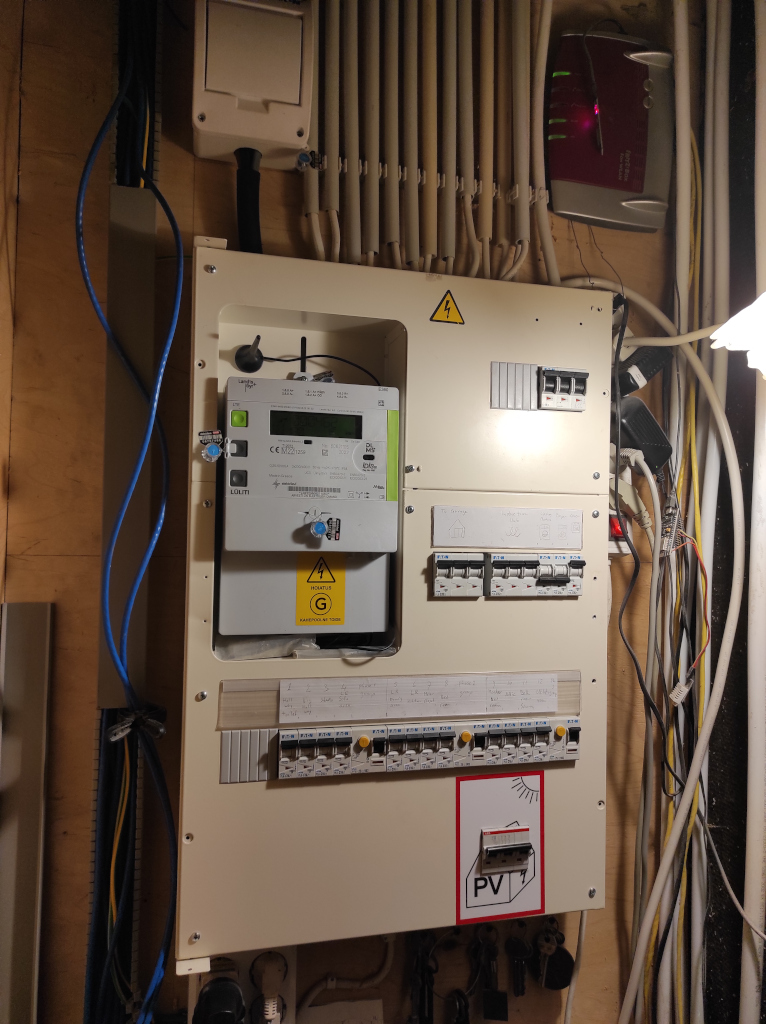
My goal was to get the solar panels connected to the grid before the end of the year. So still some work to do. Once the new cable to the electricity meter was connected, a project in which the meter was also finally moved to the final position in the meter closet, I could start connecting the inverter also. Fronius has great instruction videos online on how to do it, even though it pretty straight forward to begin with.
Once the inverter was online I set it up, enabled the API and connected it to Home Assistant. The next day it started spitting data which I then displayed as nice graphs.
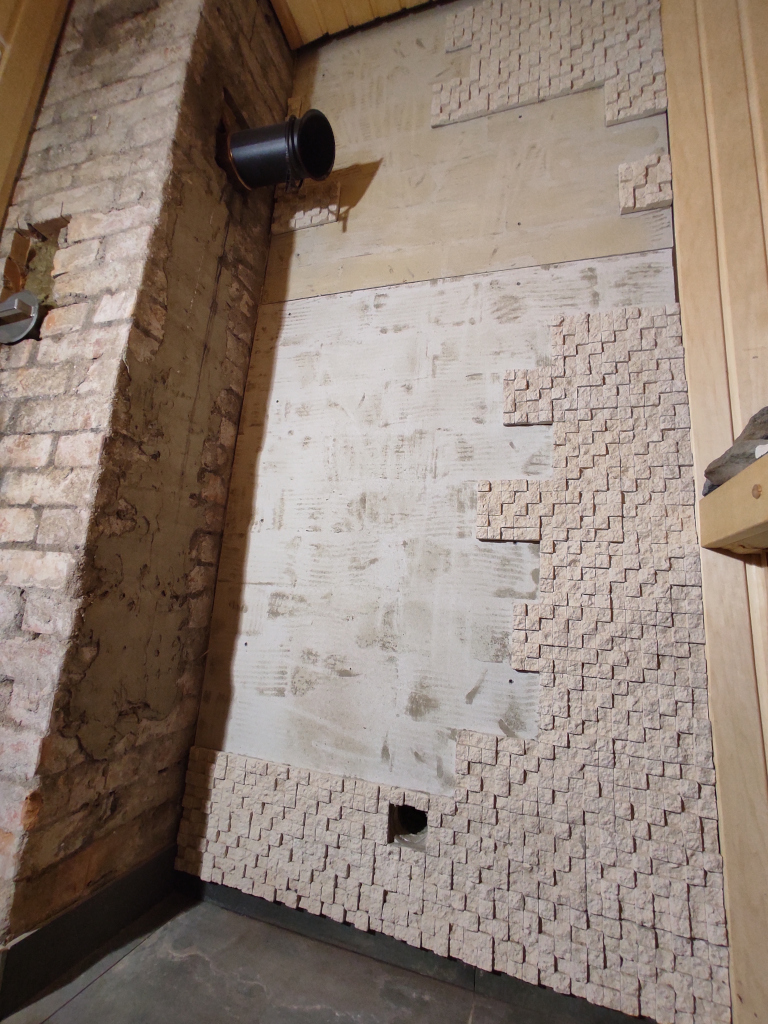
With that done, I decided it was time to do a bit of service and repair work in the sauna. After three year a few of the stones started to come loose, so I got a different glue. When I started to take of the loose stones from the top, I soon found out it would be a bit more work then the few I thought where loose, around 80% of the stones came loose without any effort, so I took them out and after that glued them back in place. I now also could finally glue the stones in front of the chimney and on the other side of the chimney put the last wood.
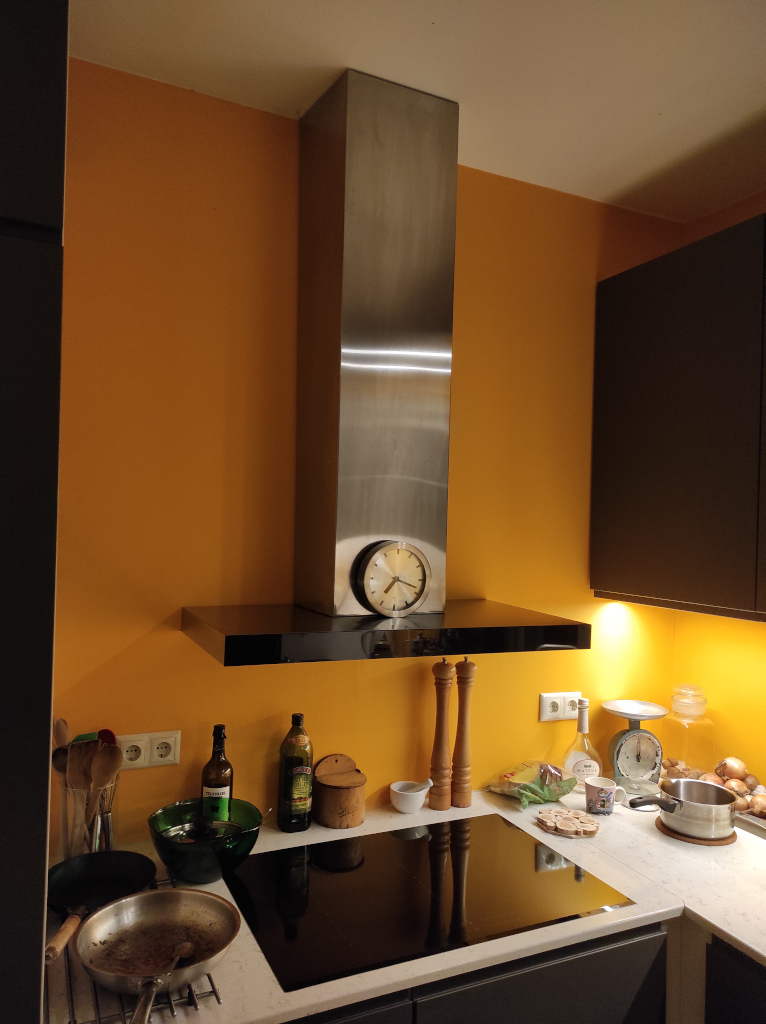
In the kitchen I placed the chimney of the extractor hood, I put insulation material in it but it was still much noisier then we had hoped. Let’s see if at some point I can come up with an idea to improve that, as now it is not a nice hood to use.
Everything connectedA few tiles got looseAnother finishing touchAnd the chimney is finally covered as well
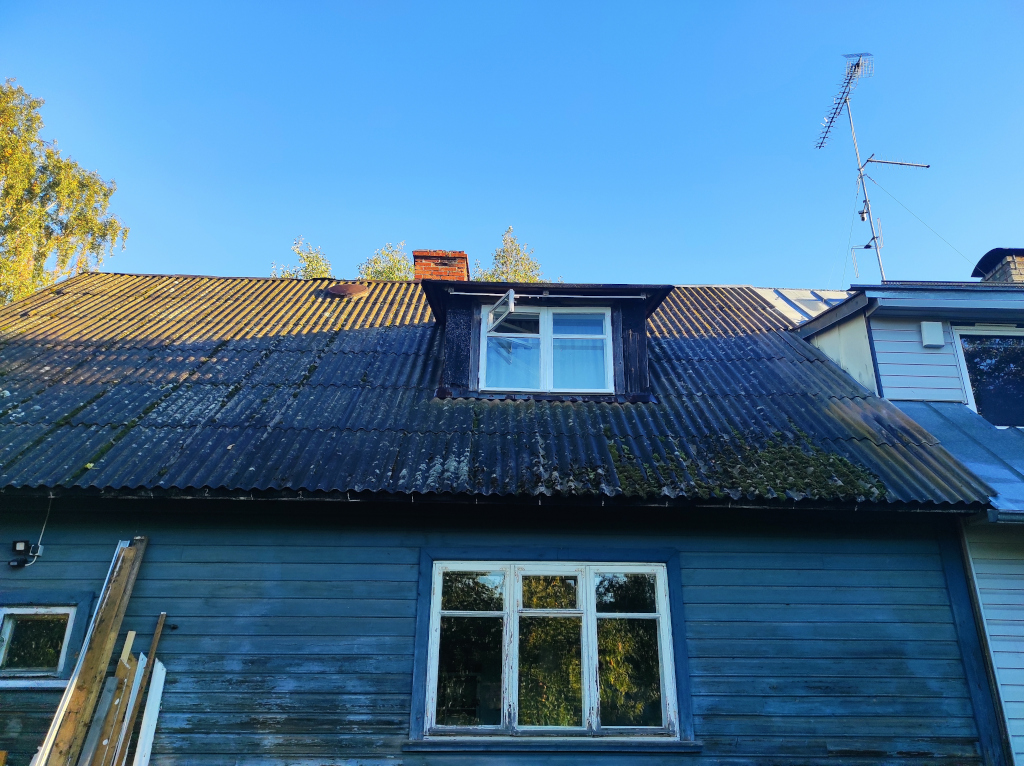
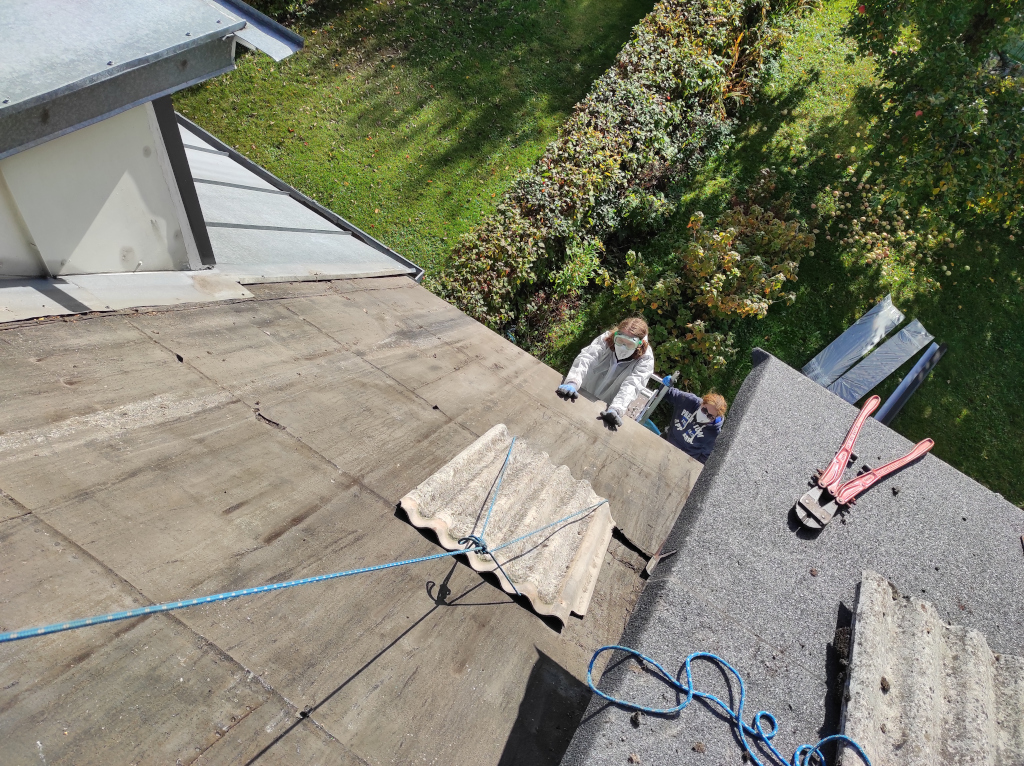
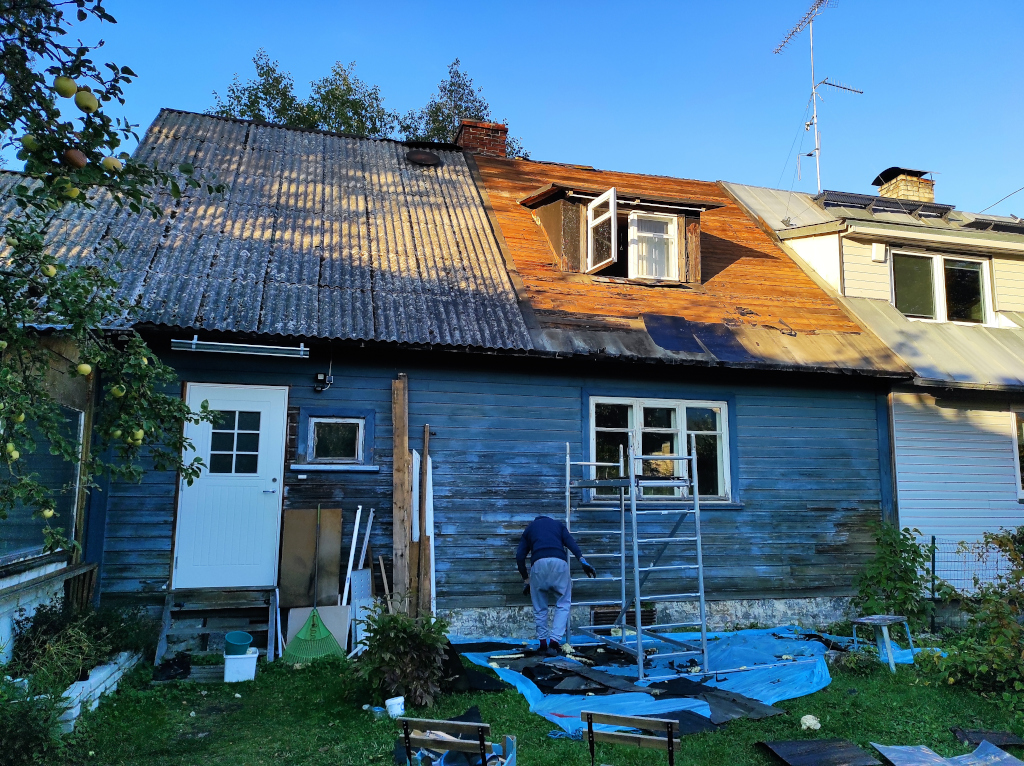
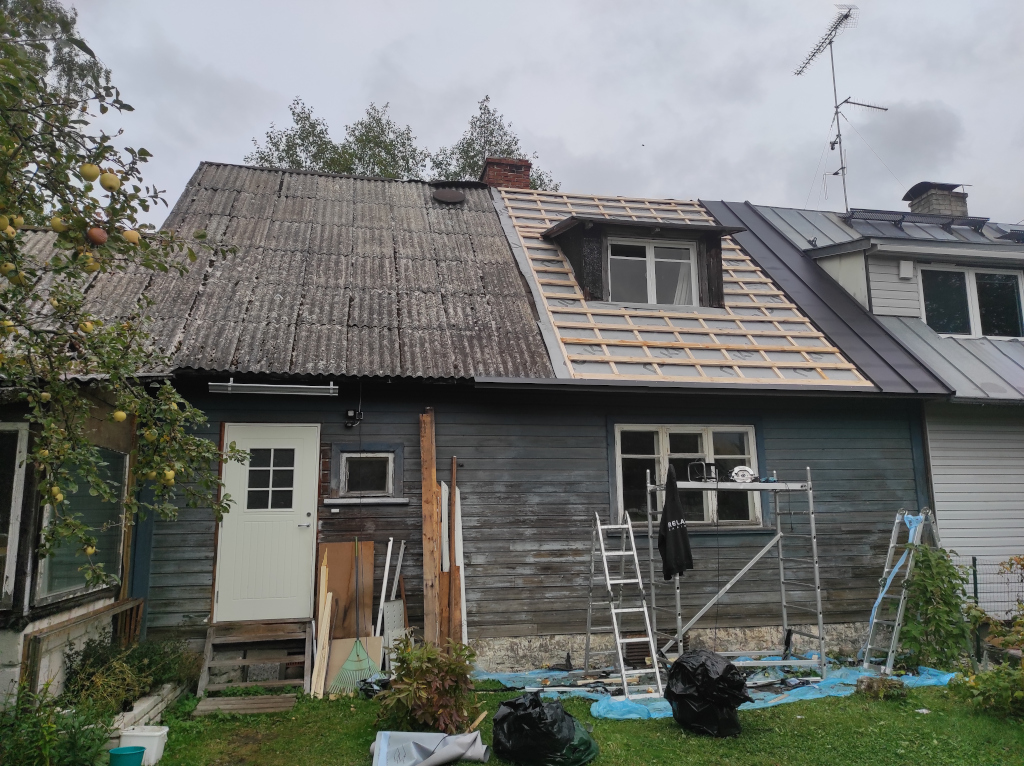
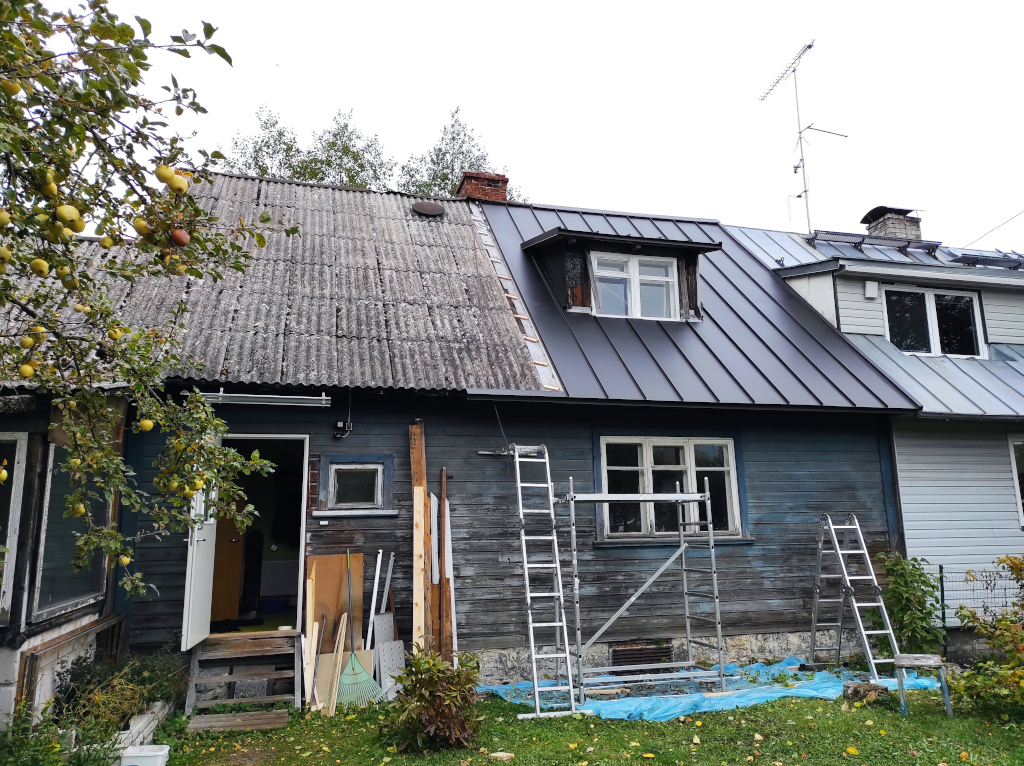
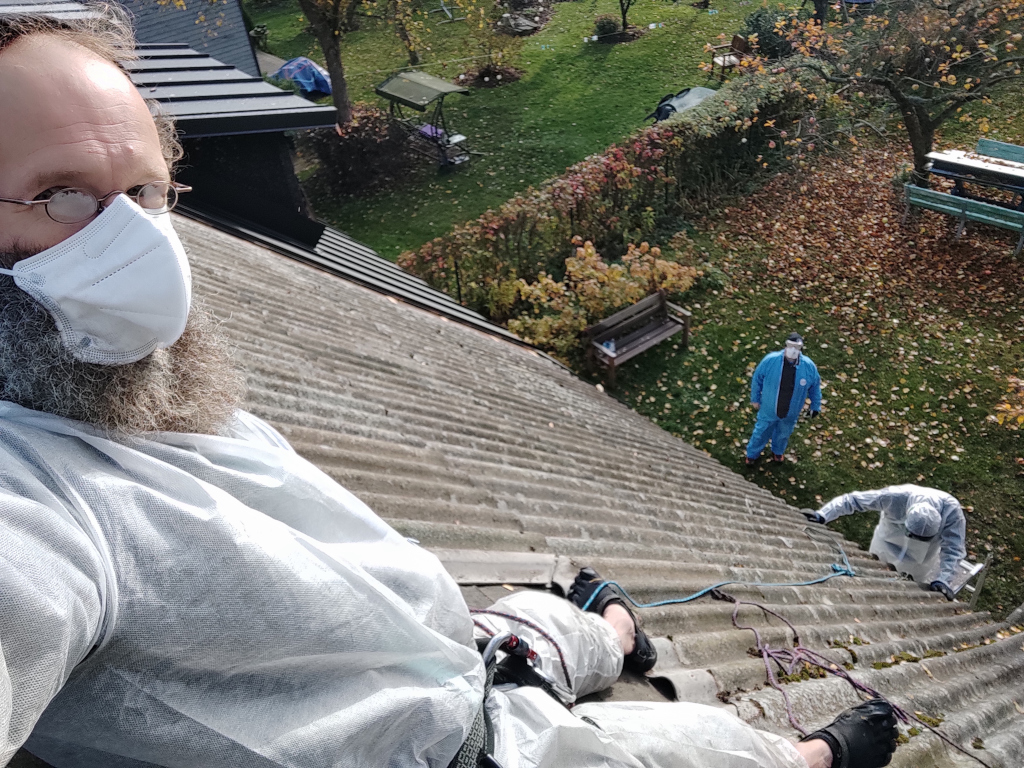
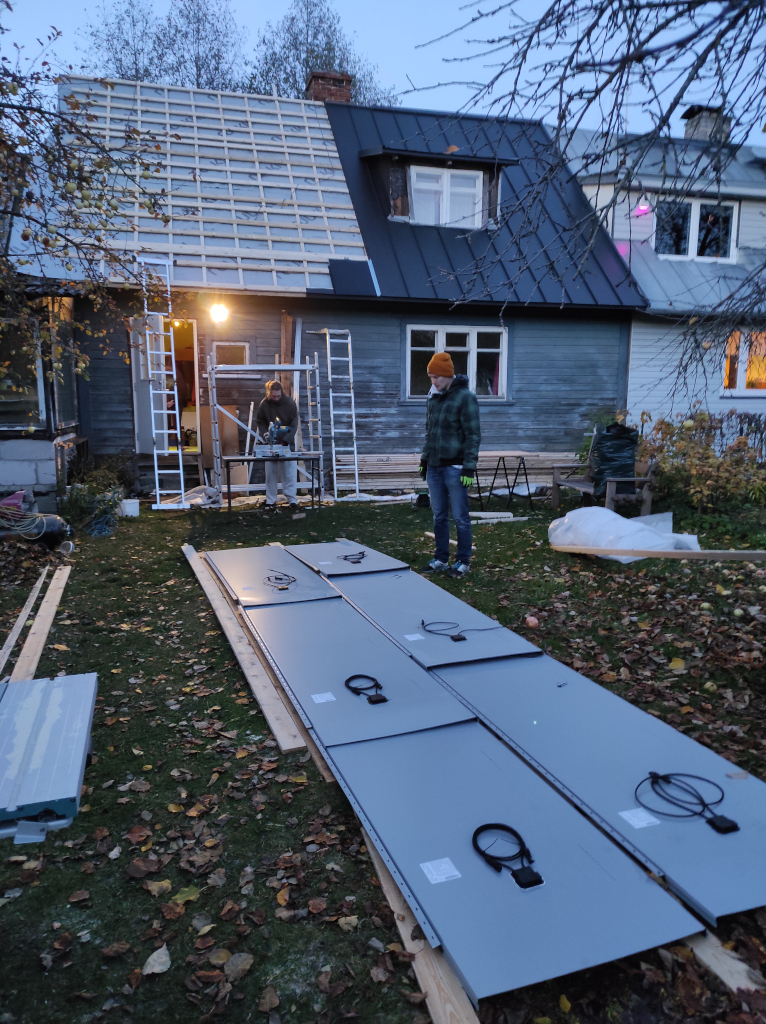
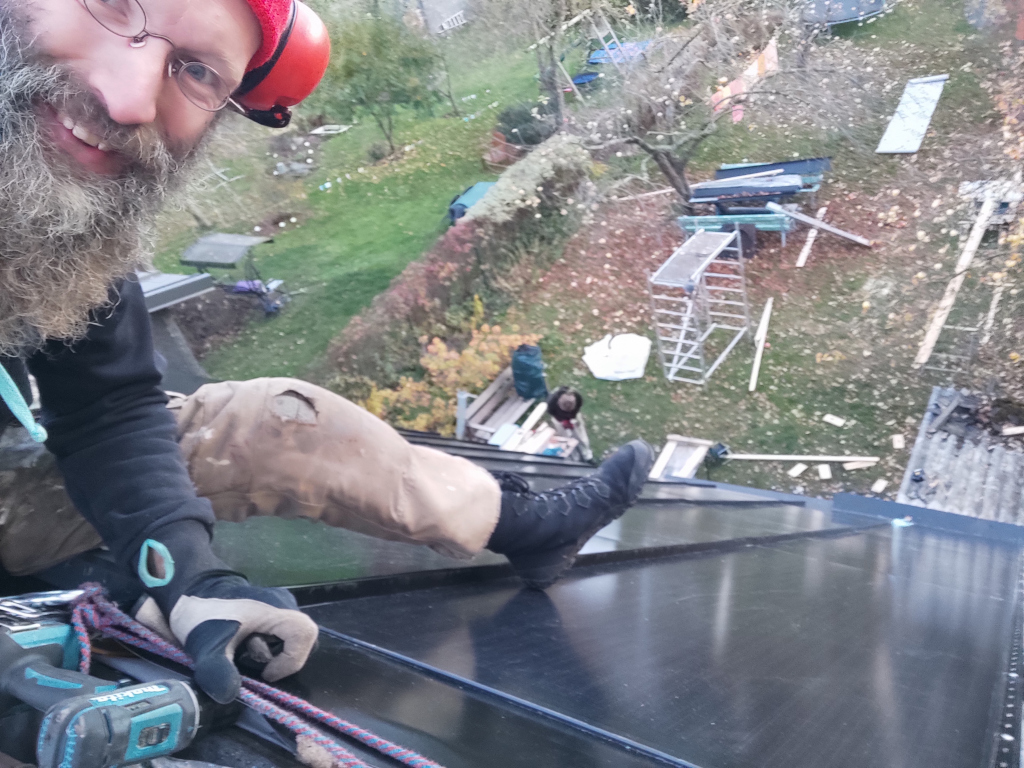
The weather is still good, and I want to have to solar panels on the roof before winter. Partly because this part of the roof still has some leakage at odd times. Besides it would be nice to have them online before January, so I will have a good start of the annual data. We first took off half of the roof, the part that bordered the neighbors. Here would be normal roofing. Dressed up in overalls, PF3 masks and gloves we took of the asbestos roof plates. The nails that where used came out surprisingly easy and there where no breakages. This went quicker then expected. Under the asbestos there was asphalt. To take that off took way more time then anticipated. It seemed nail where free in the Soviet times, they used so many! When the roof was clean, we placed the vapor barrier and the distance holders. On top of that the horizontal planks and after two days of work this part was ready for the new roof. Another two days later the roof was on and if looked fantastic! The neighbor was also very enthusiastic.
The next weekend I worked on some electrical things for the home automation without very much success and I finally placed the kitchen light in the final position. Mo found a place that was willing to make a custom extractor hood chimney. In Tartu of all places.
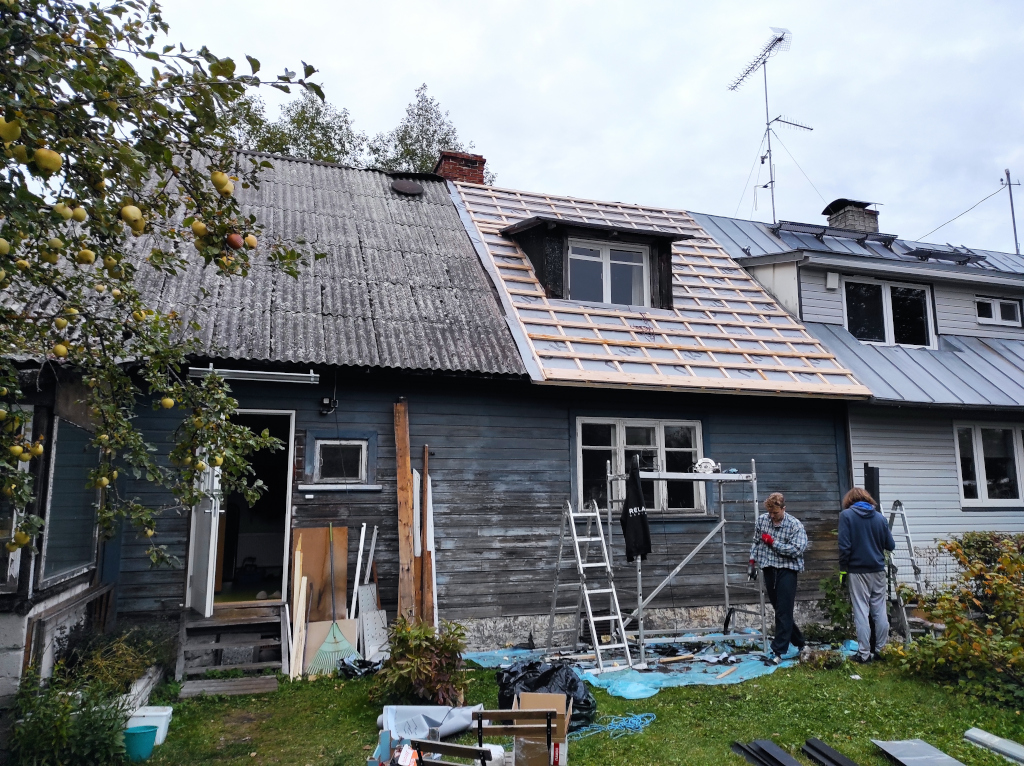
The weather forecast was good again, so we decided to replace the next part of the roof that would hold the solar panels. It was easier because we did not have to work around the dormer, but connecting the panels and routing the wires took more time, so all in all it took another 4 days get the solar panels up. The roof looks absolutely amazing!
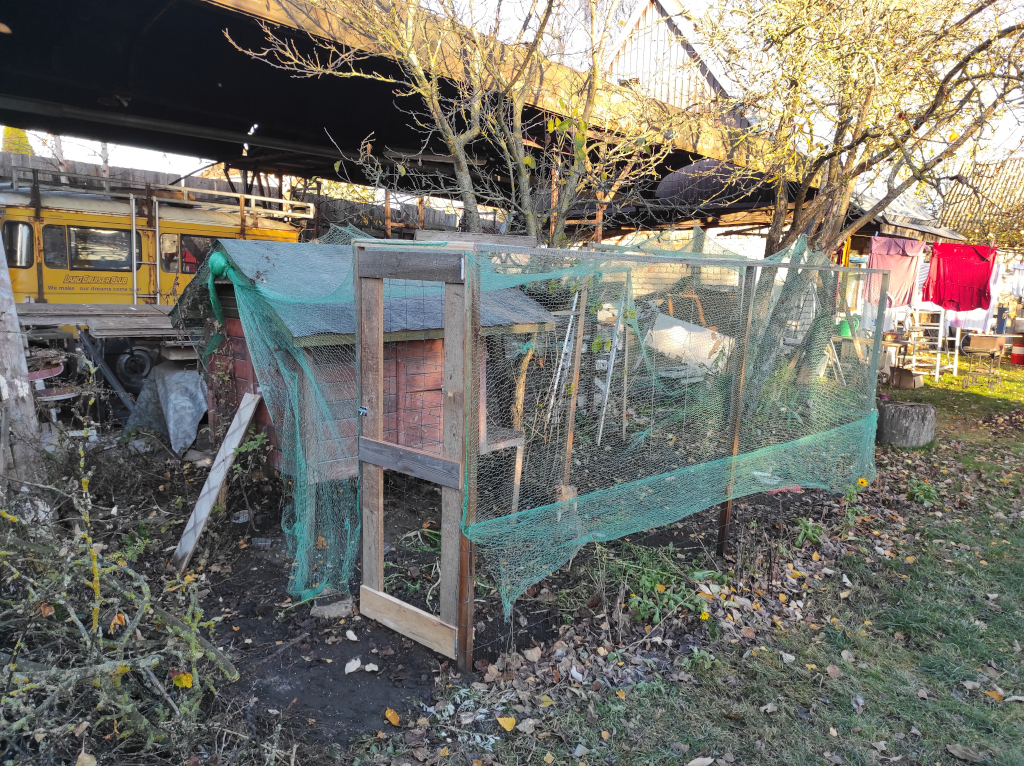
Before the winter would come in, I also upgraded the chicken coop with a door to make it easier to get in and out.
BeforeTaking the old roof offThe clean roofGood helpReady for the new roofFirst panels doneFirst half doneFinally the lights doneMore helpThe solar panel puzzleSafety firstFinally a door in the coopAfter
Ever since we moved into this house it boggled me how the door of the living room and the studio constantly bumped into each other. With the kitchen and living room mainly done, the hallway would be next. The first thing I picked up was the door of the studio. With a bit of checking out how it was put in, it was pretty easy to take out the frame as well.
When this was done I turned it 180 degrees and put it back in. This sure is one of the things that when it is done you ask yourself why you have not done this before. It made total sense and it felt like it never had been any different.
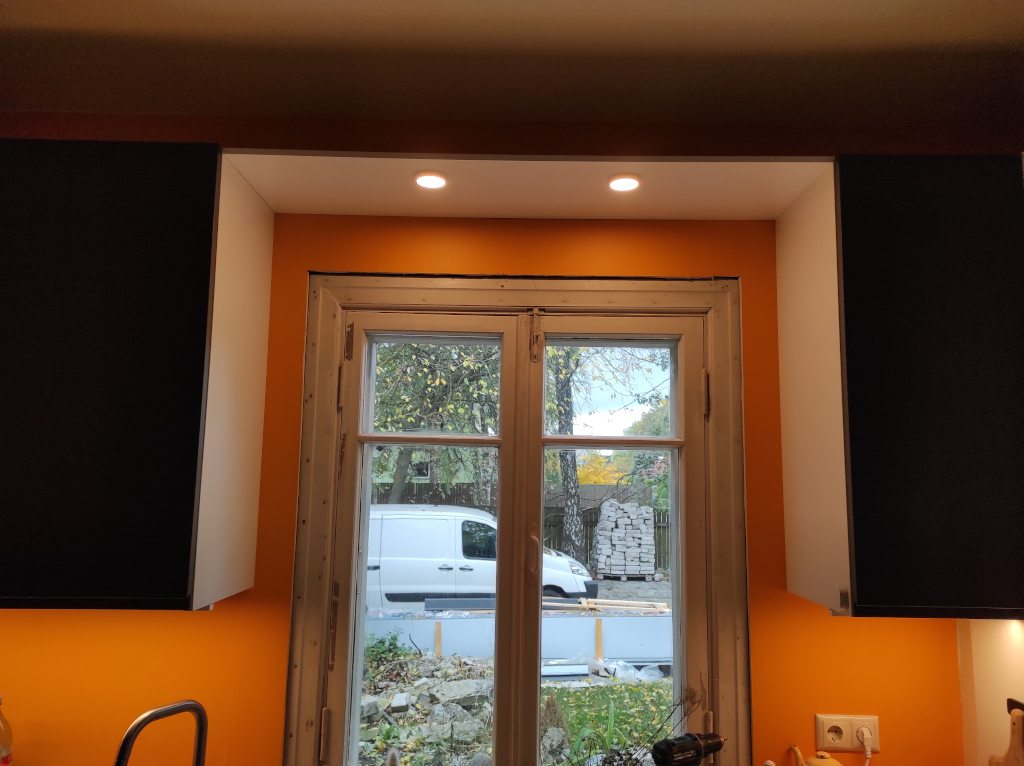
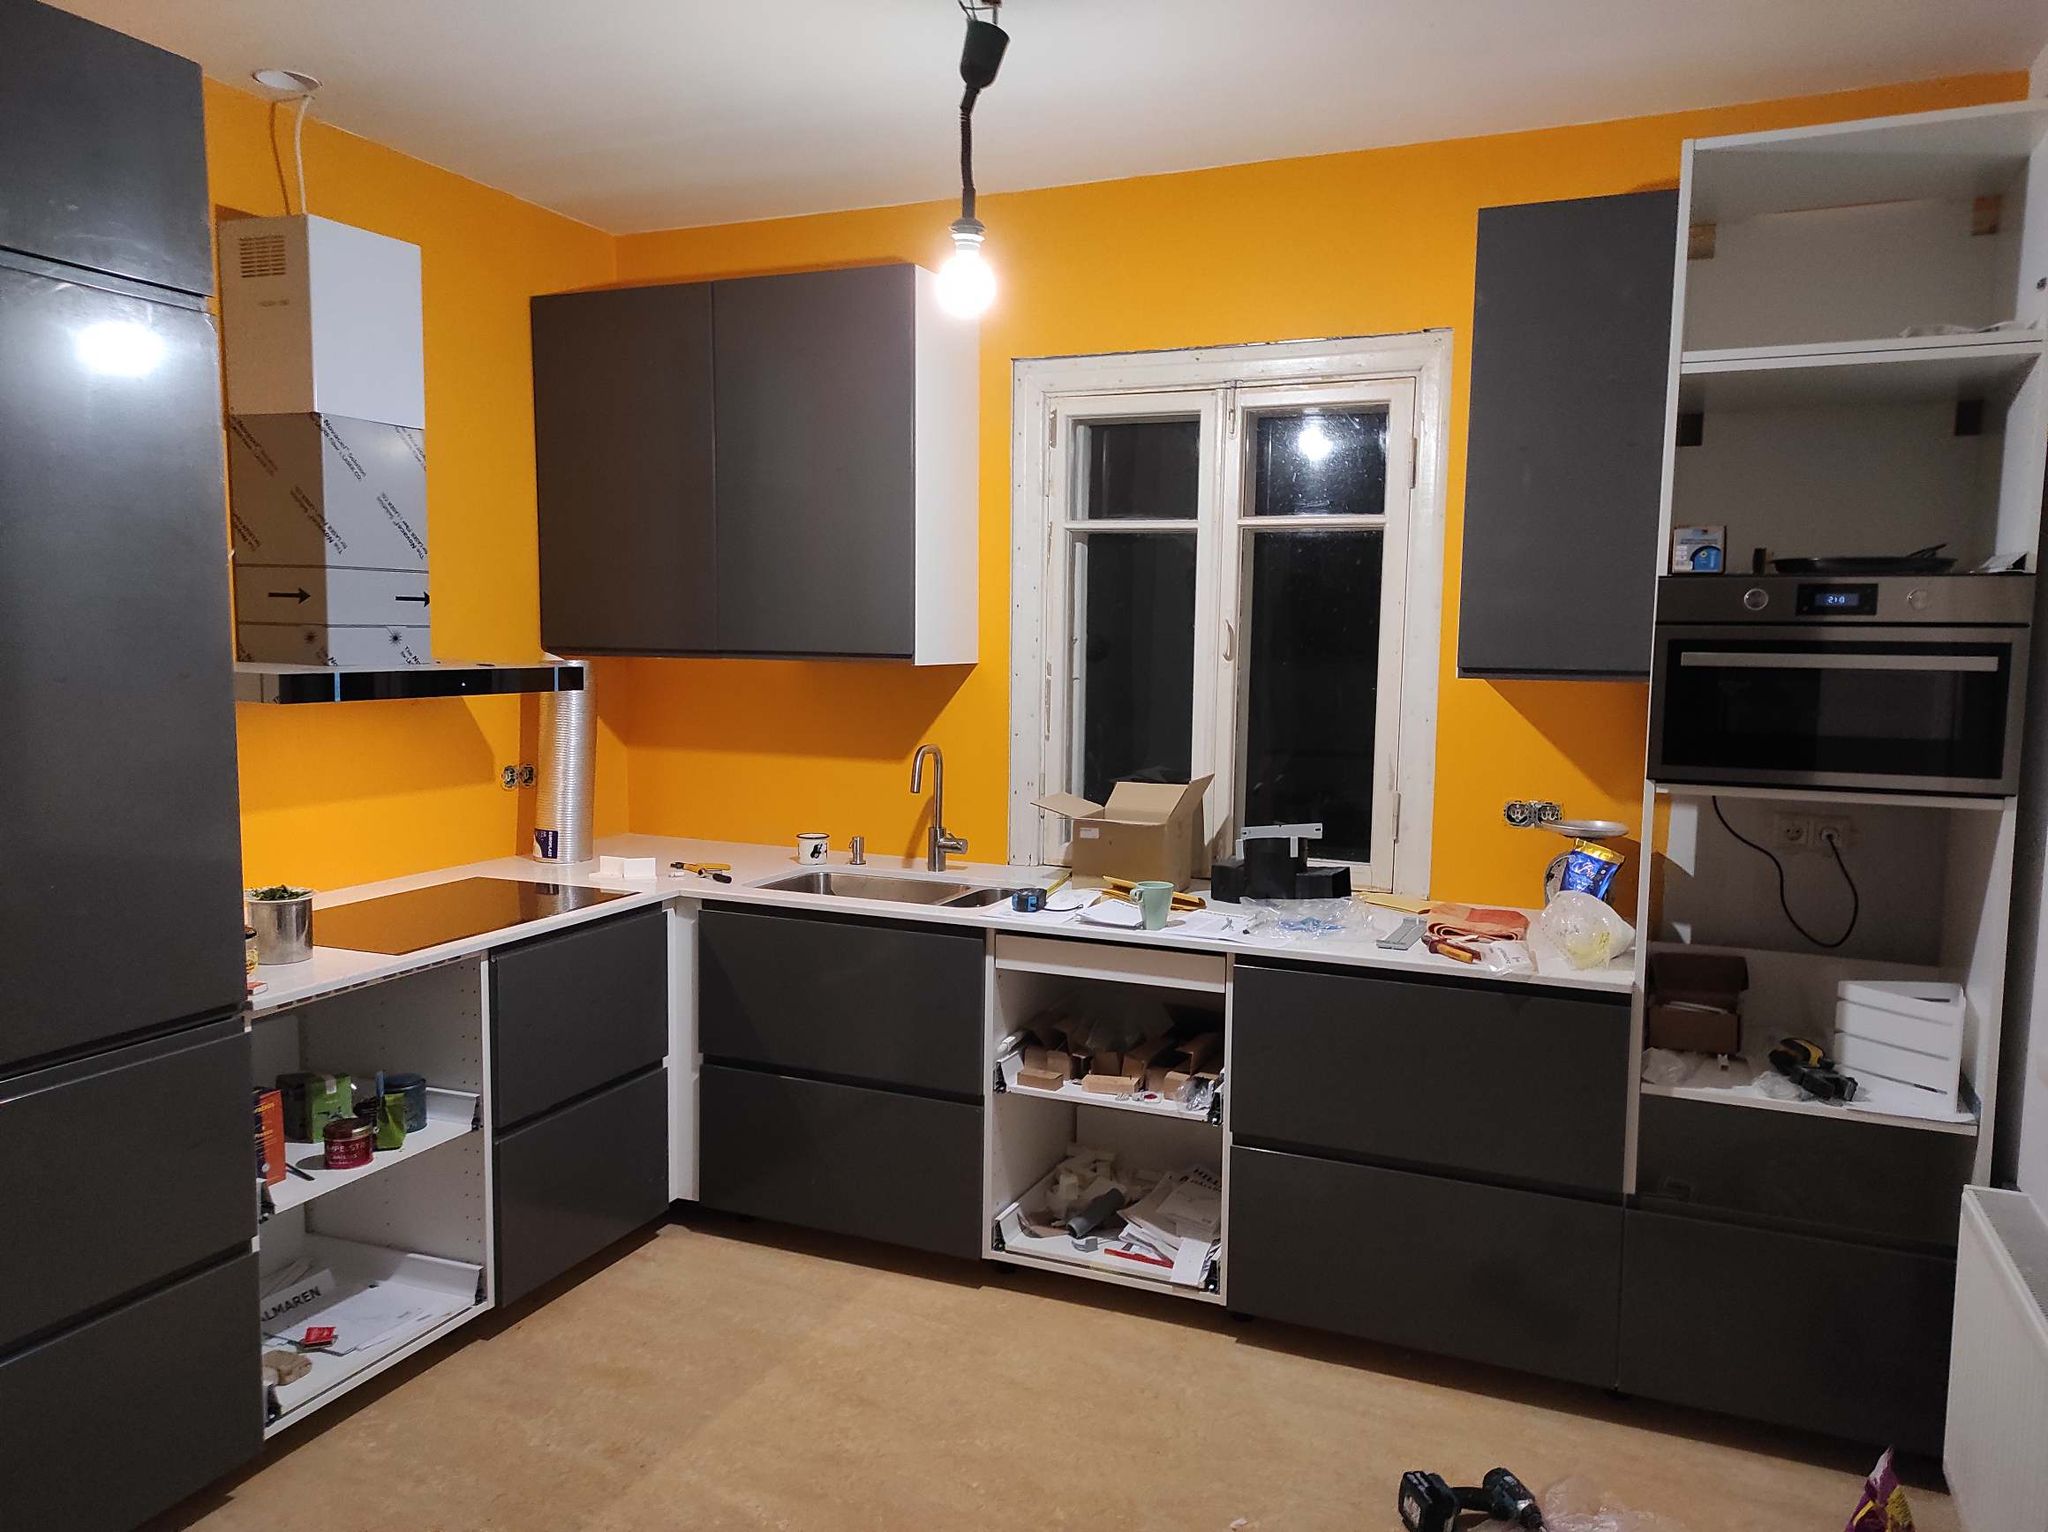
The last thing missing in the kitchen was the light over the counter. The missing piece was a wire between the adapter and the lights. It has a very specific connector, so it would not be easy to connect the otherwise. After enough patience and checking on several European Ikea stores, I found them in Berlin, so I contacted a friend in Berlin to get a few wires and send them. They finally came in and this really finished the kitchen. Not a week to early as the night are starting early these days.
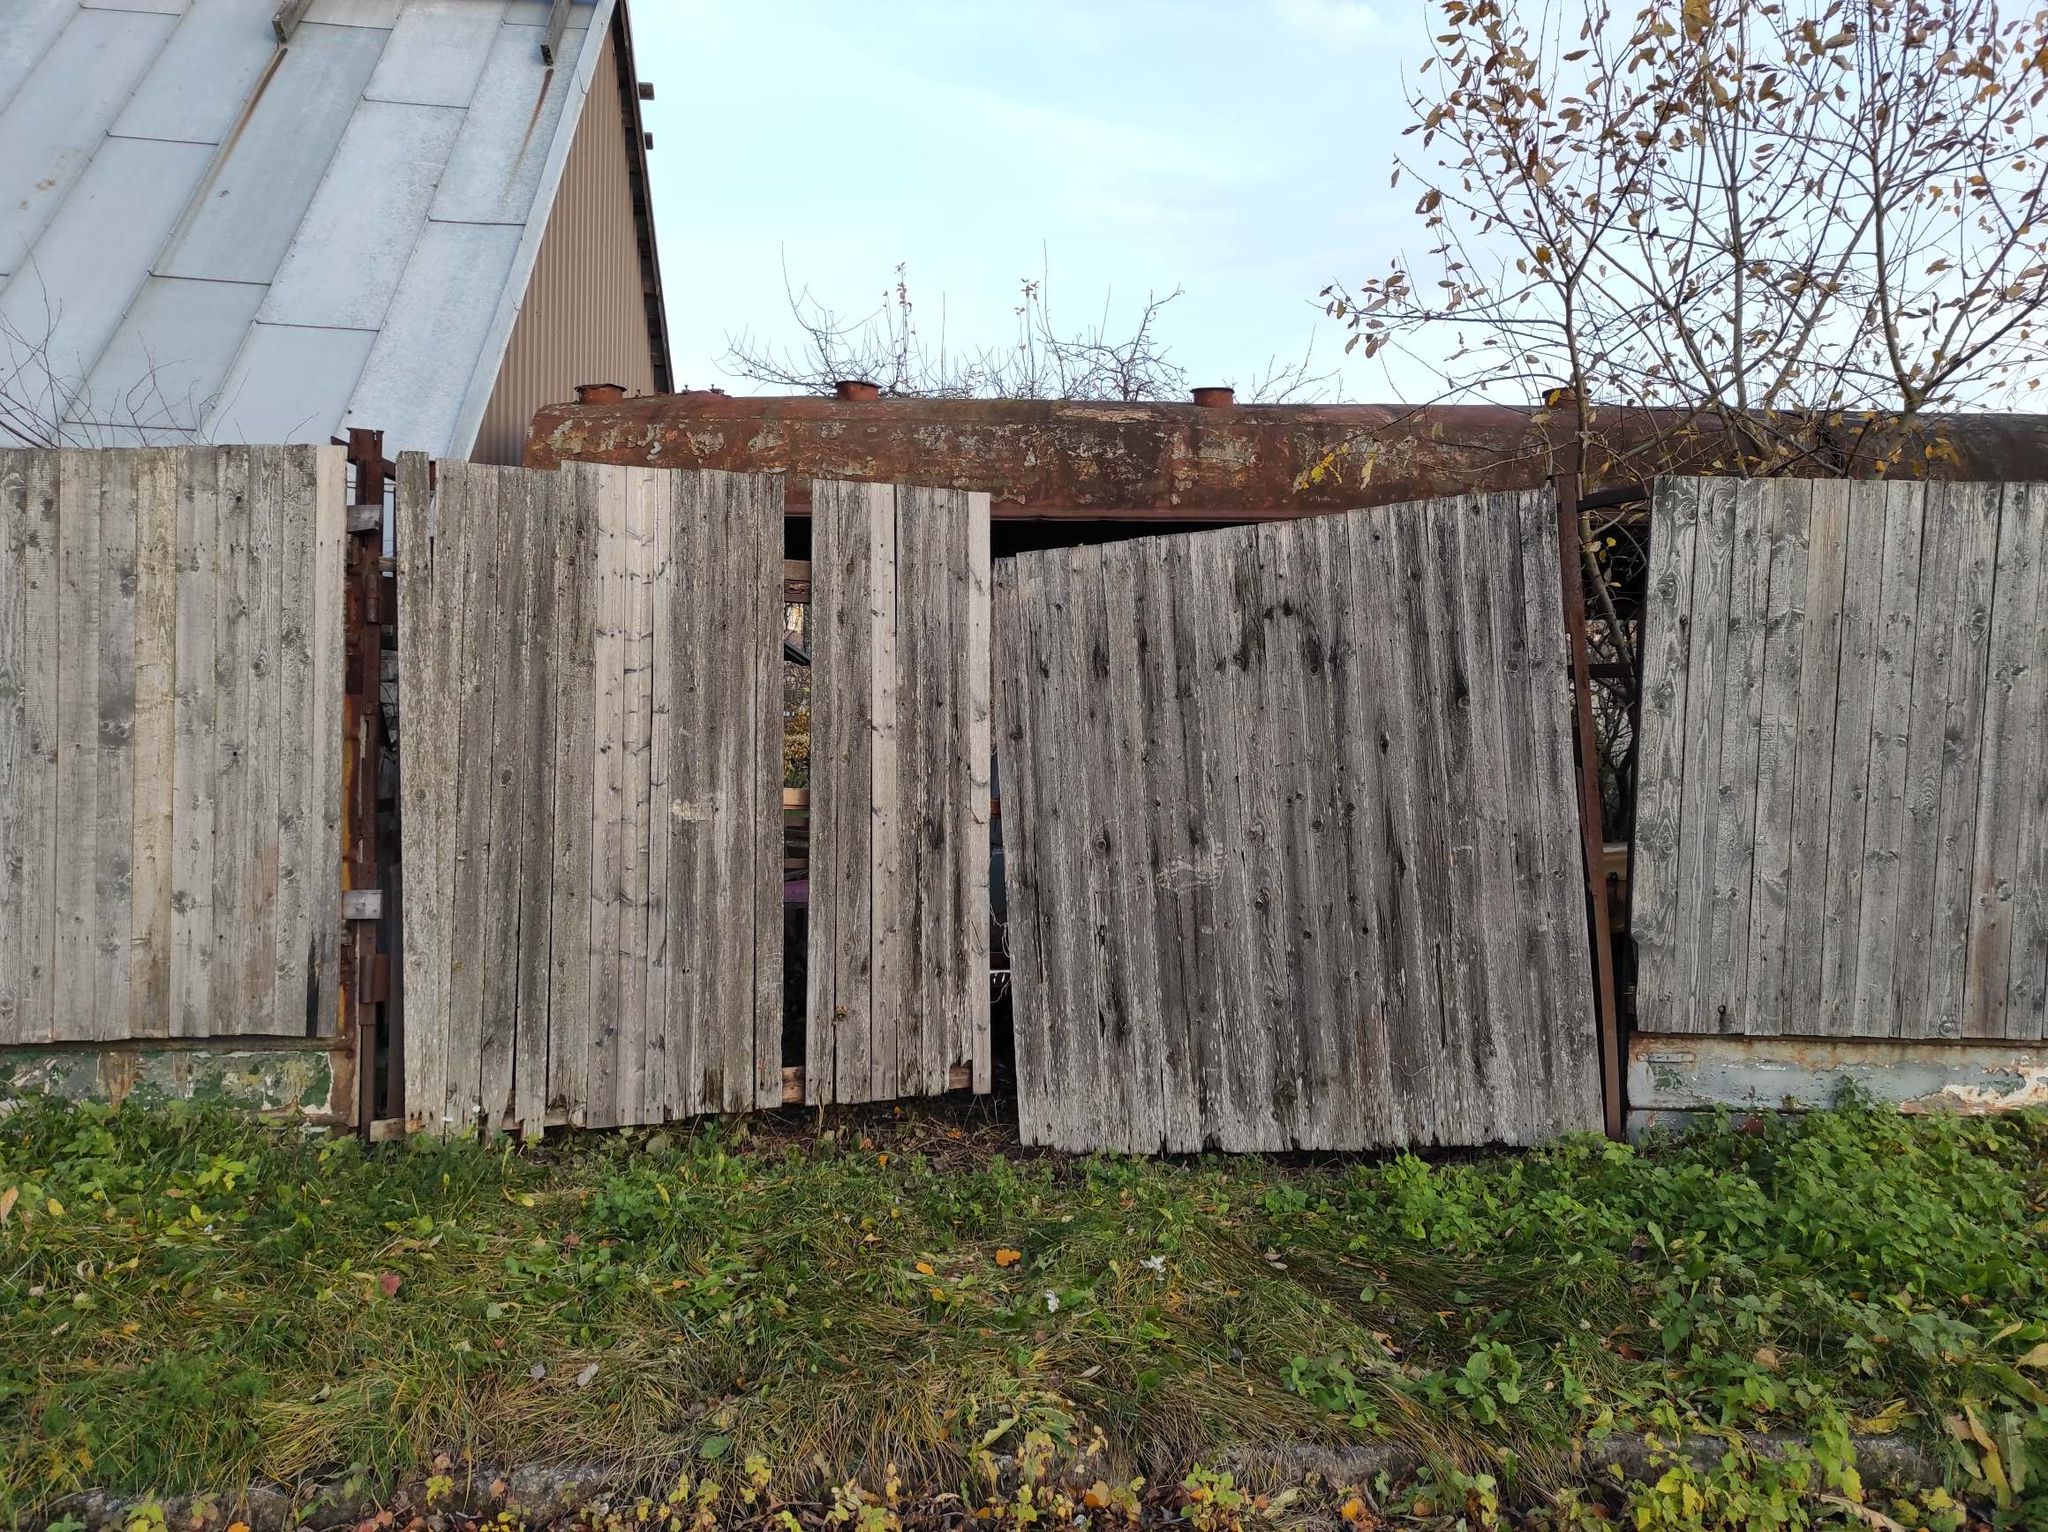
Fall is taking over summer. With it comes stormy weather. Some of the fences need some attention.
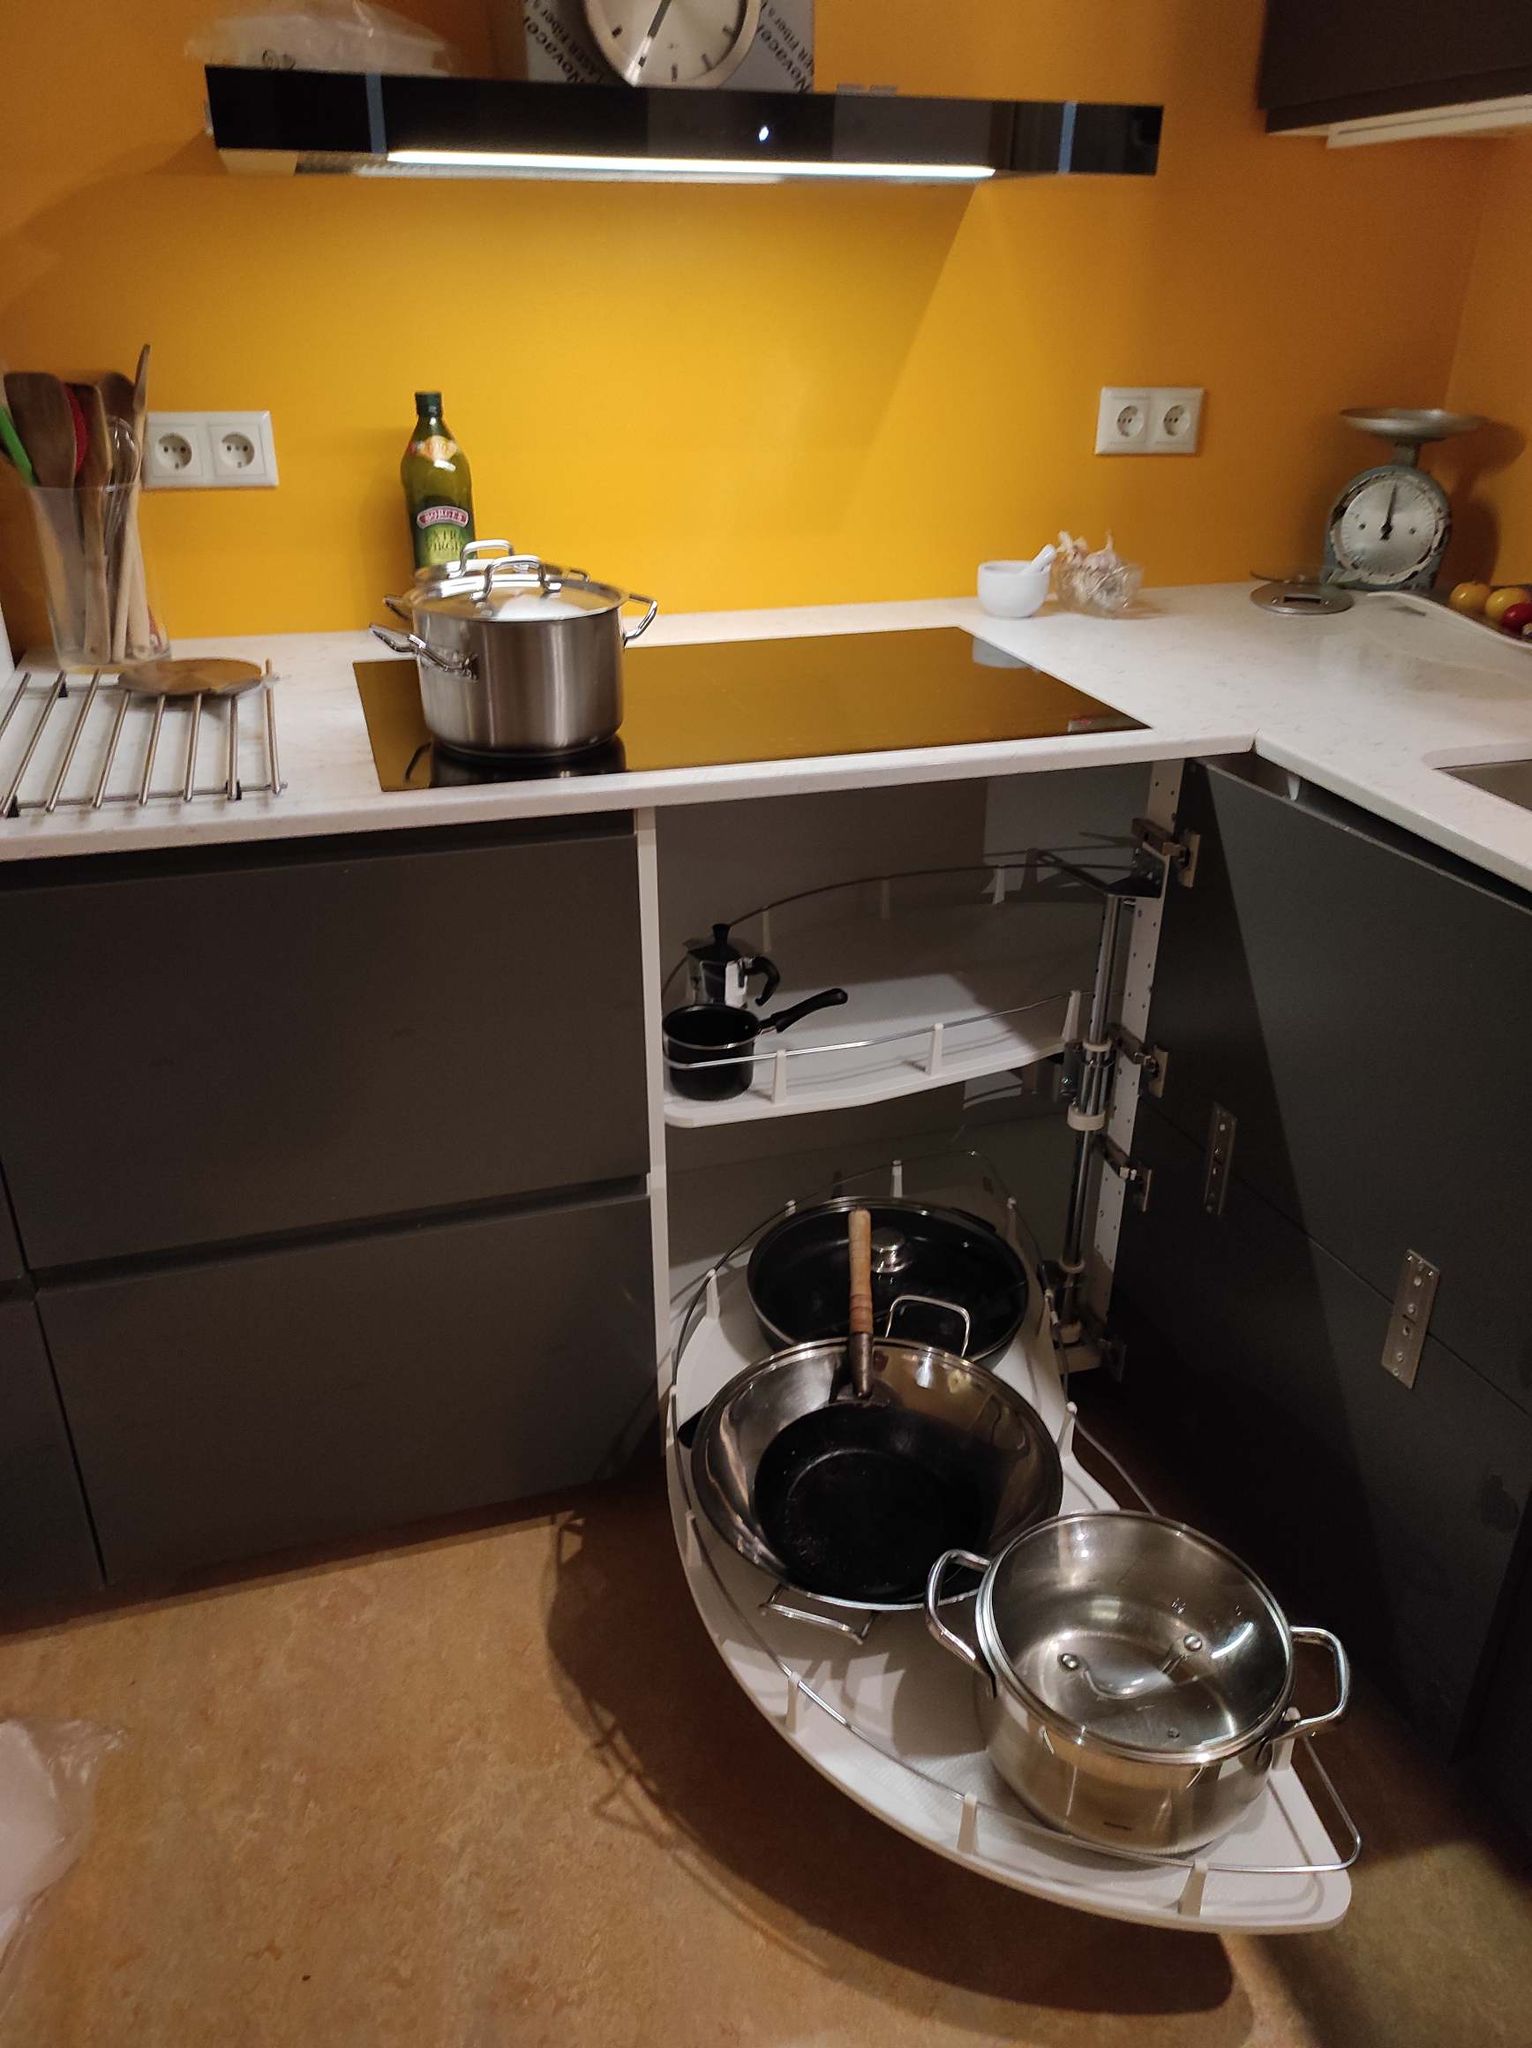
Besides there was another email from Ikea. Finally the pull out fitting for the corner cabinet came in. Installing that turned the cabinet into a useful cabinet where our pots and pans can be kept in an organized manner.
The before picture. Seems I forgot to take an after picture.Another useful cabinet
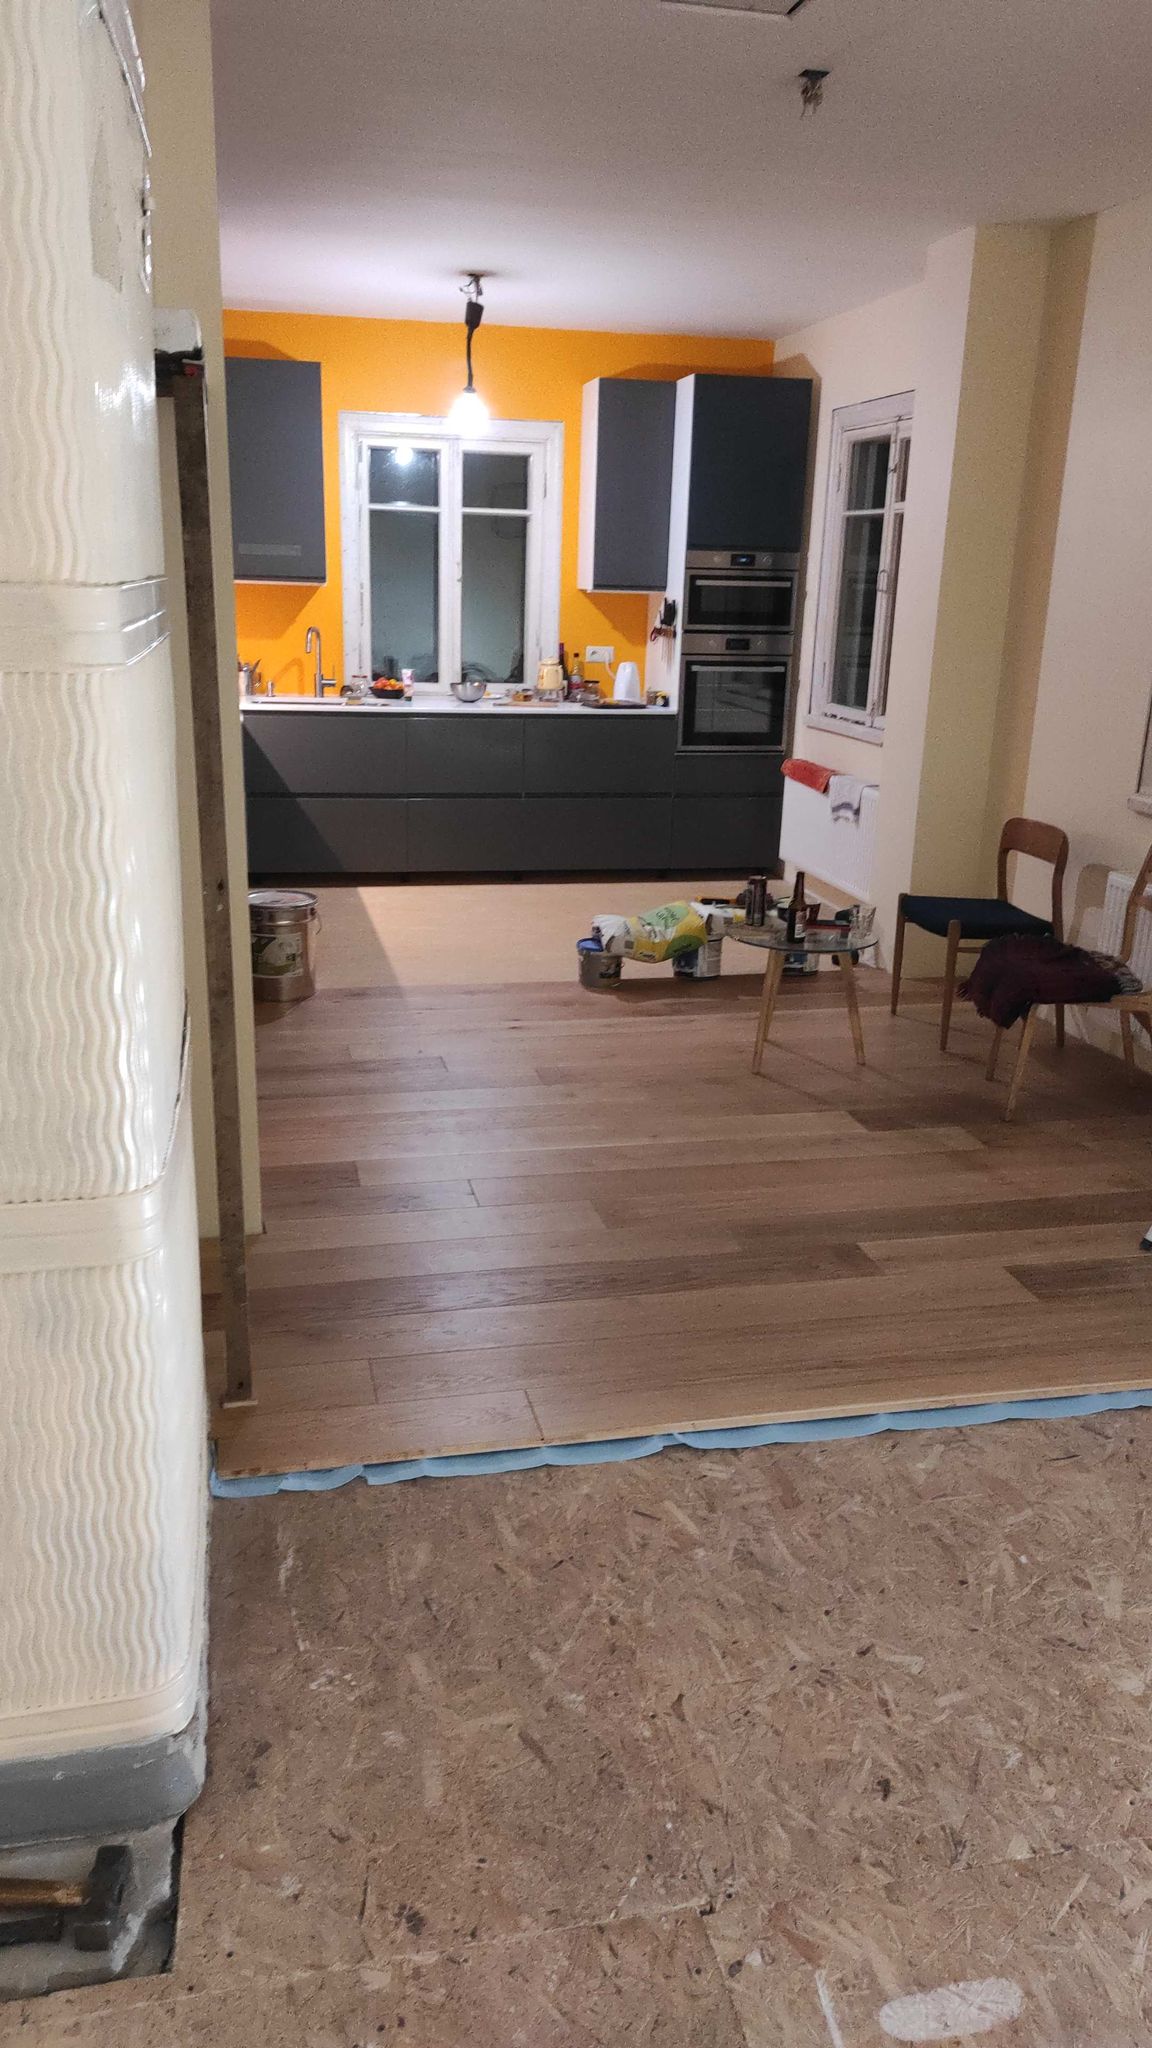
Finally having a real living room feels so good. We really enjoy just sitting on the sofa, listening to music. Cooking in our real kitchen and having dinner on the table. We kind of took it easy a bit and relax.
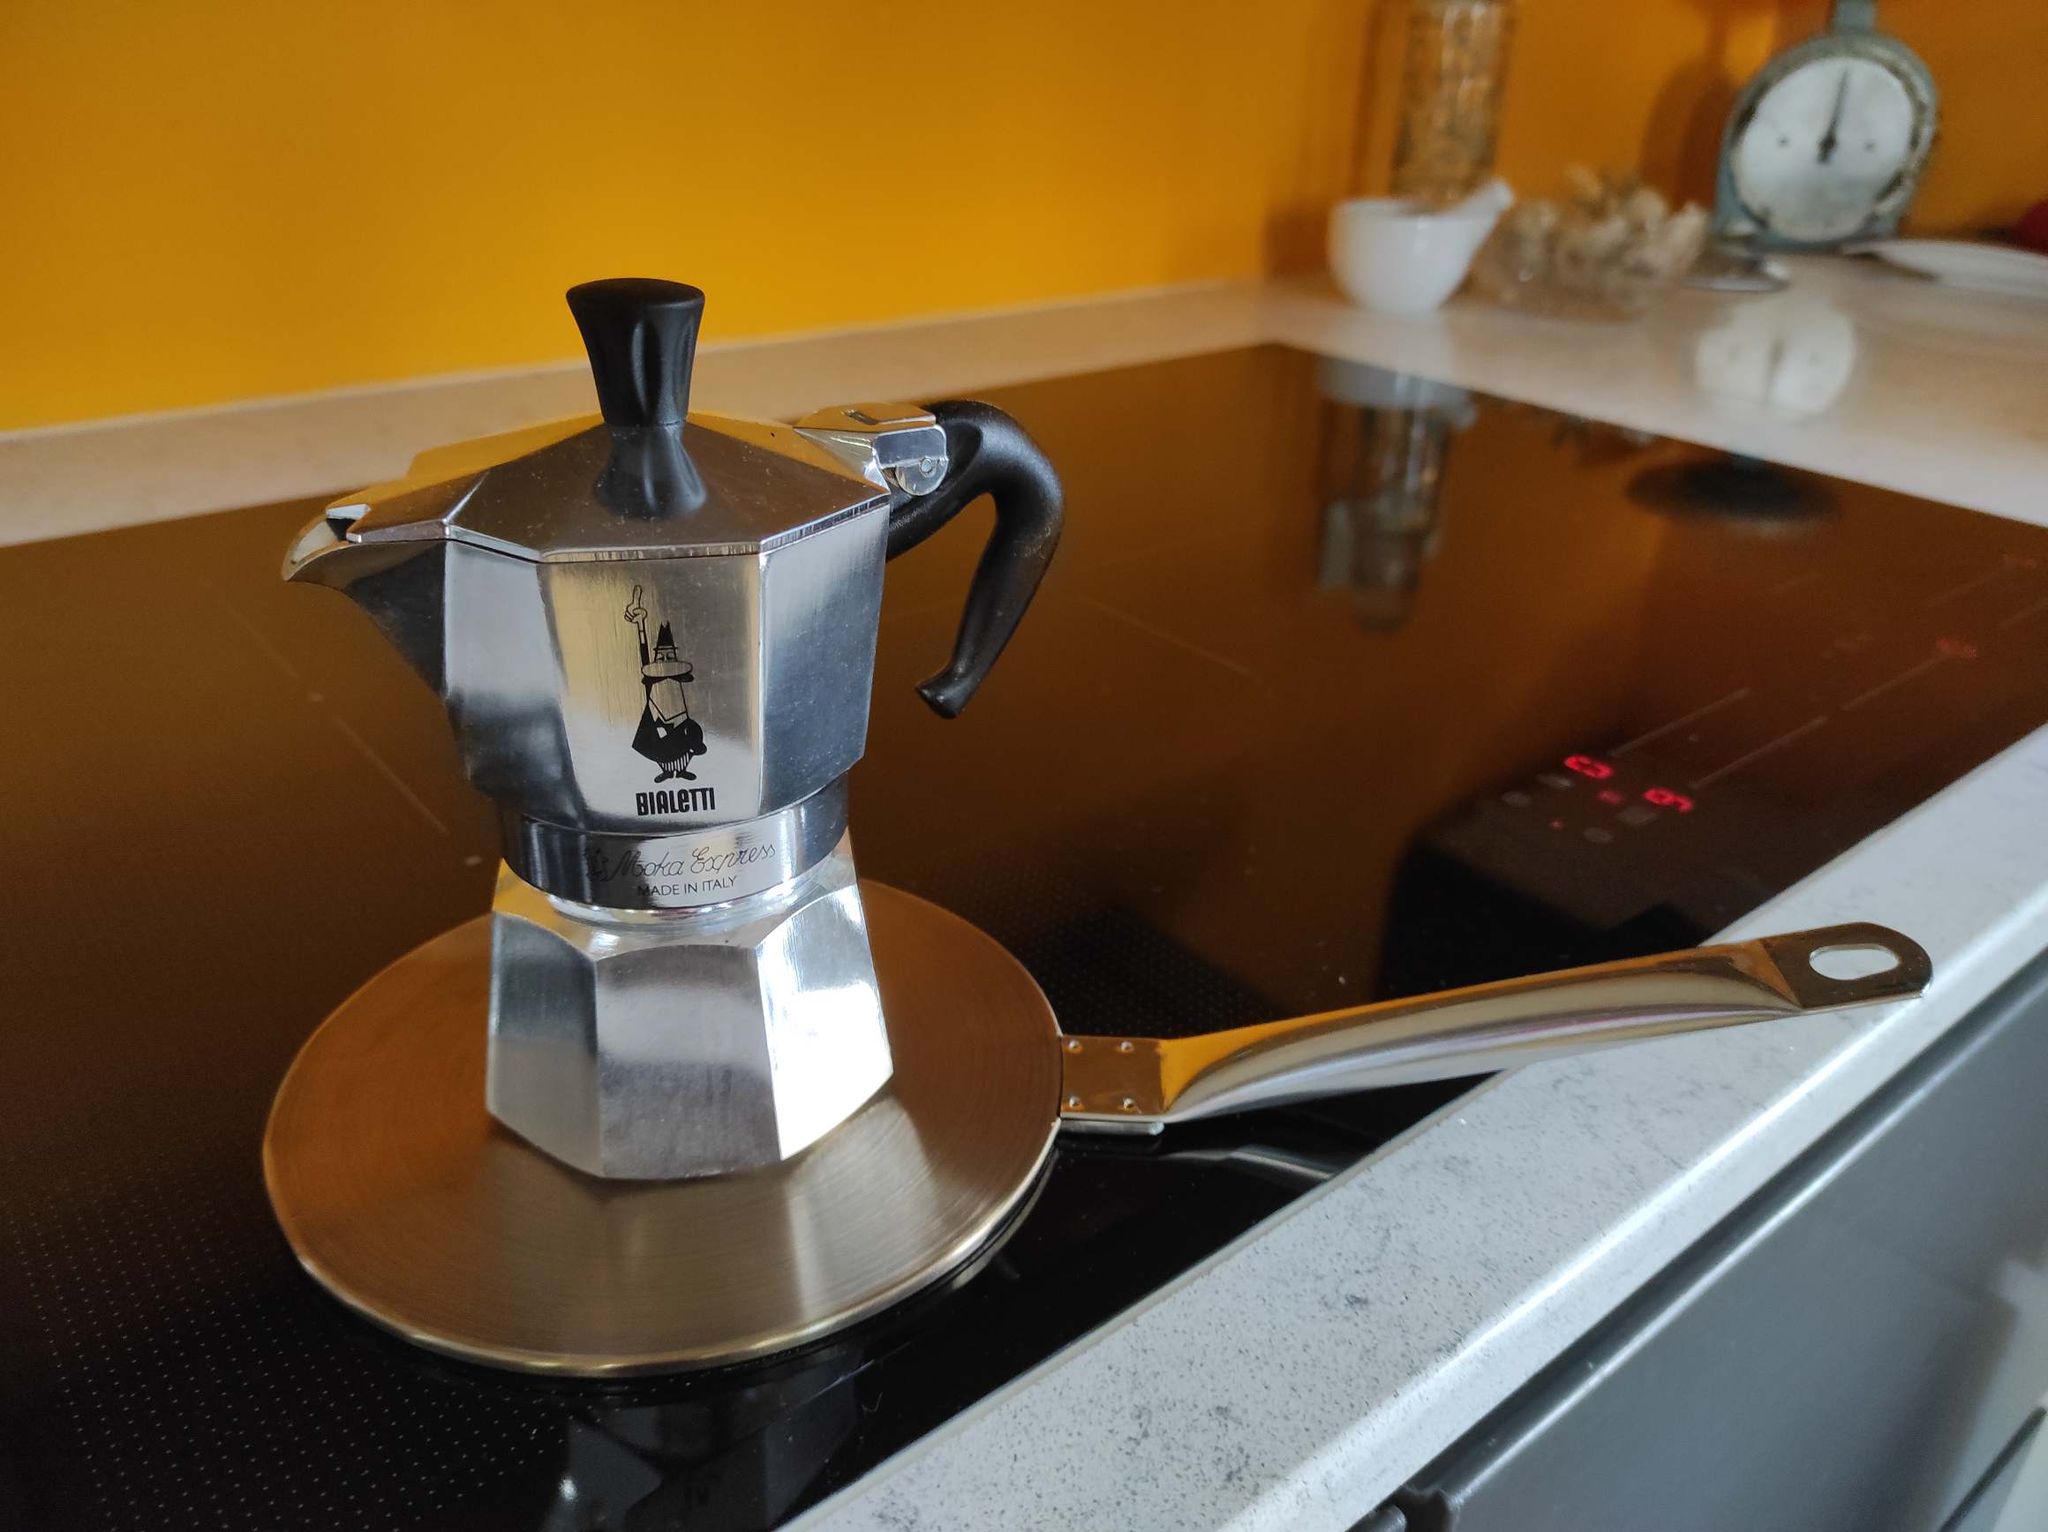
Some of the small things we did was getting a induction adapter for the moka espresso maker Mo had gotten from Stefano. While we where at the wholesale store I had noticed these adapters, so when the moka maker did not work, I knew how to fix this.
Mo’s mother also gave us an old lamp with yellow details in the same colour as our kitchen wall. So we tried it and it seems to fit nicely.
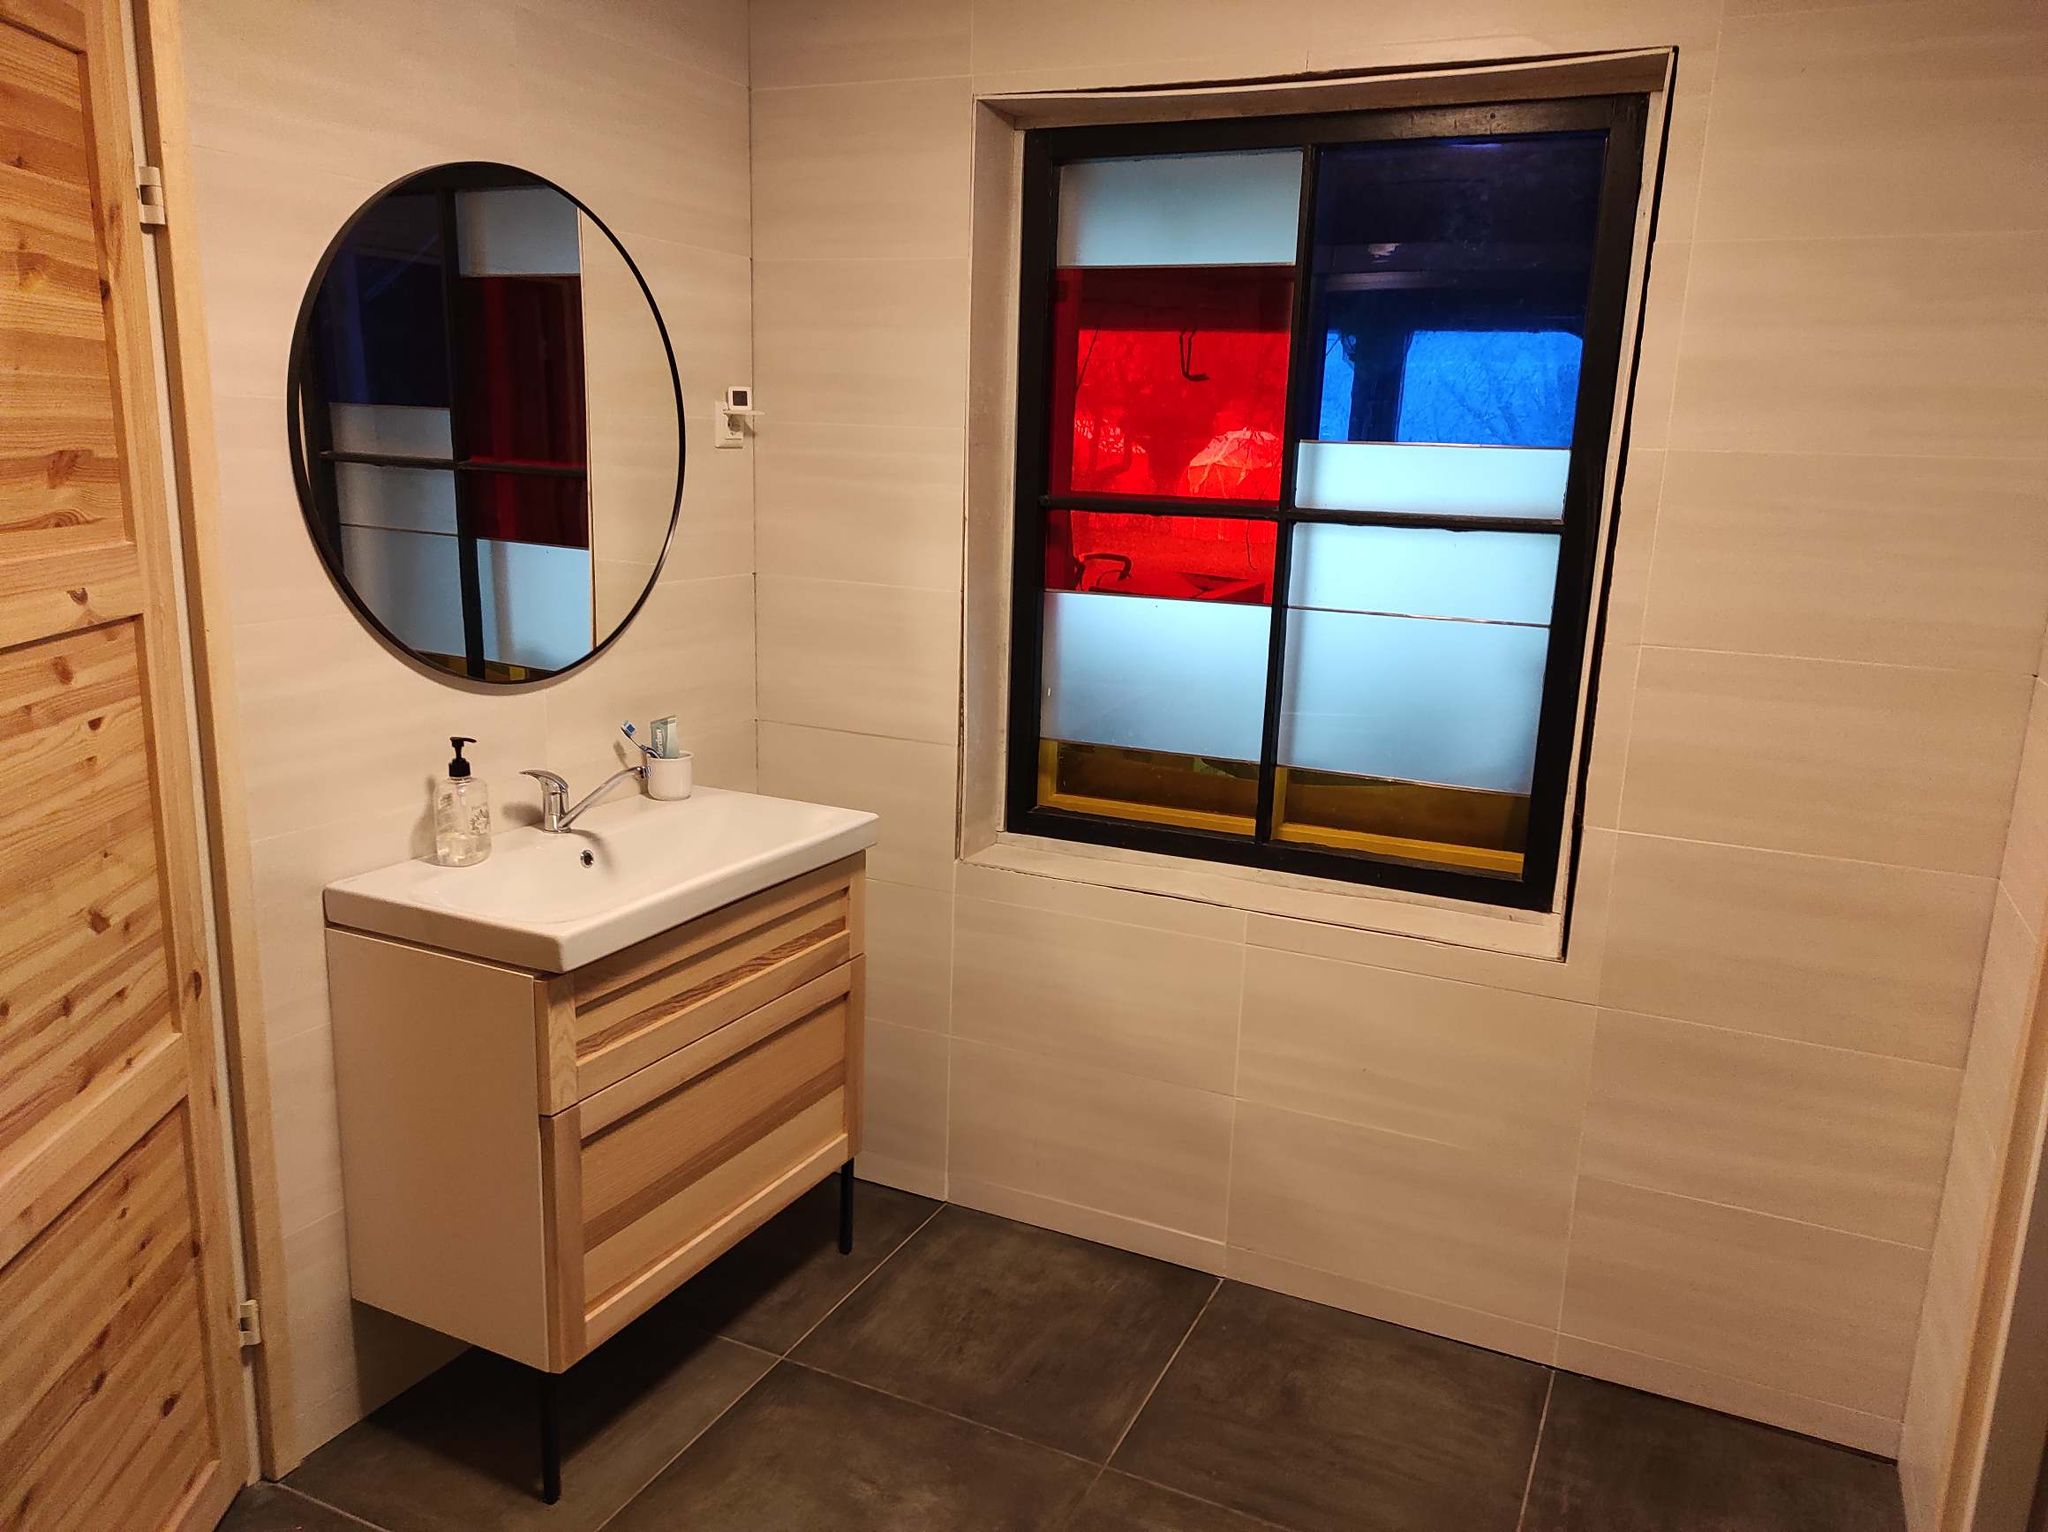
And with the kitchen finished, we don’t have to do dishes in the bathroom anymore, so we could finally install the vanity desk in the bathroom.
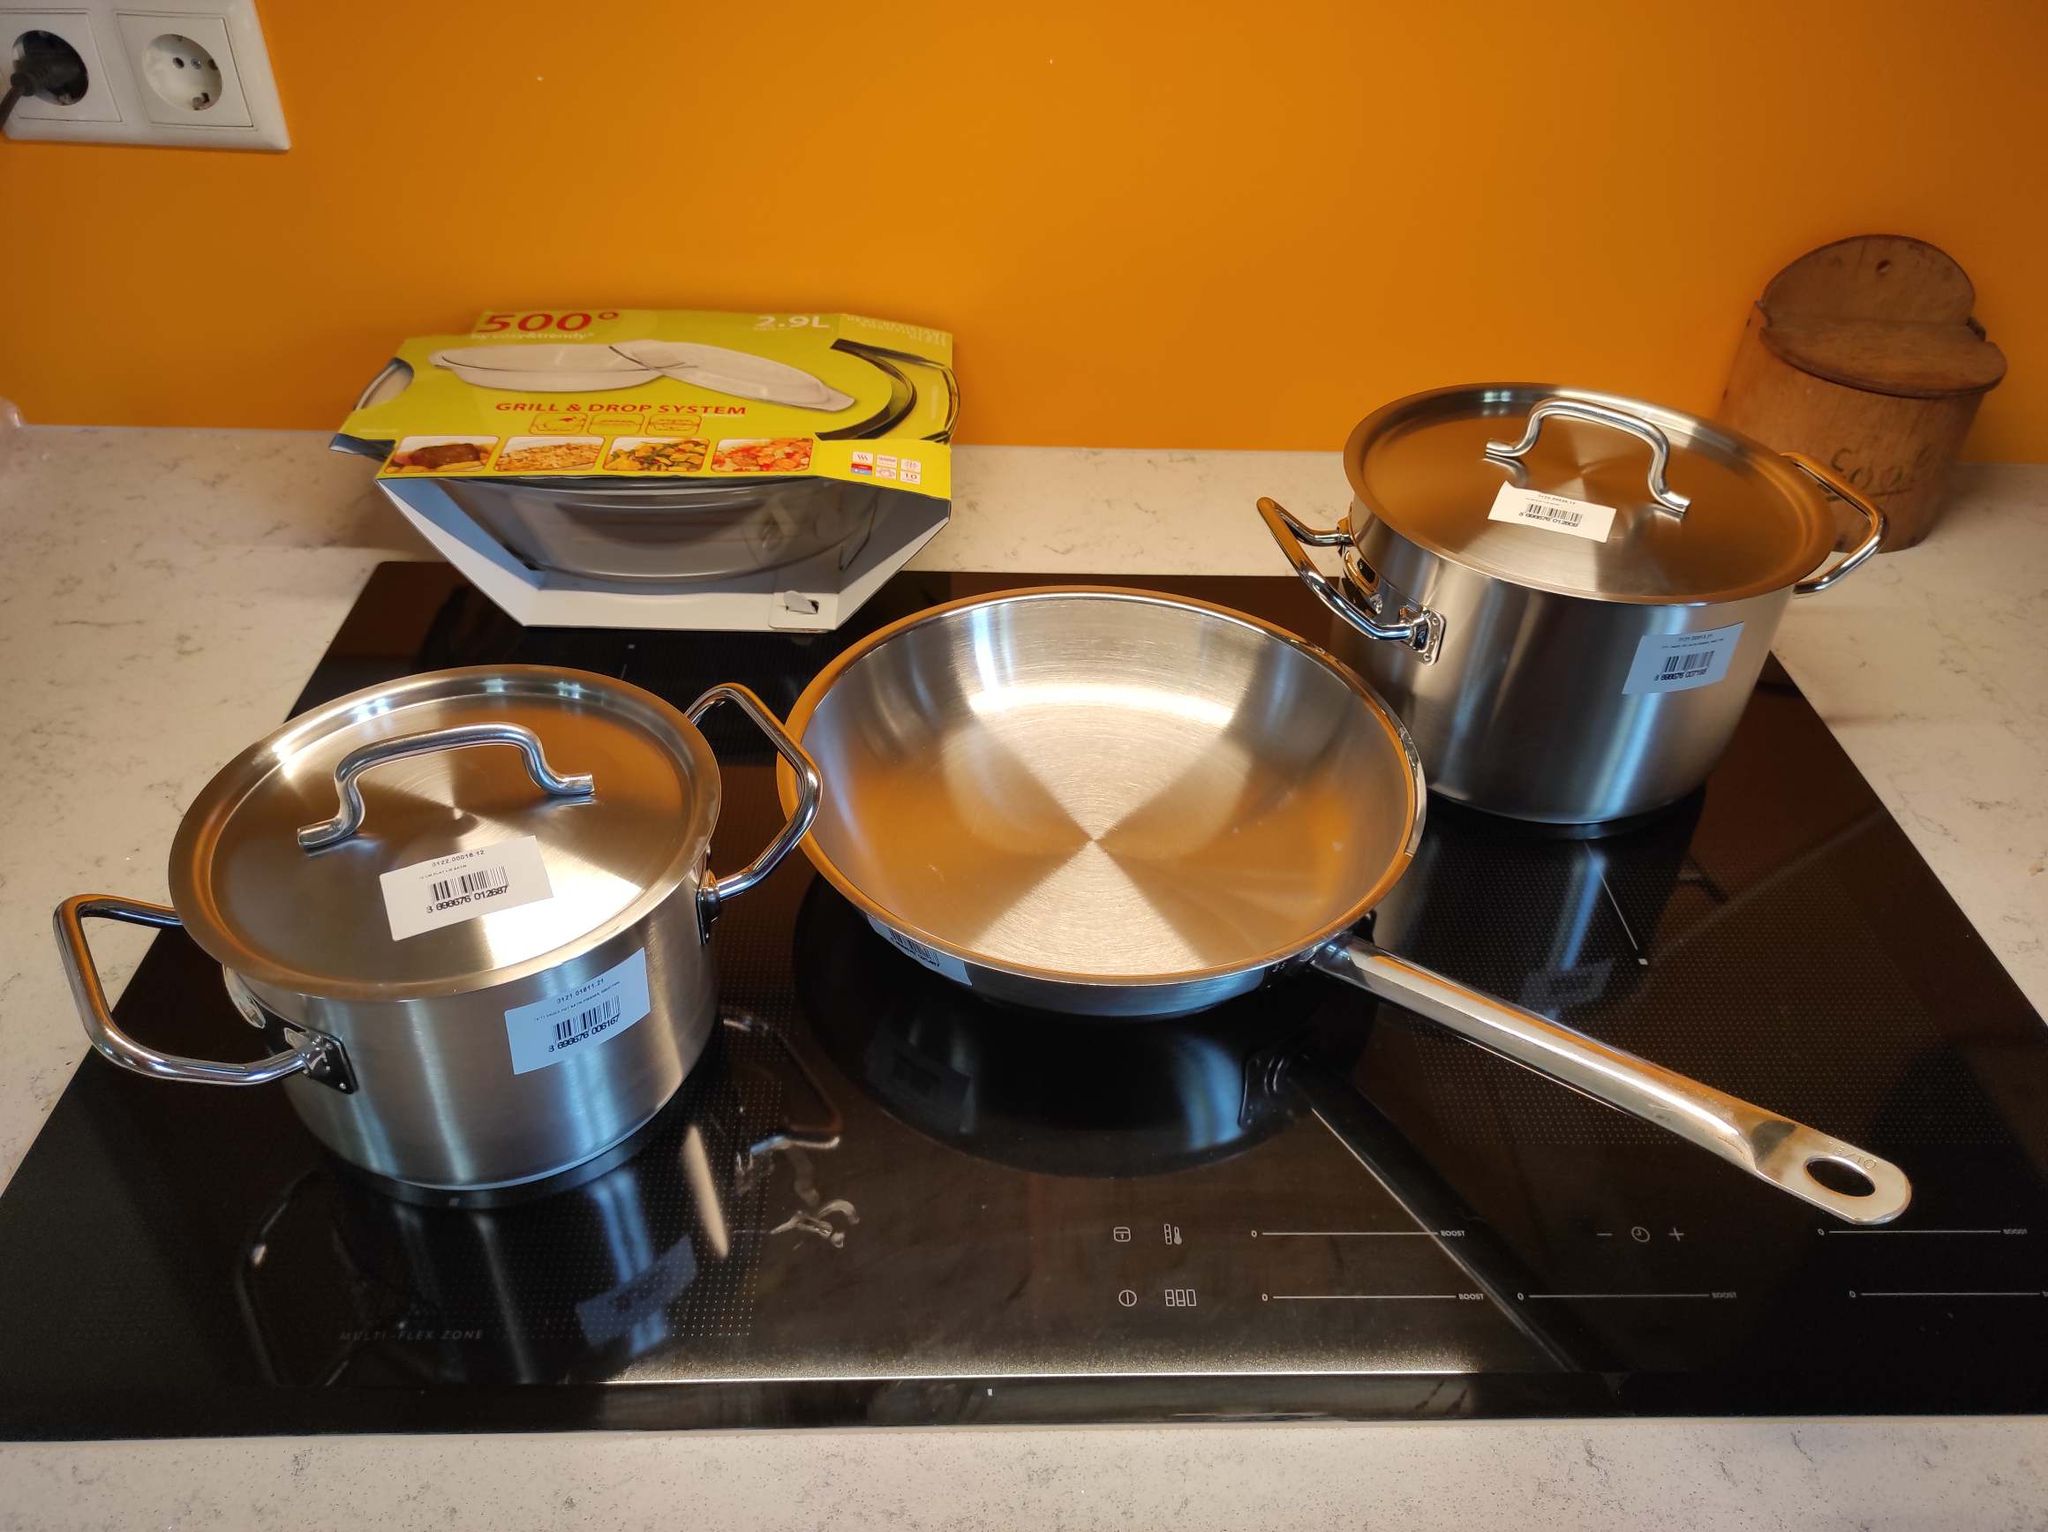
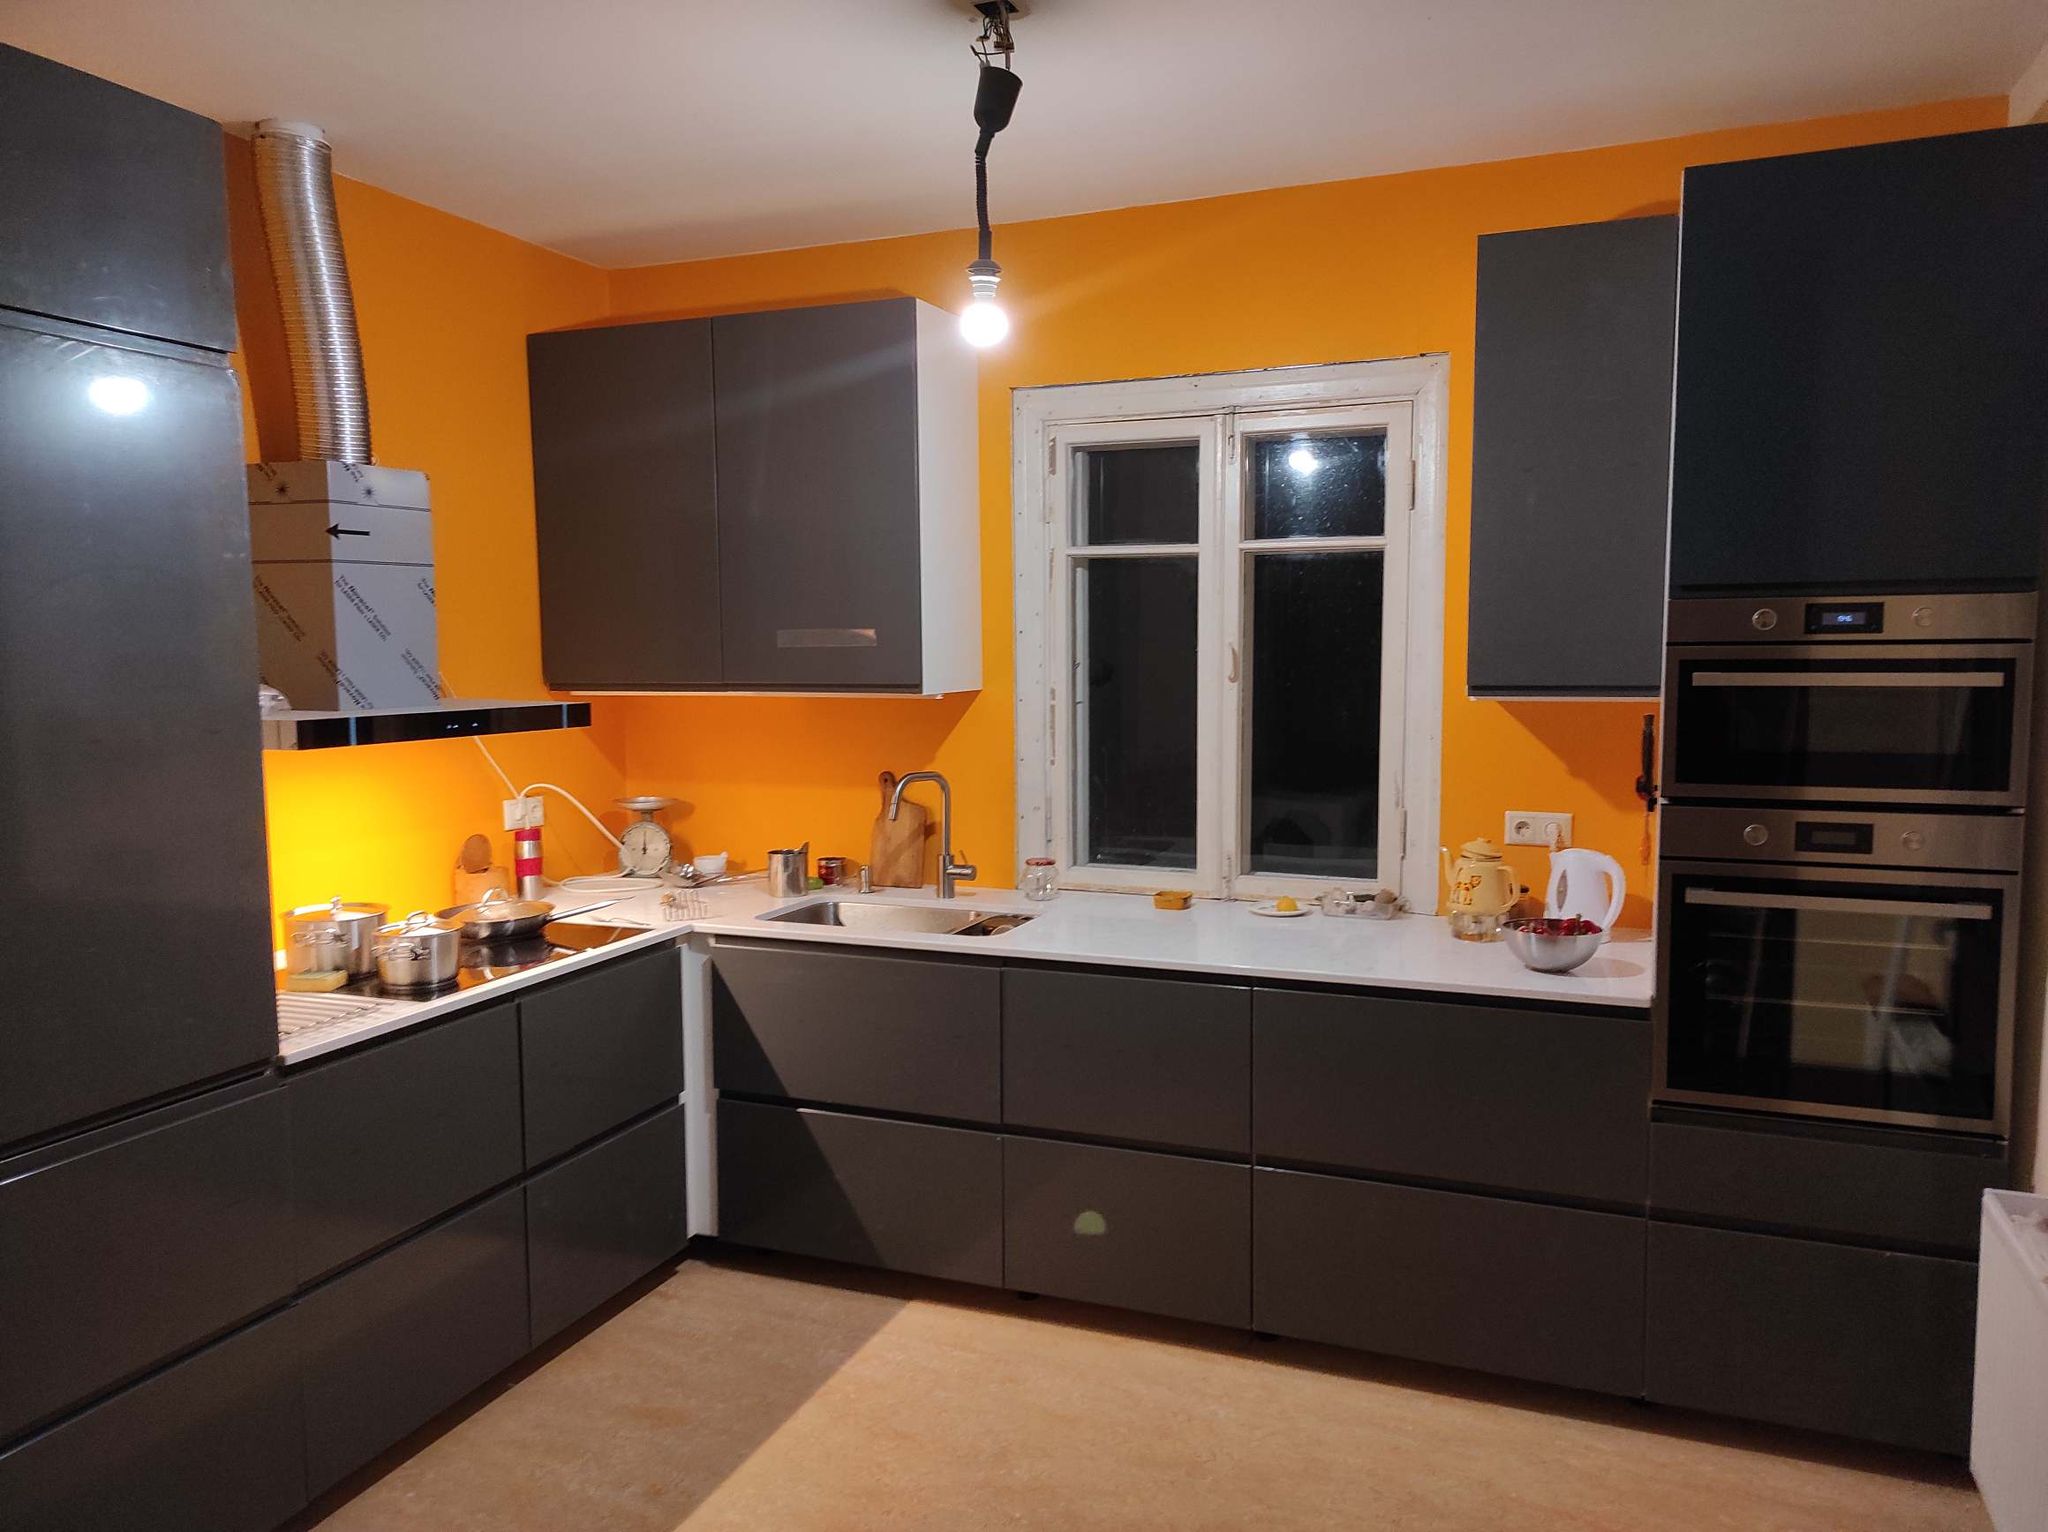
Finally Ikea send a message about the last fronts we where missing. So after picking them up, I could finally finish the kitchen. Well, almost finish as the cables for the counter lights are still missing. But it looks awesome! We also got new pots and pan as we now have an induction hub. I got them at the horeca wholesale store for a very nice price.
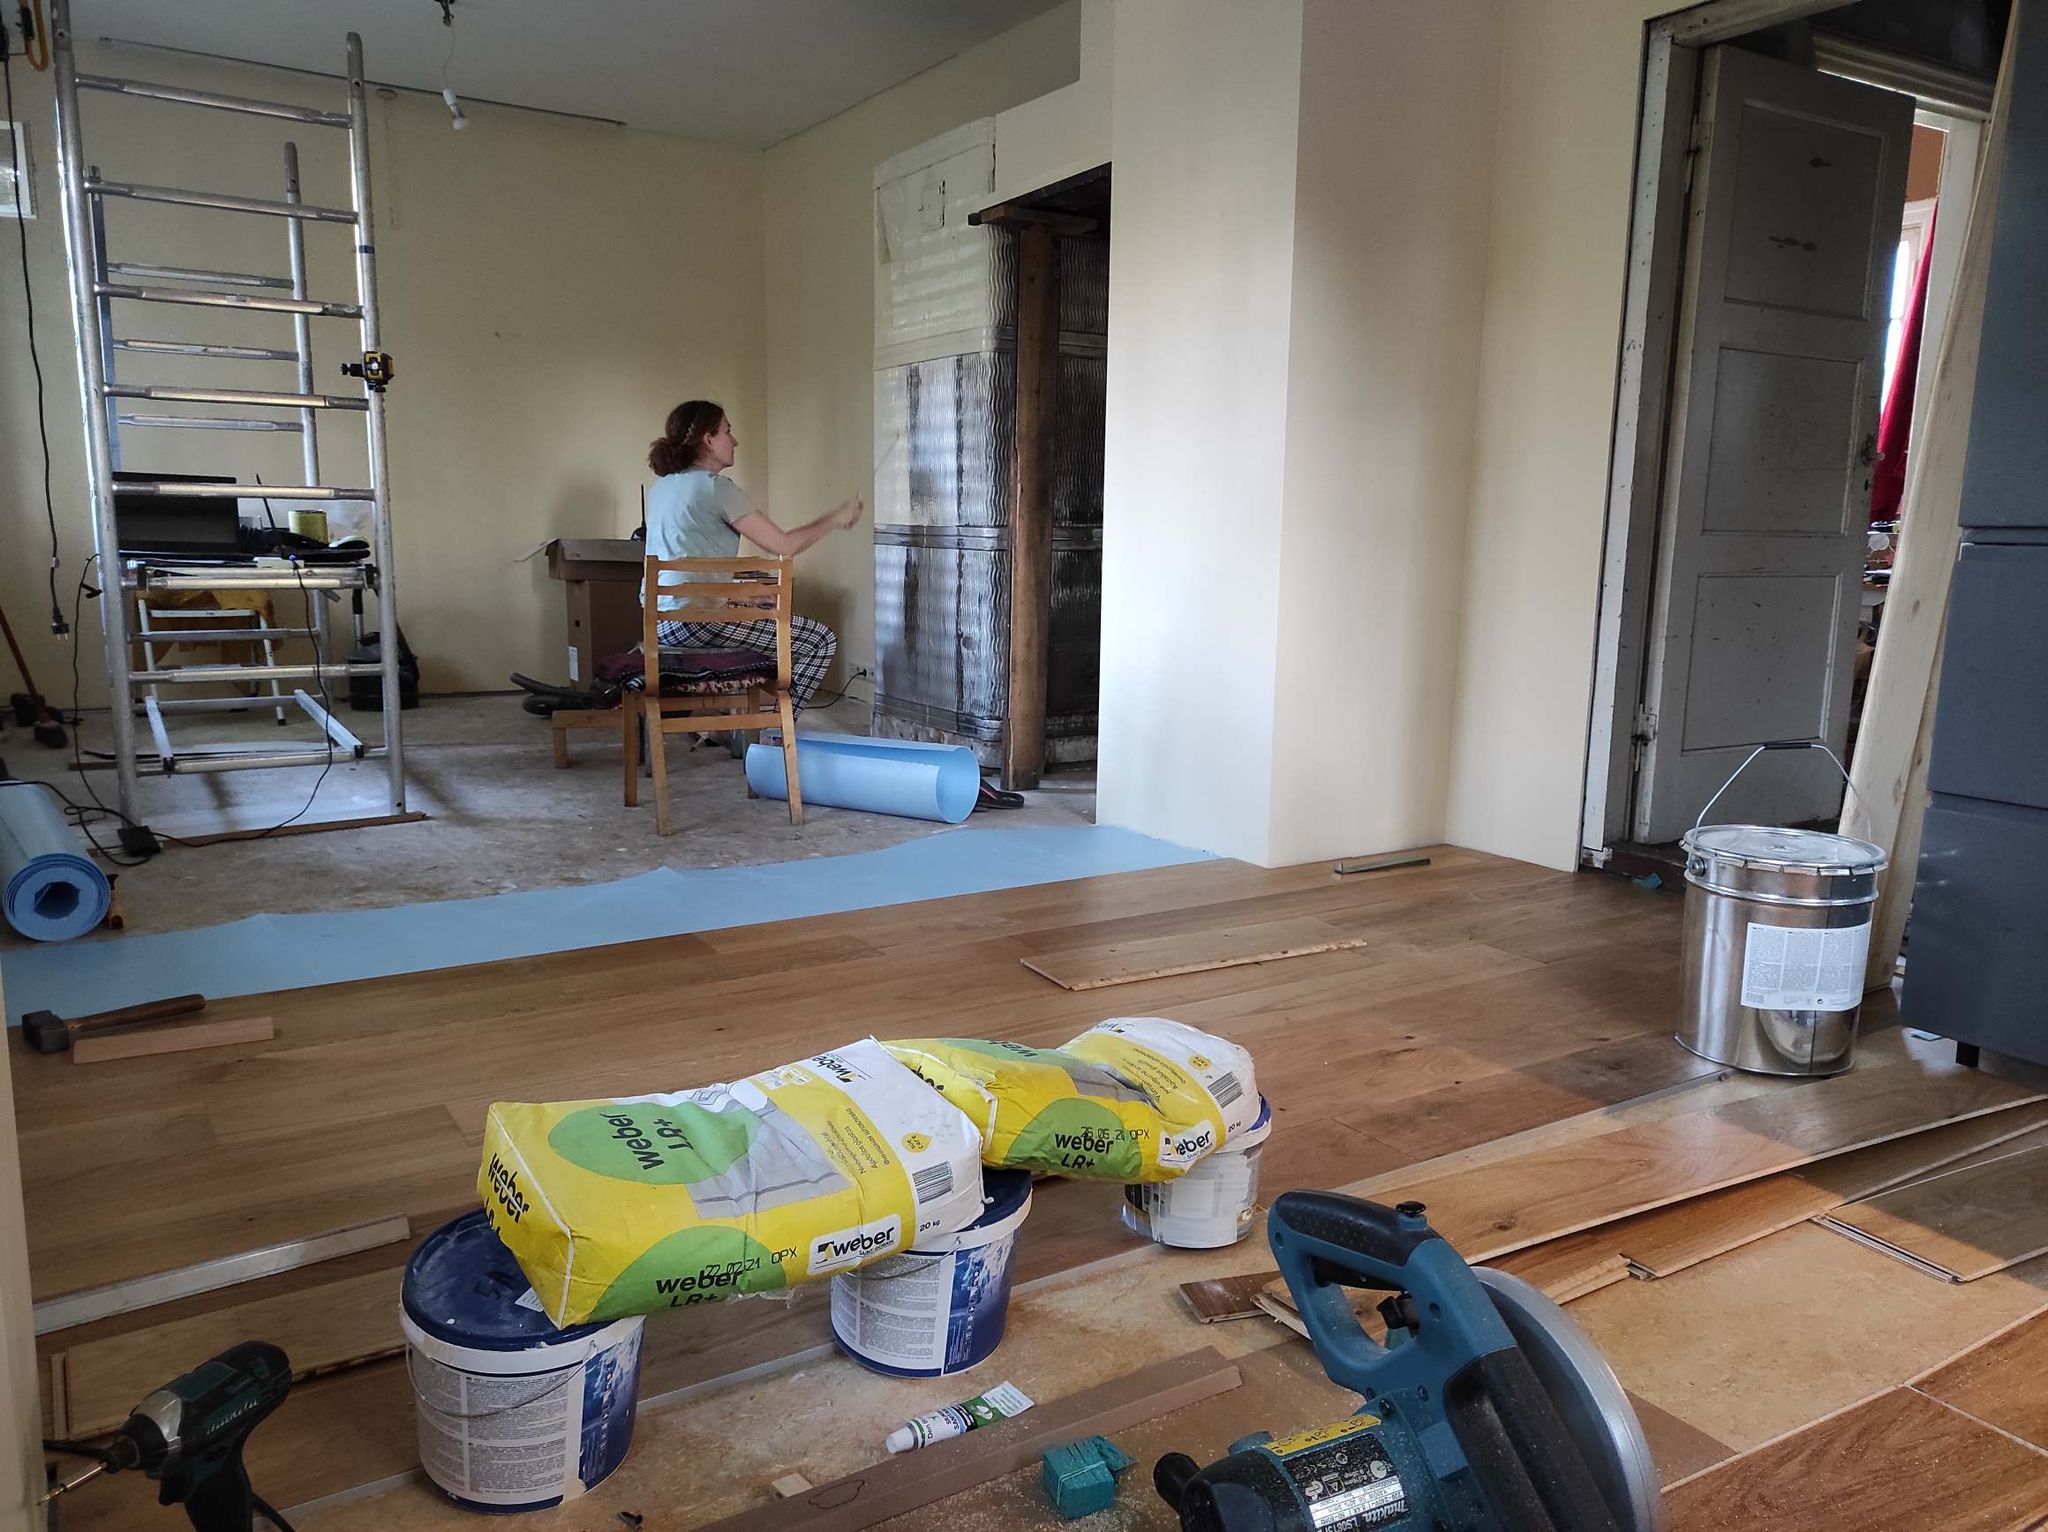
In the living room it finally time for the wooden floor and the painting of the stove with a special heat resistant paint (just in case we ever fire it up again). Mo does the painting and I am putting in the floor. A very productive day !
New pots and panFloor and paintingThe result so farReally close to done!
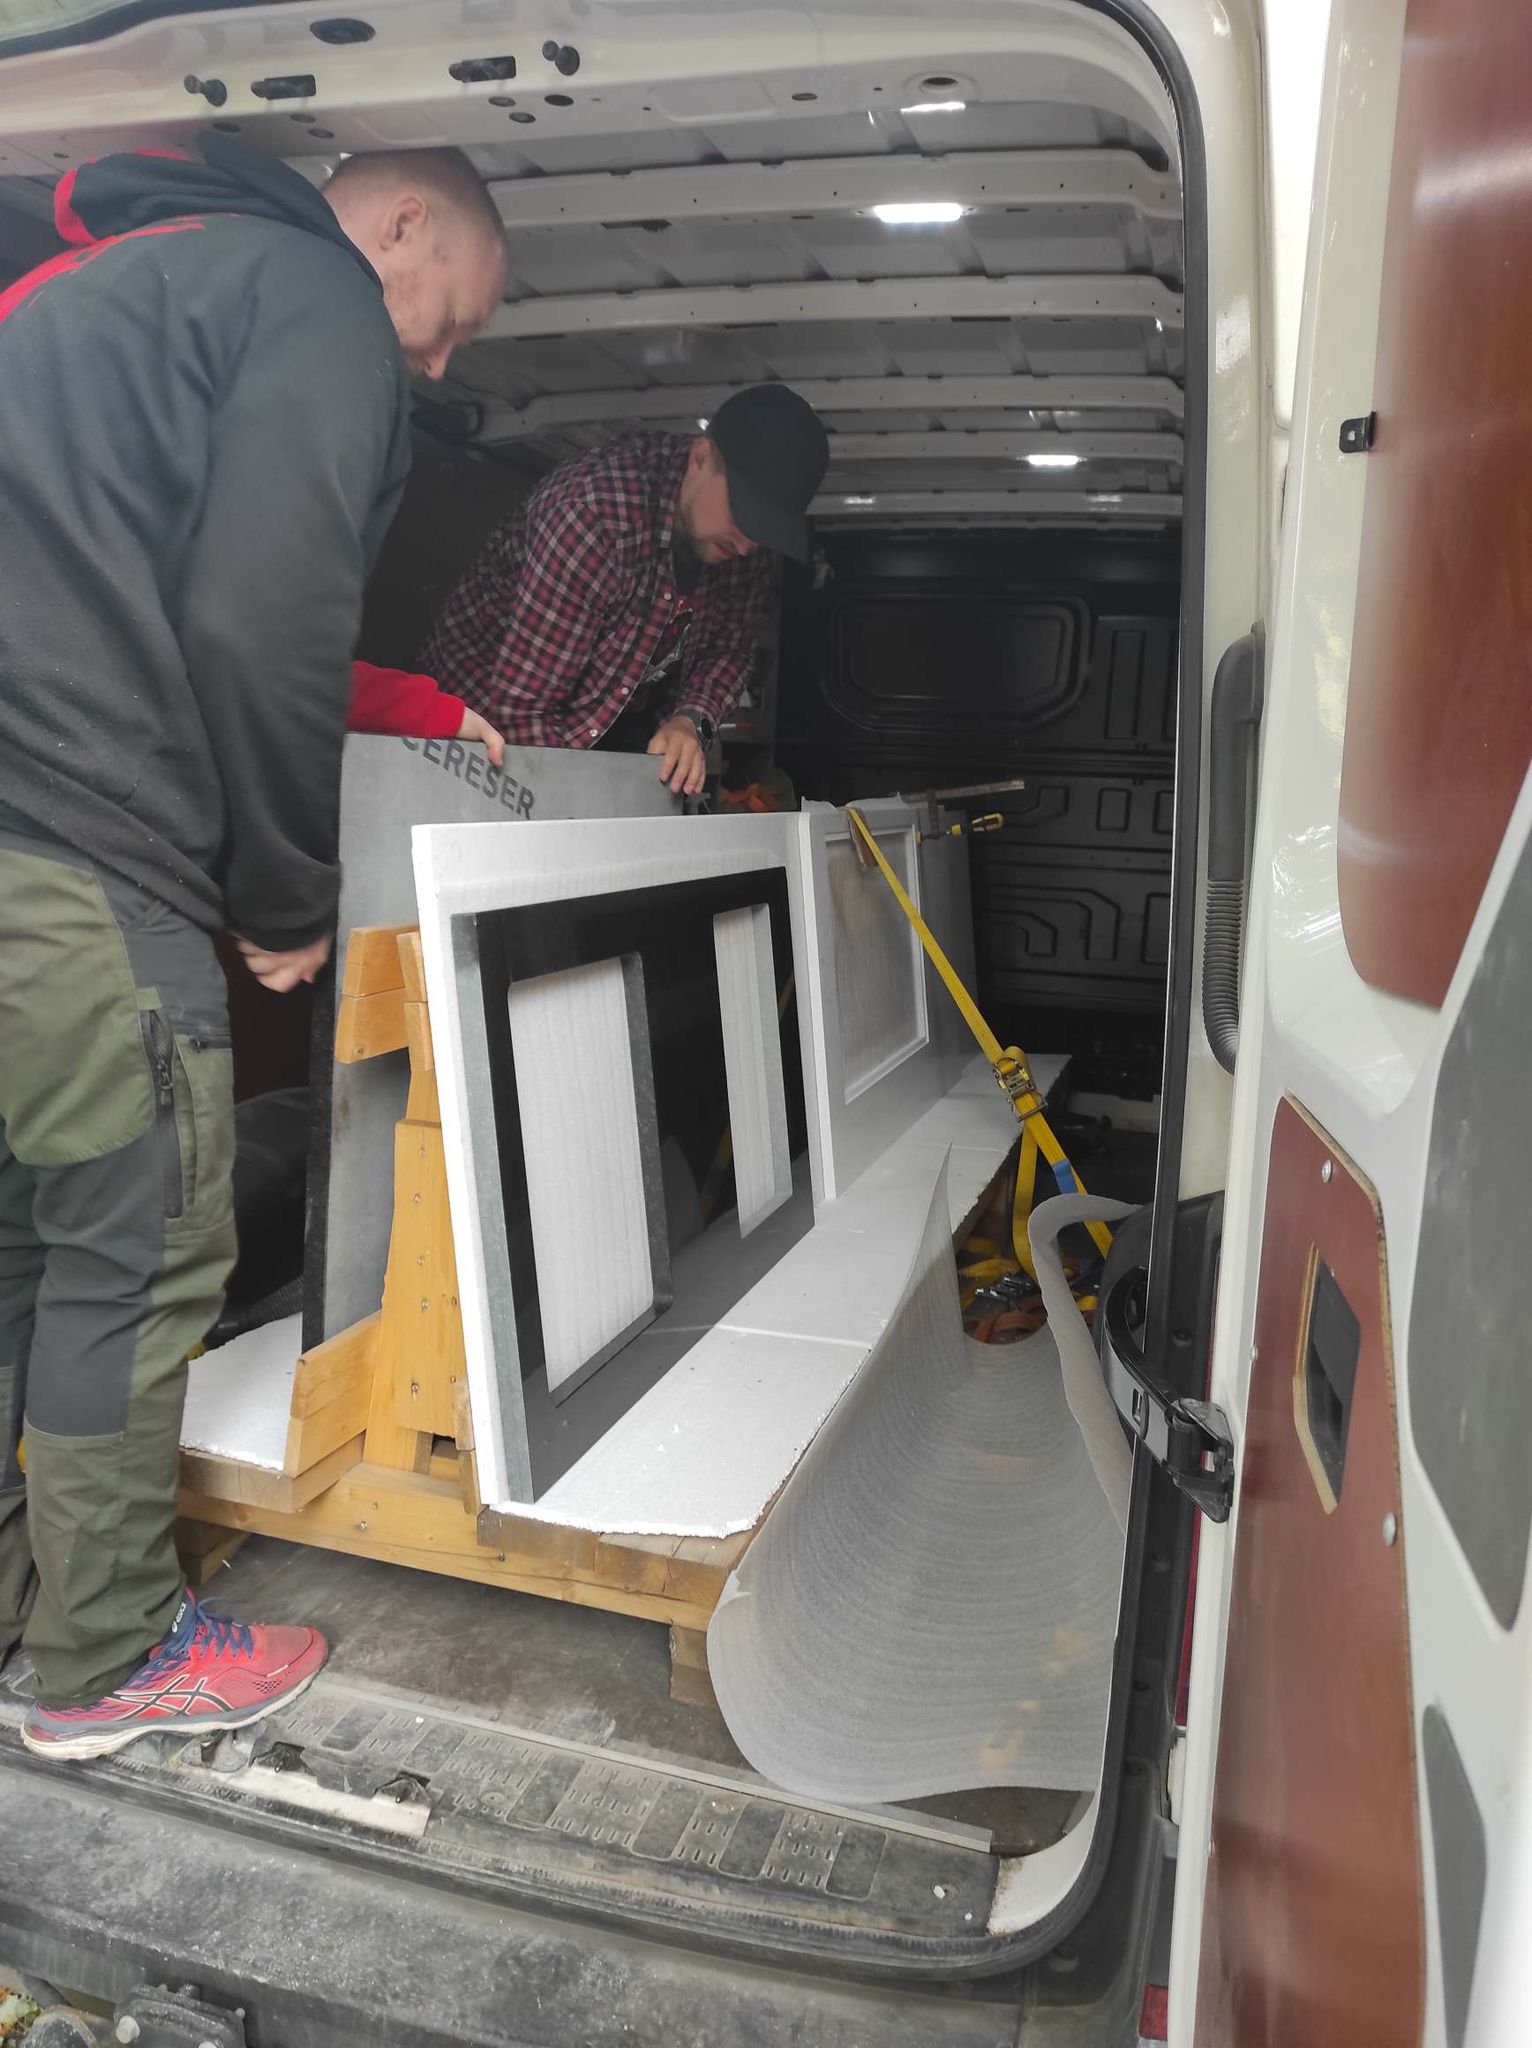
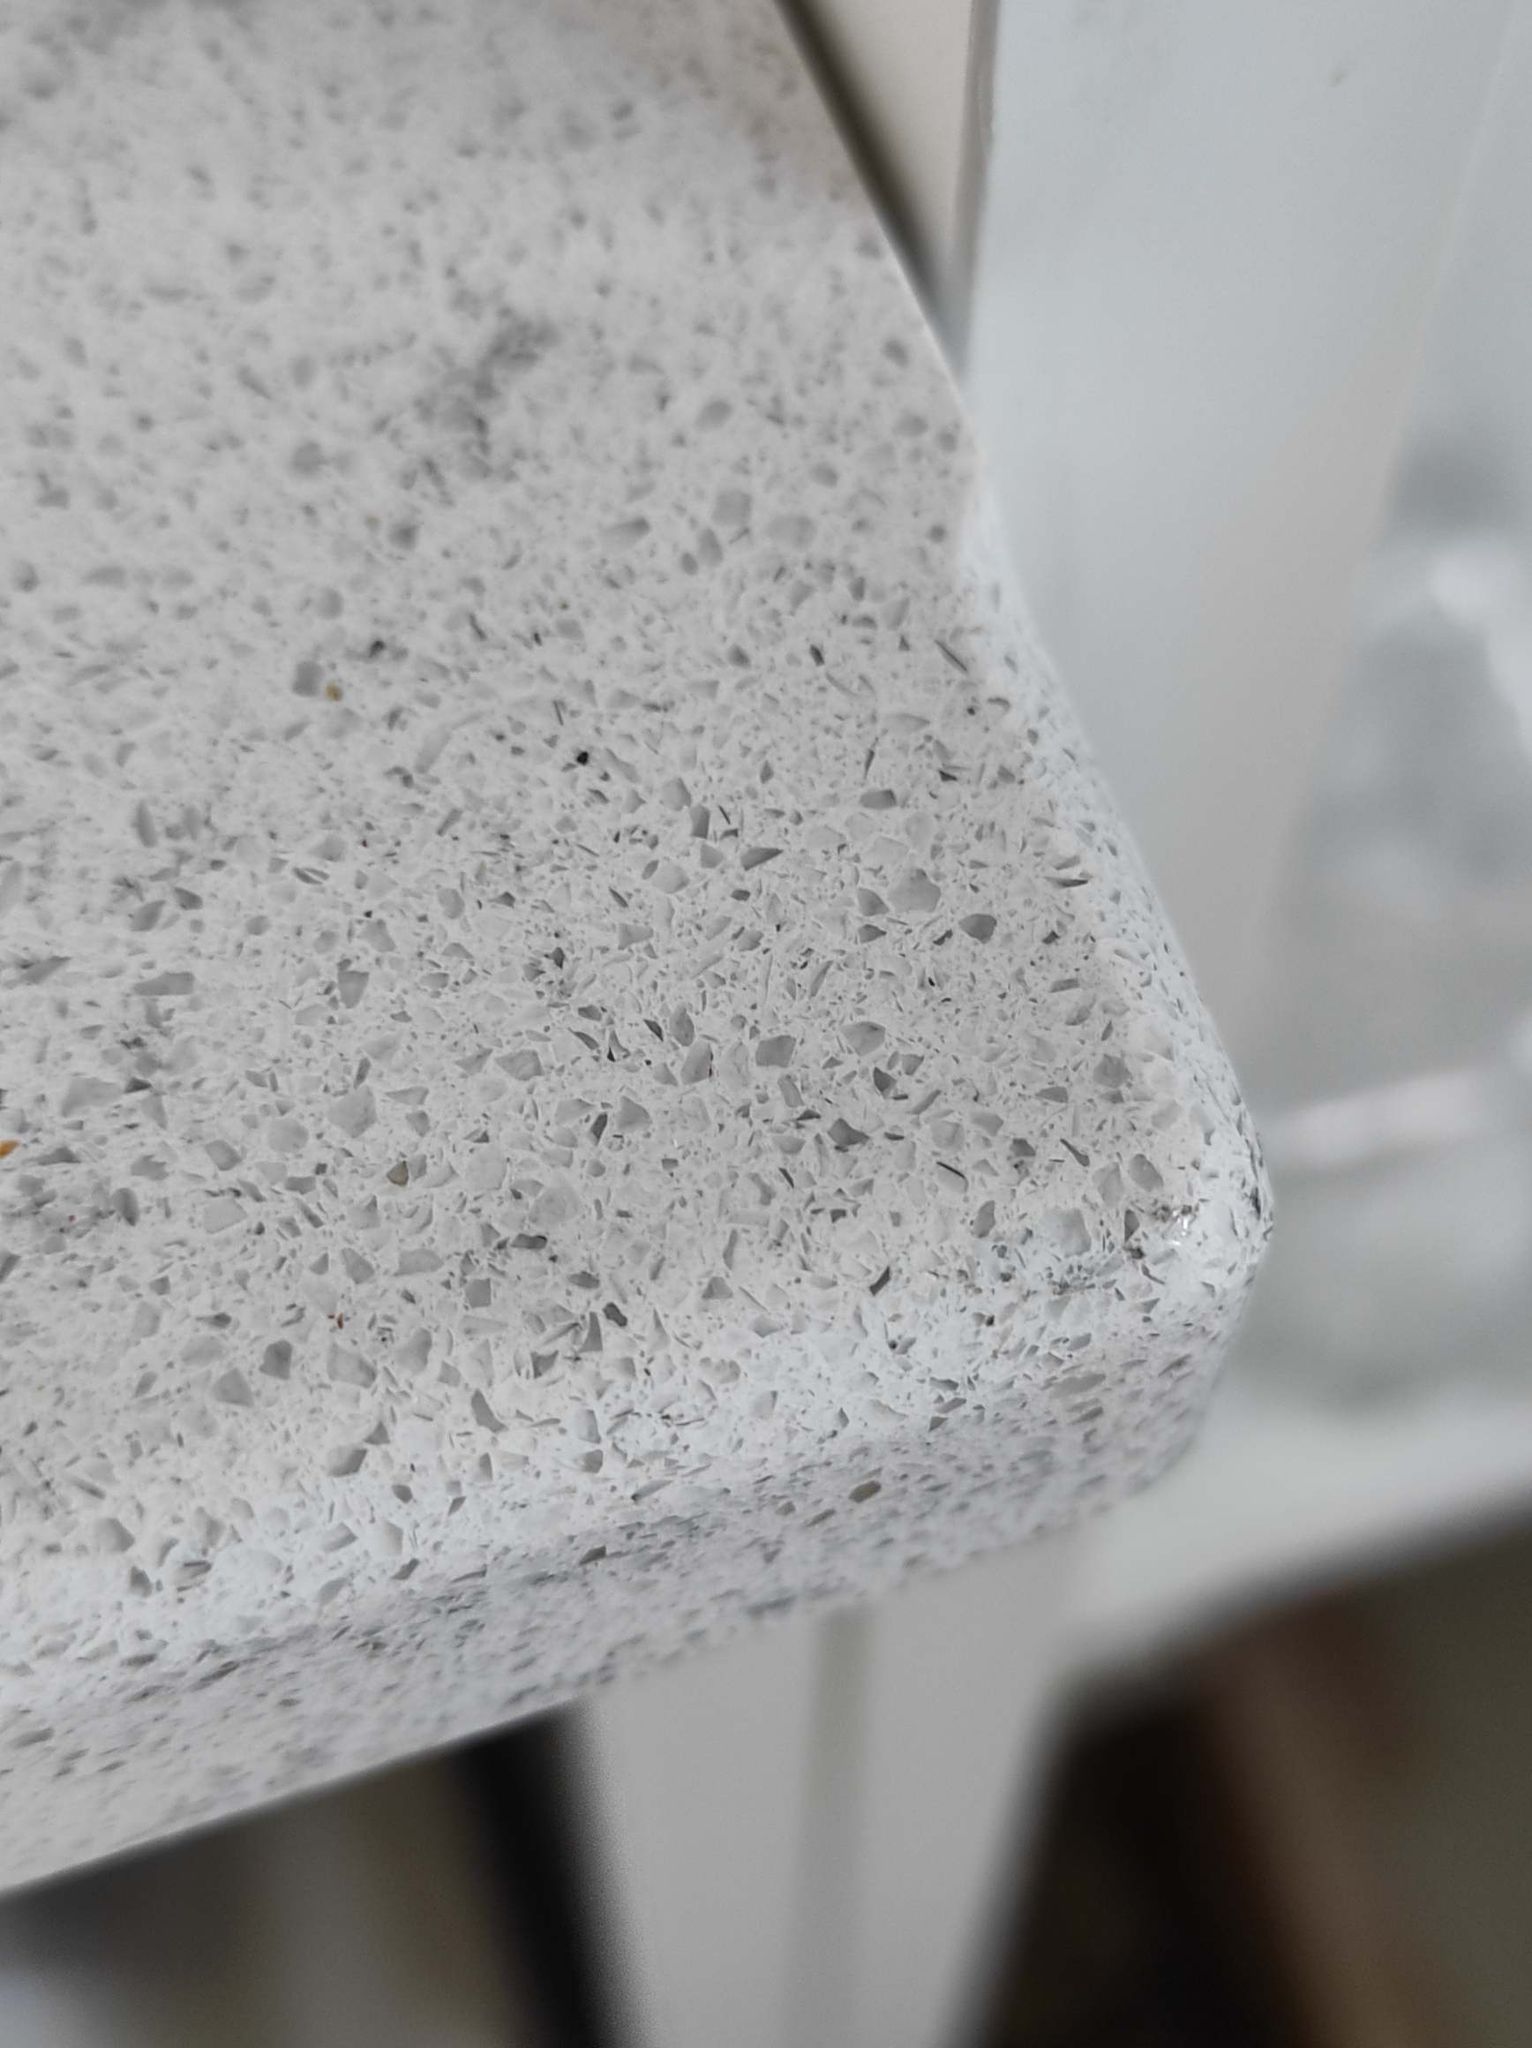
After a week of fine tuning the plastered walls in the living room finally the phone call came in that the countertop was ready. Two people from Granimar came to deliver and install the countertop. It looked great and fitted like a glove. They had it installed in less then half an hour.
During the weekend we spend painting the living room walls and installing a few more fronts in the kitchen.
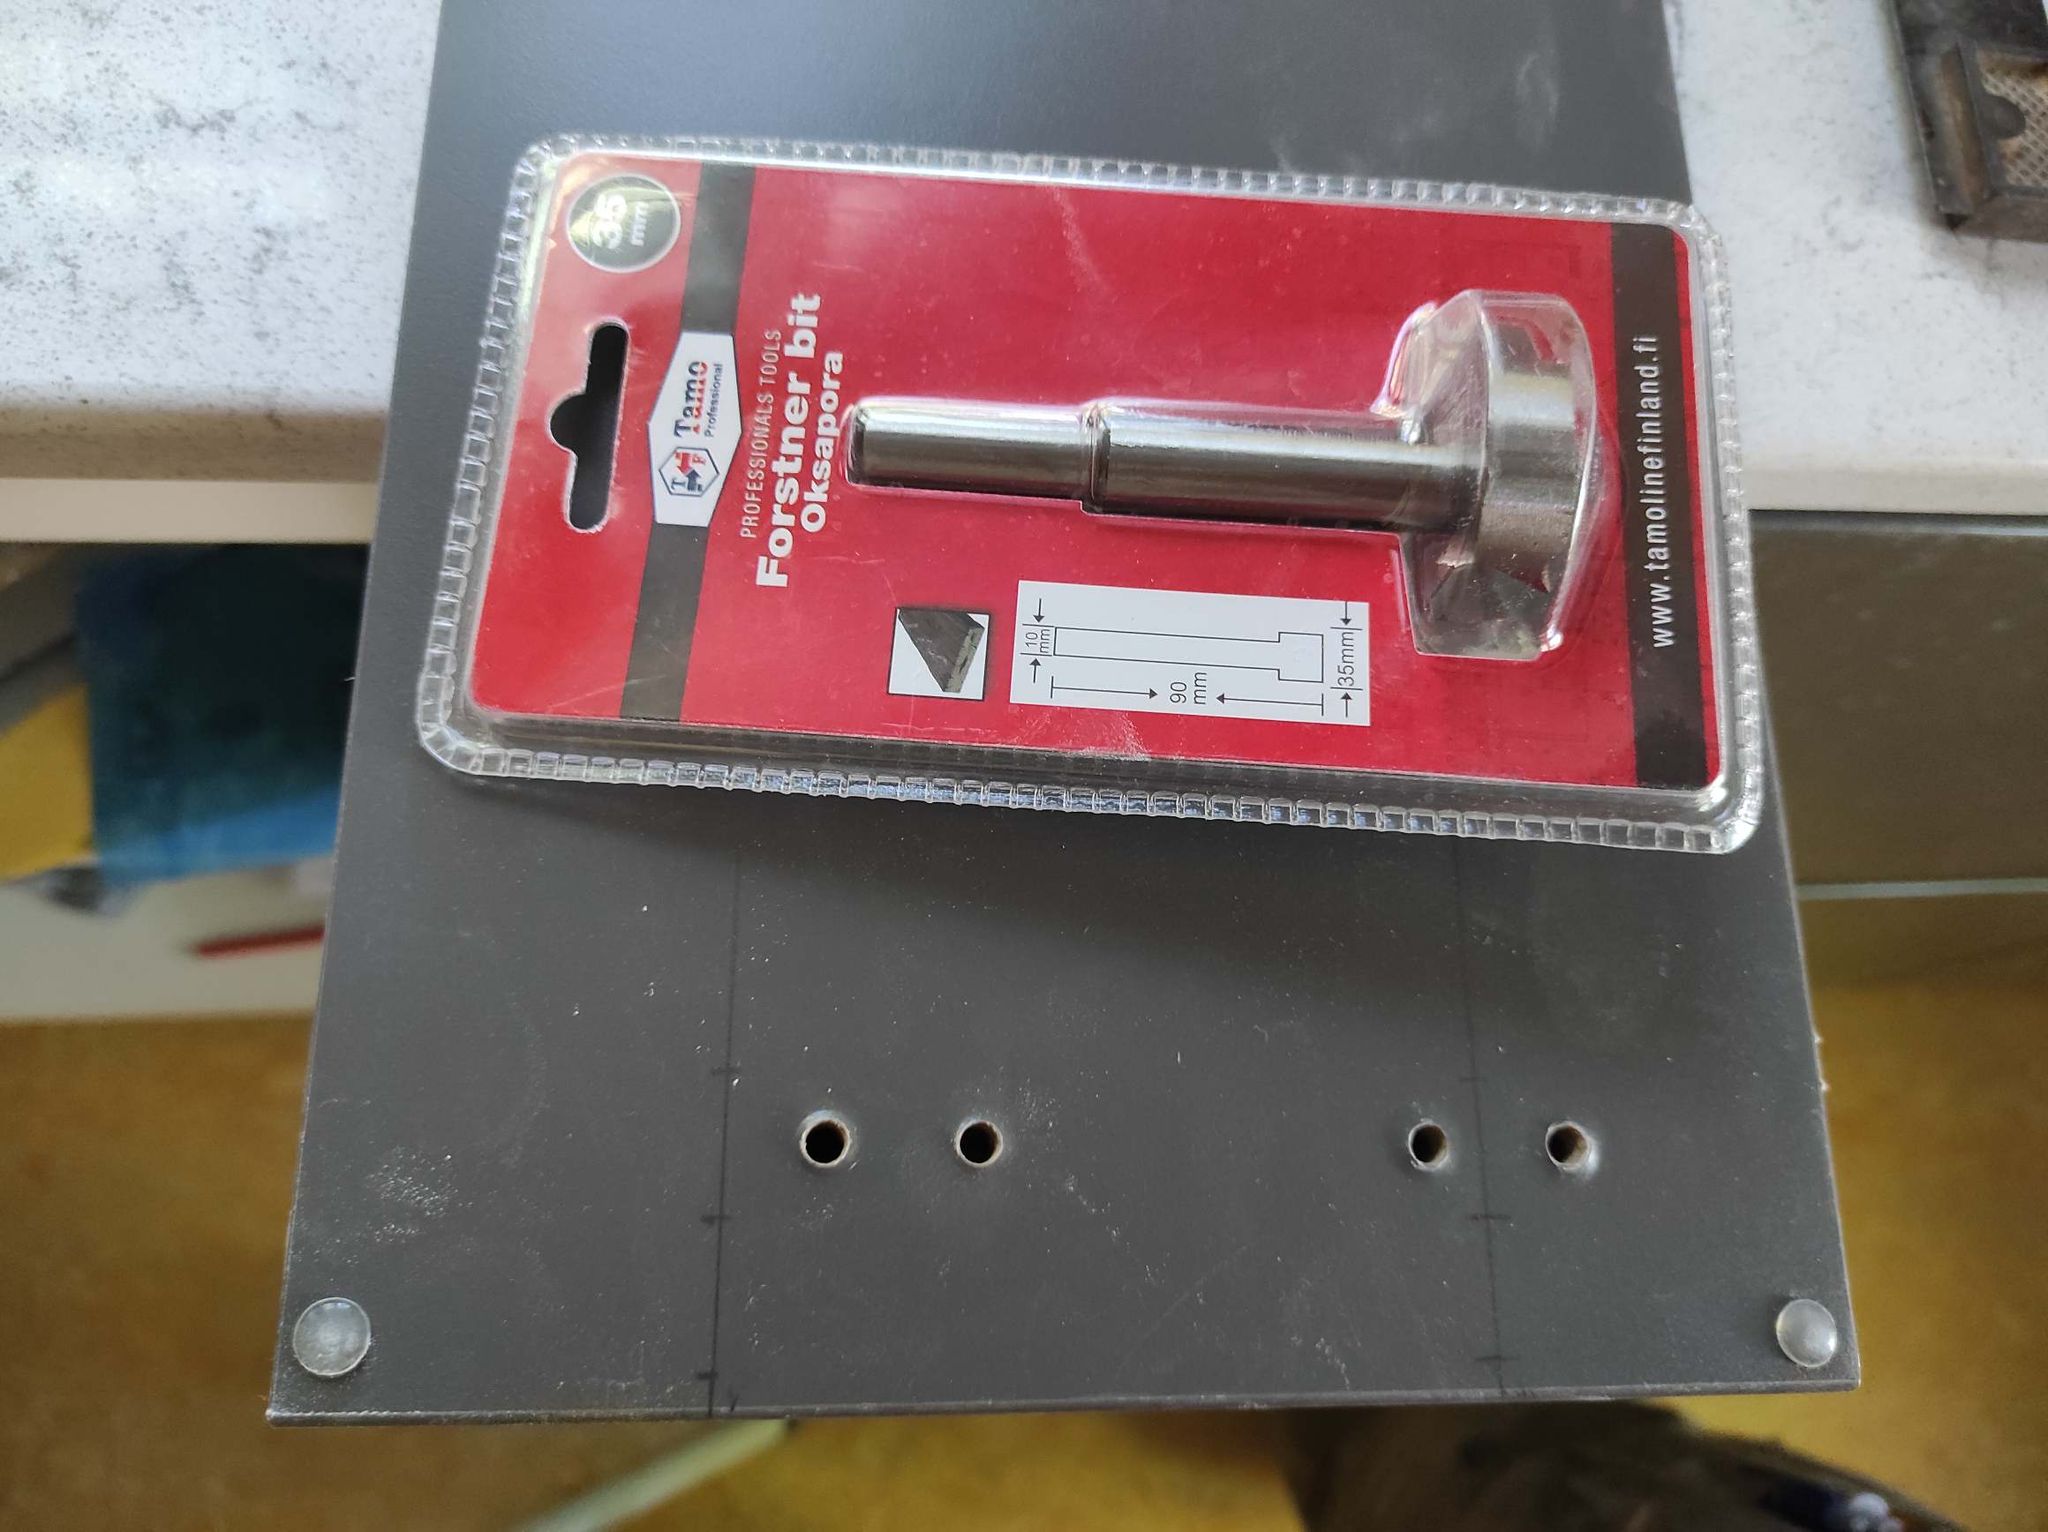
Because of the radiator the drawers under the ovens would not be able to open, so I changed the bigger drawer front for a door front and since there are not door fronts as narrow as a drawer, I bought a drill to create a hole for the hinges. When it was done it looked as if it was designed this way. Excited the kitchen really starts to get done.
The countertop is unloadedInstalled countertopNice detailThe living room gets its colourAlmost doneA bit of hacking
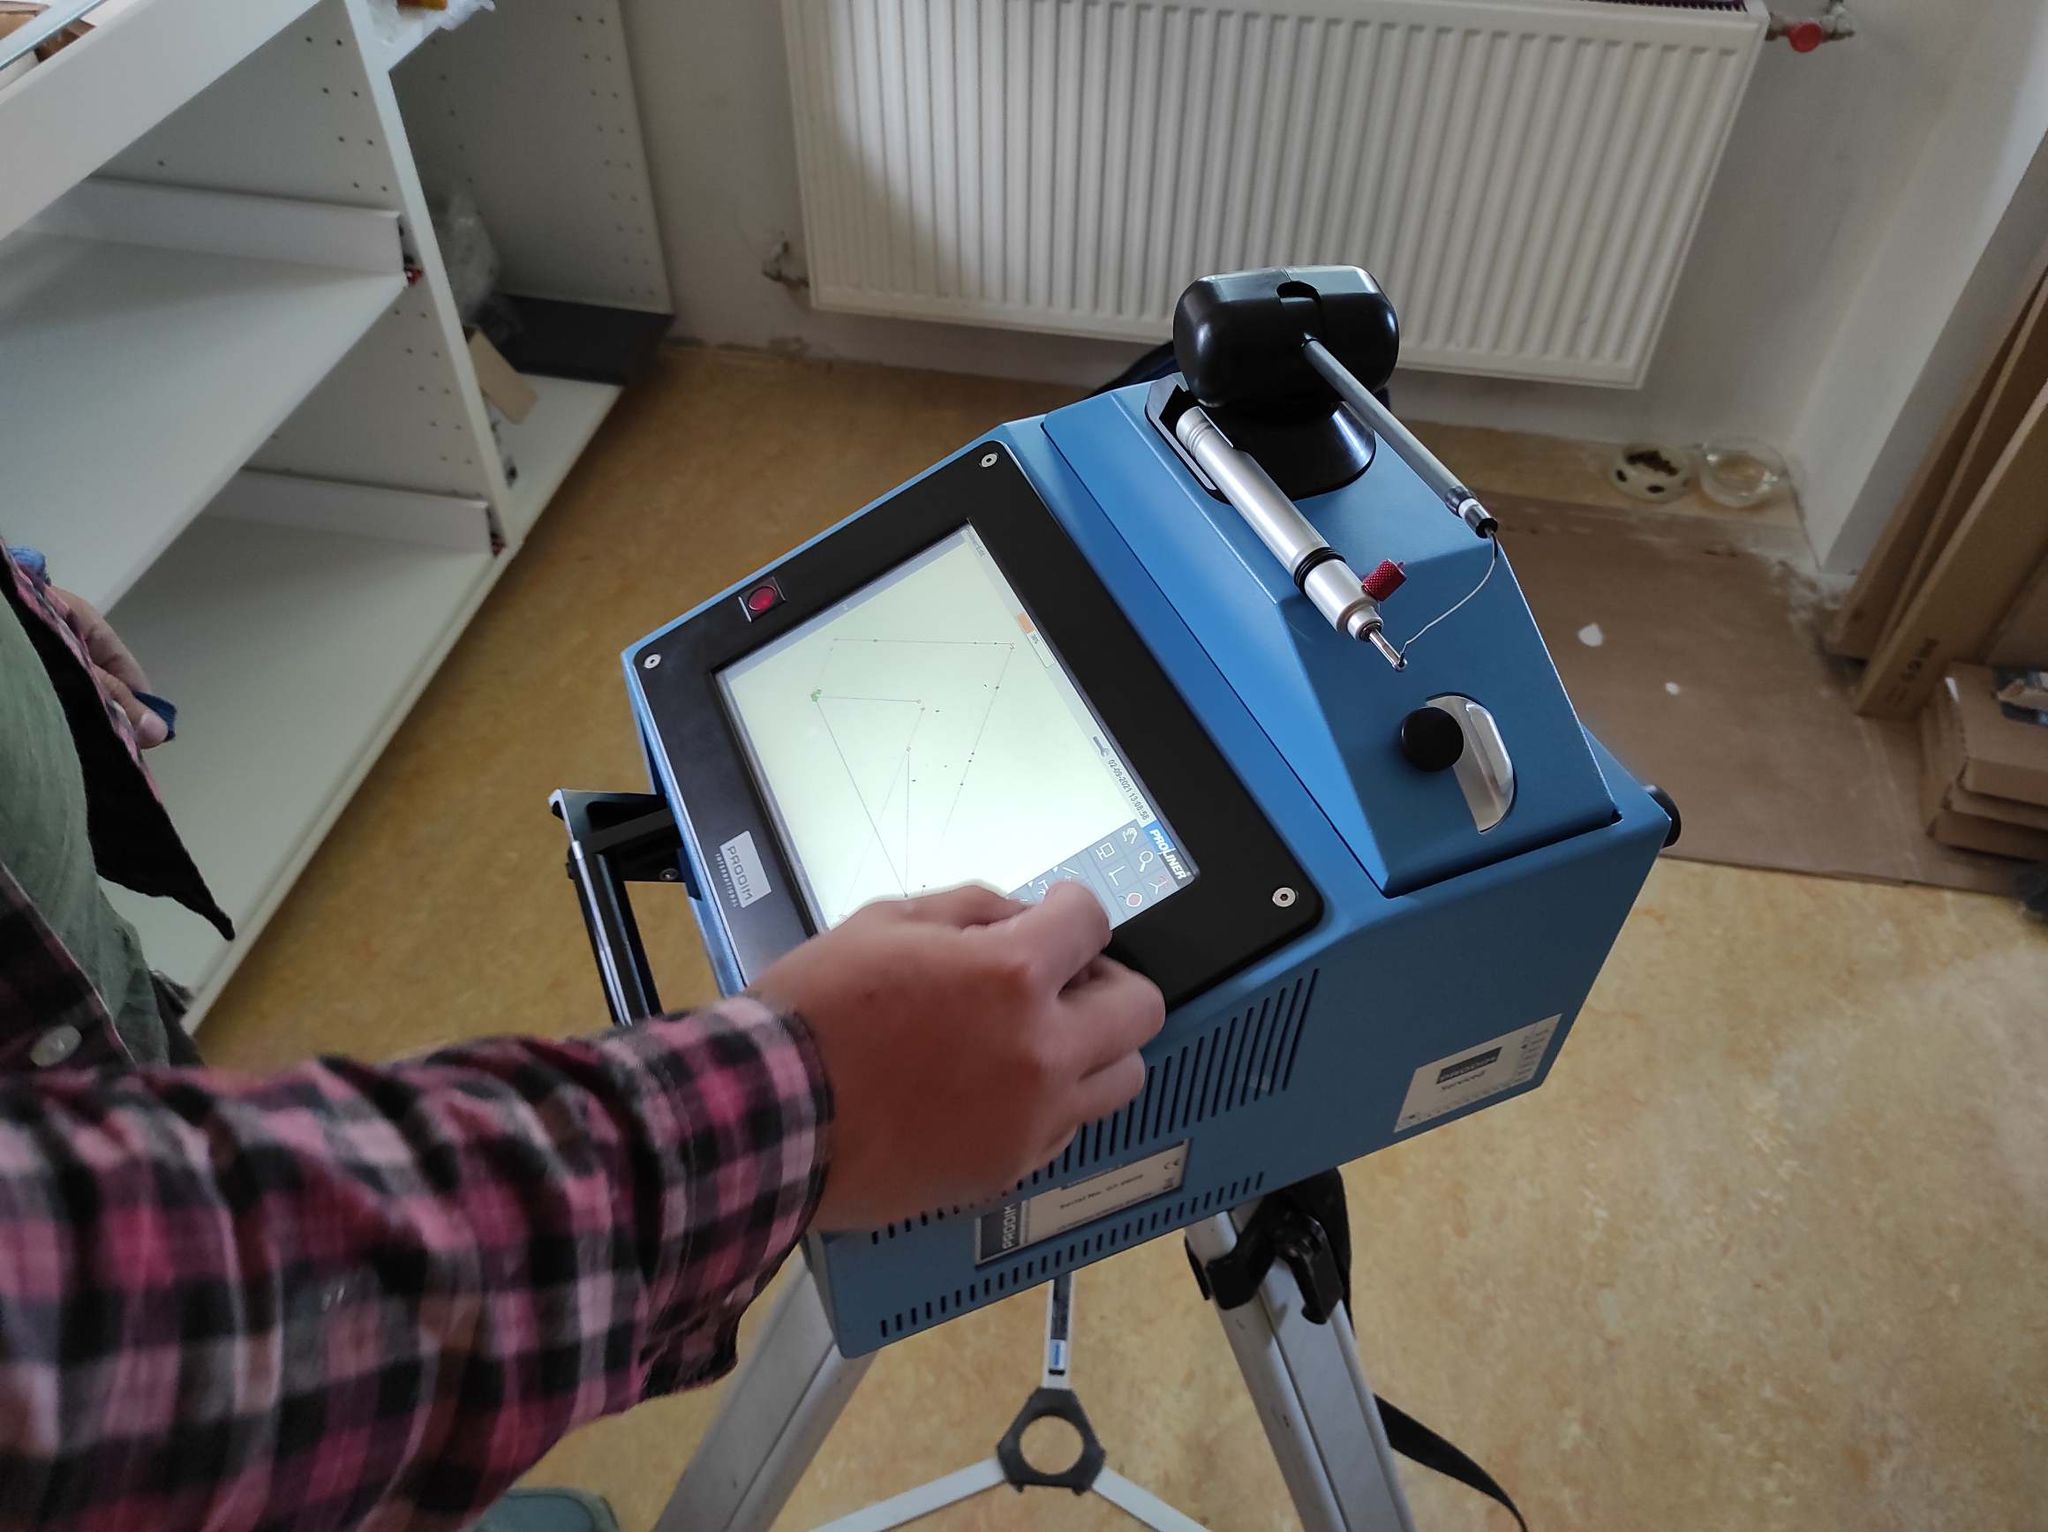
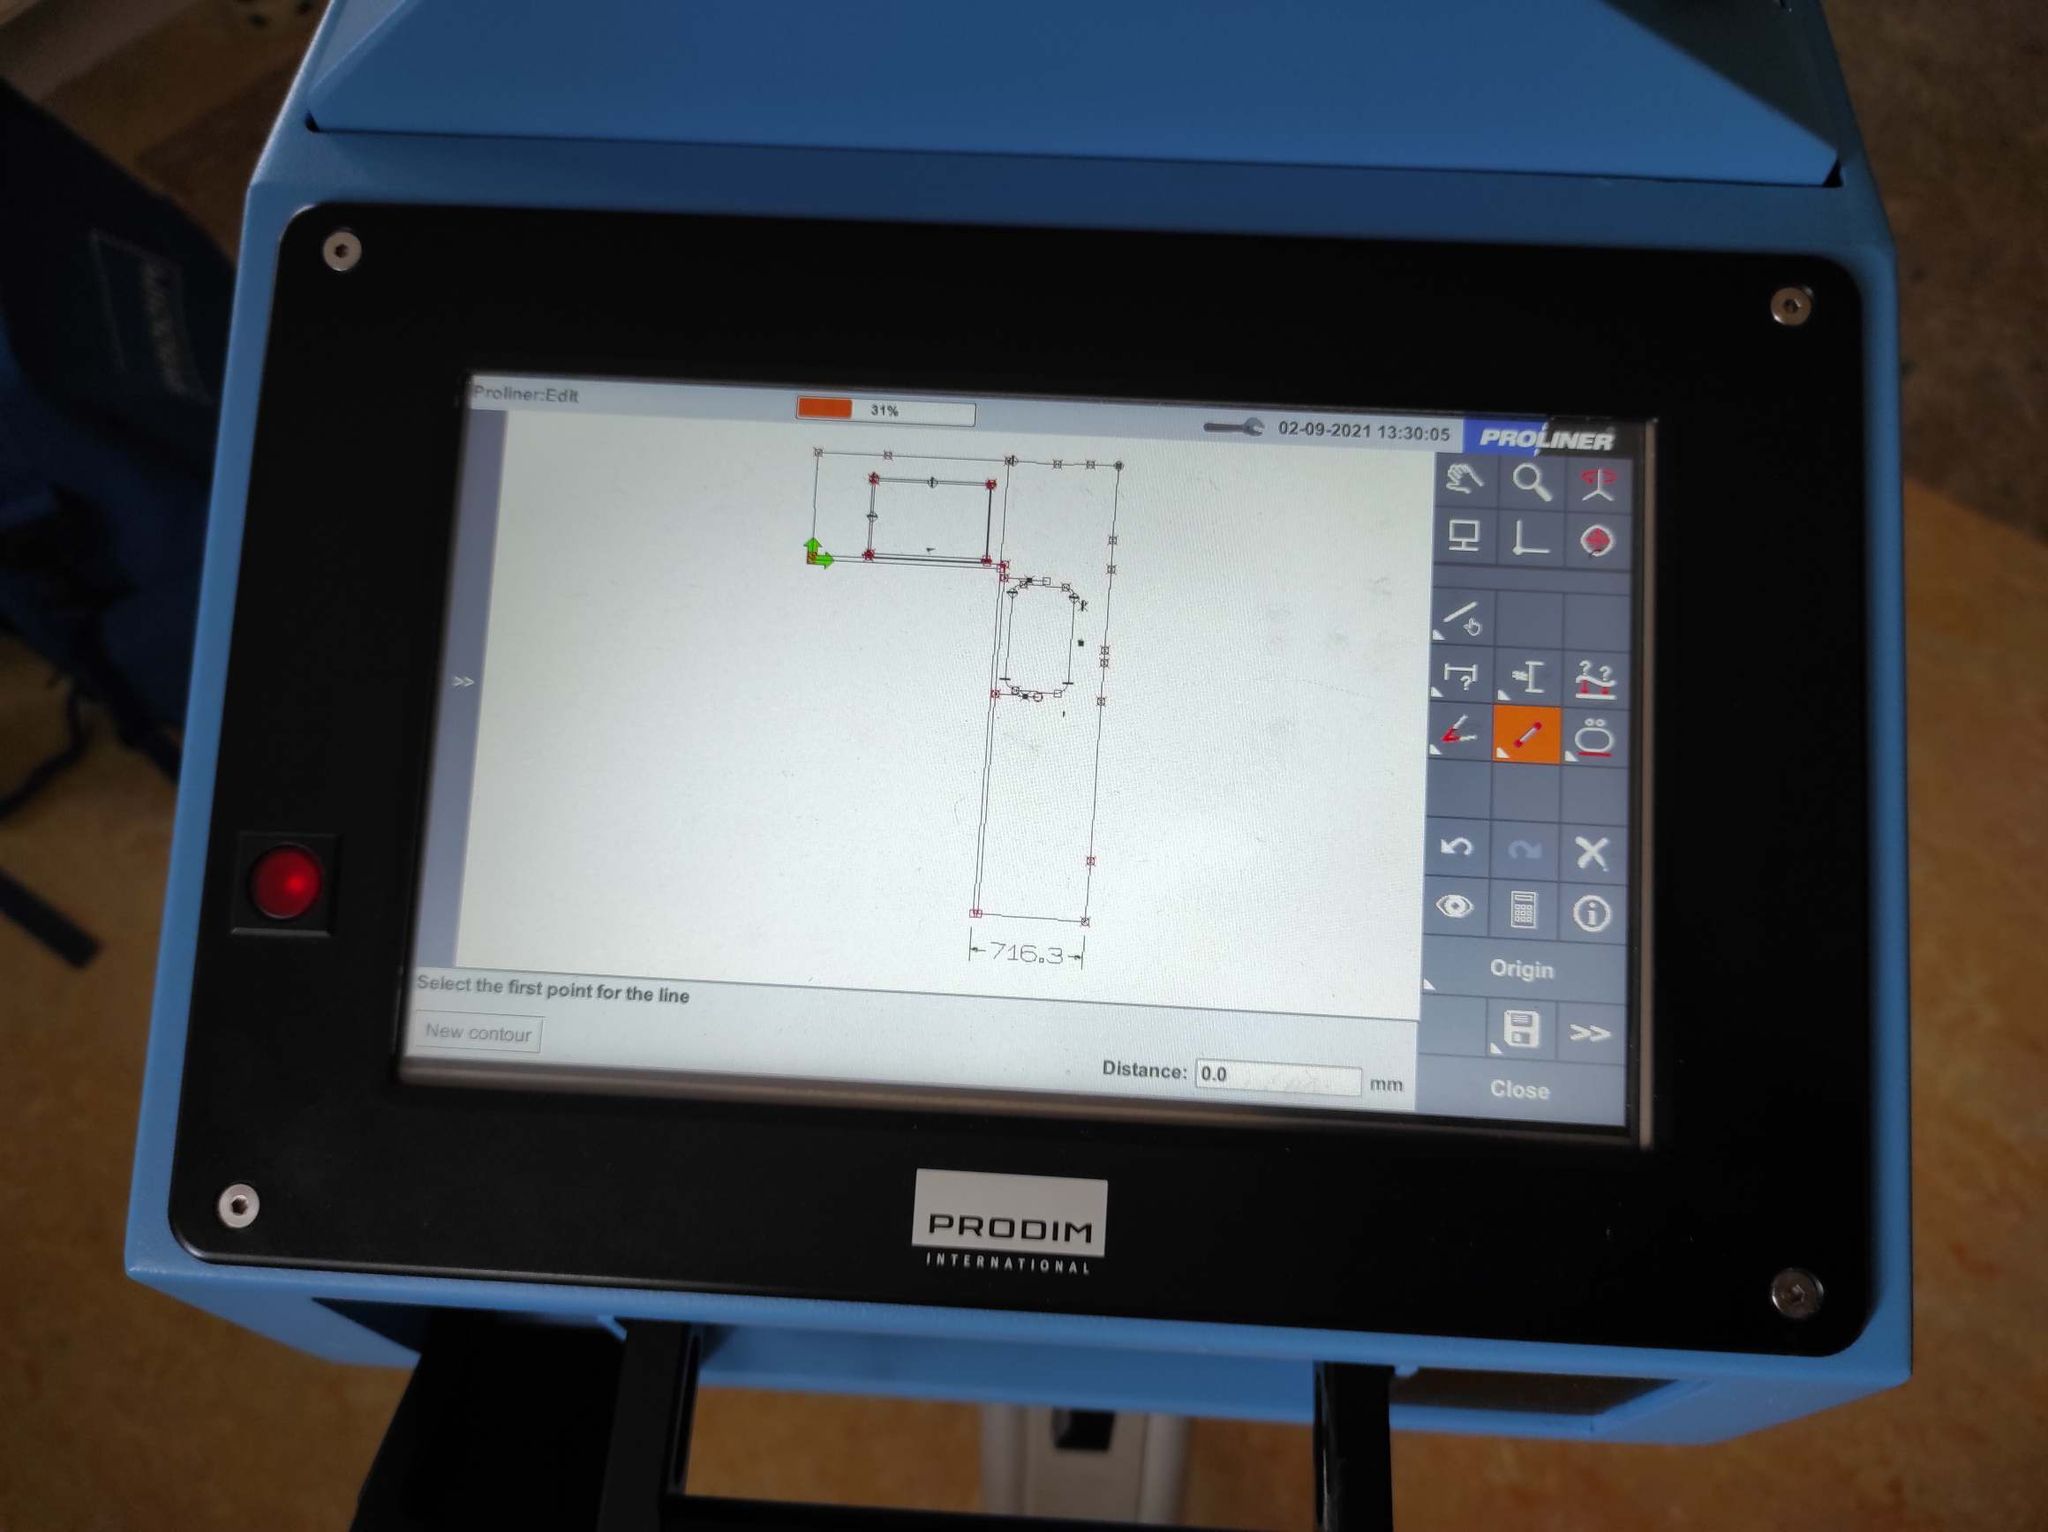
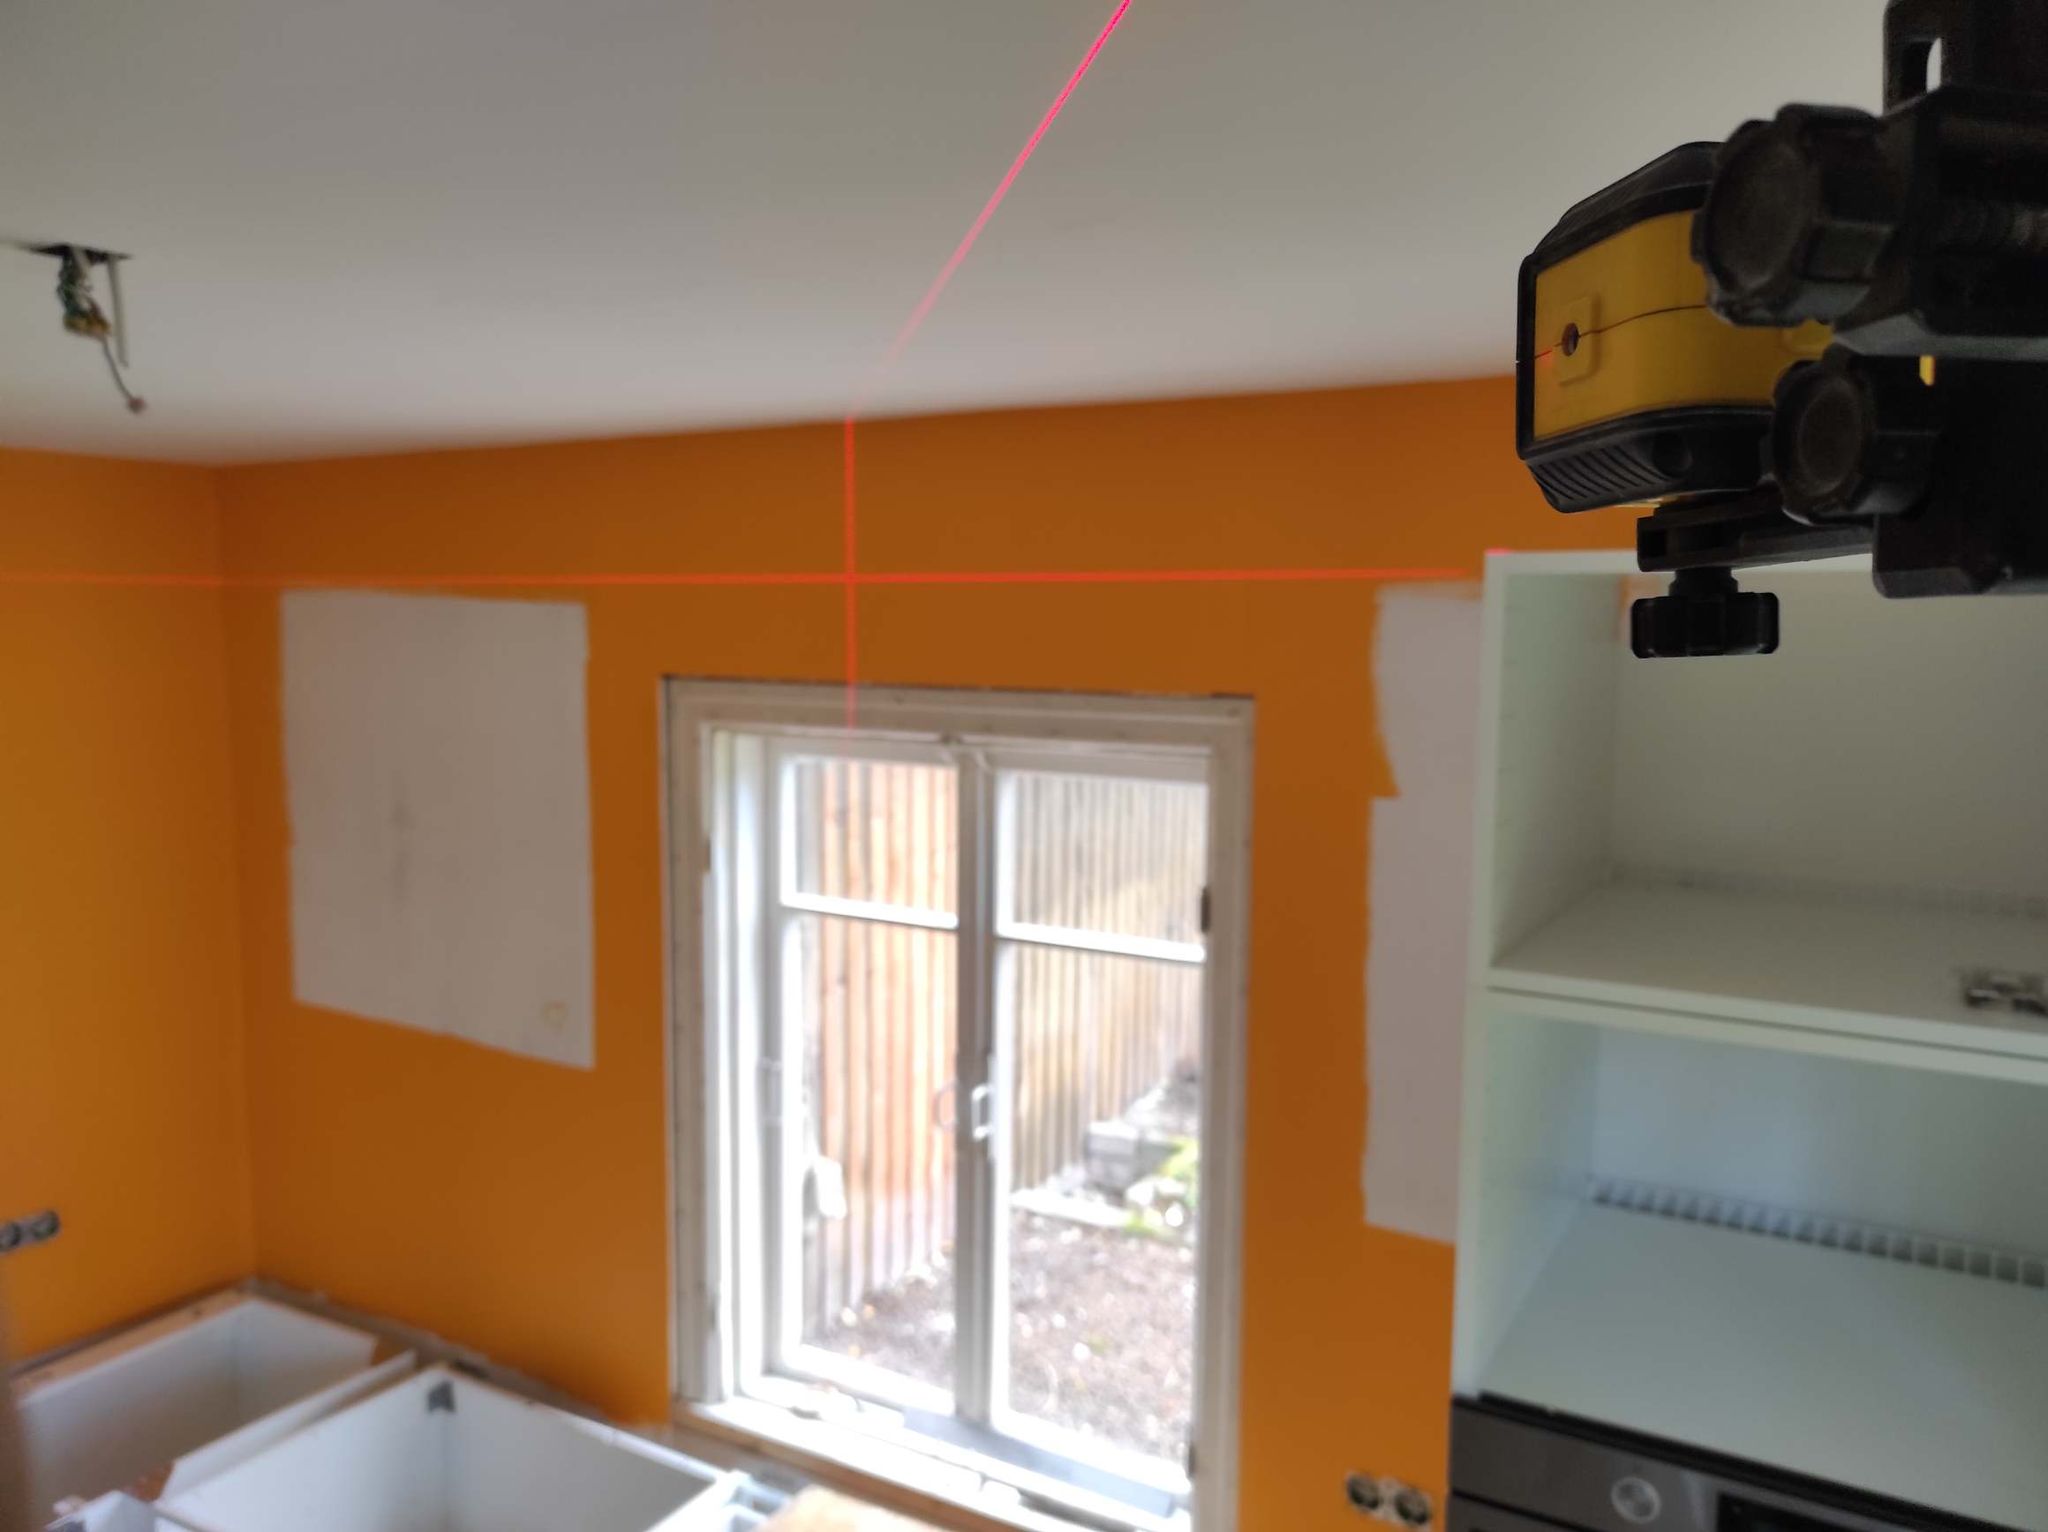
Now the cabinets have gotten their final place the countertop can be measured. The guy from Granimar came with er very nice tool to do the measurements. It is a box with a pen on a wire. Because of the wire it knows how far away from the box the pen is and because of the pressure from the wire it also knows the direction relative to the box. Apart from that there is a touch screen with some CAD software and in no-time the design was made. It should take 1-2 weeks to be ready.
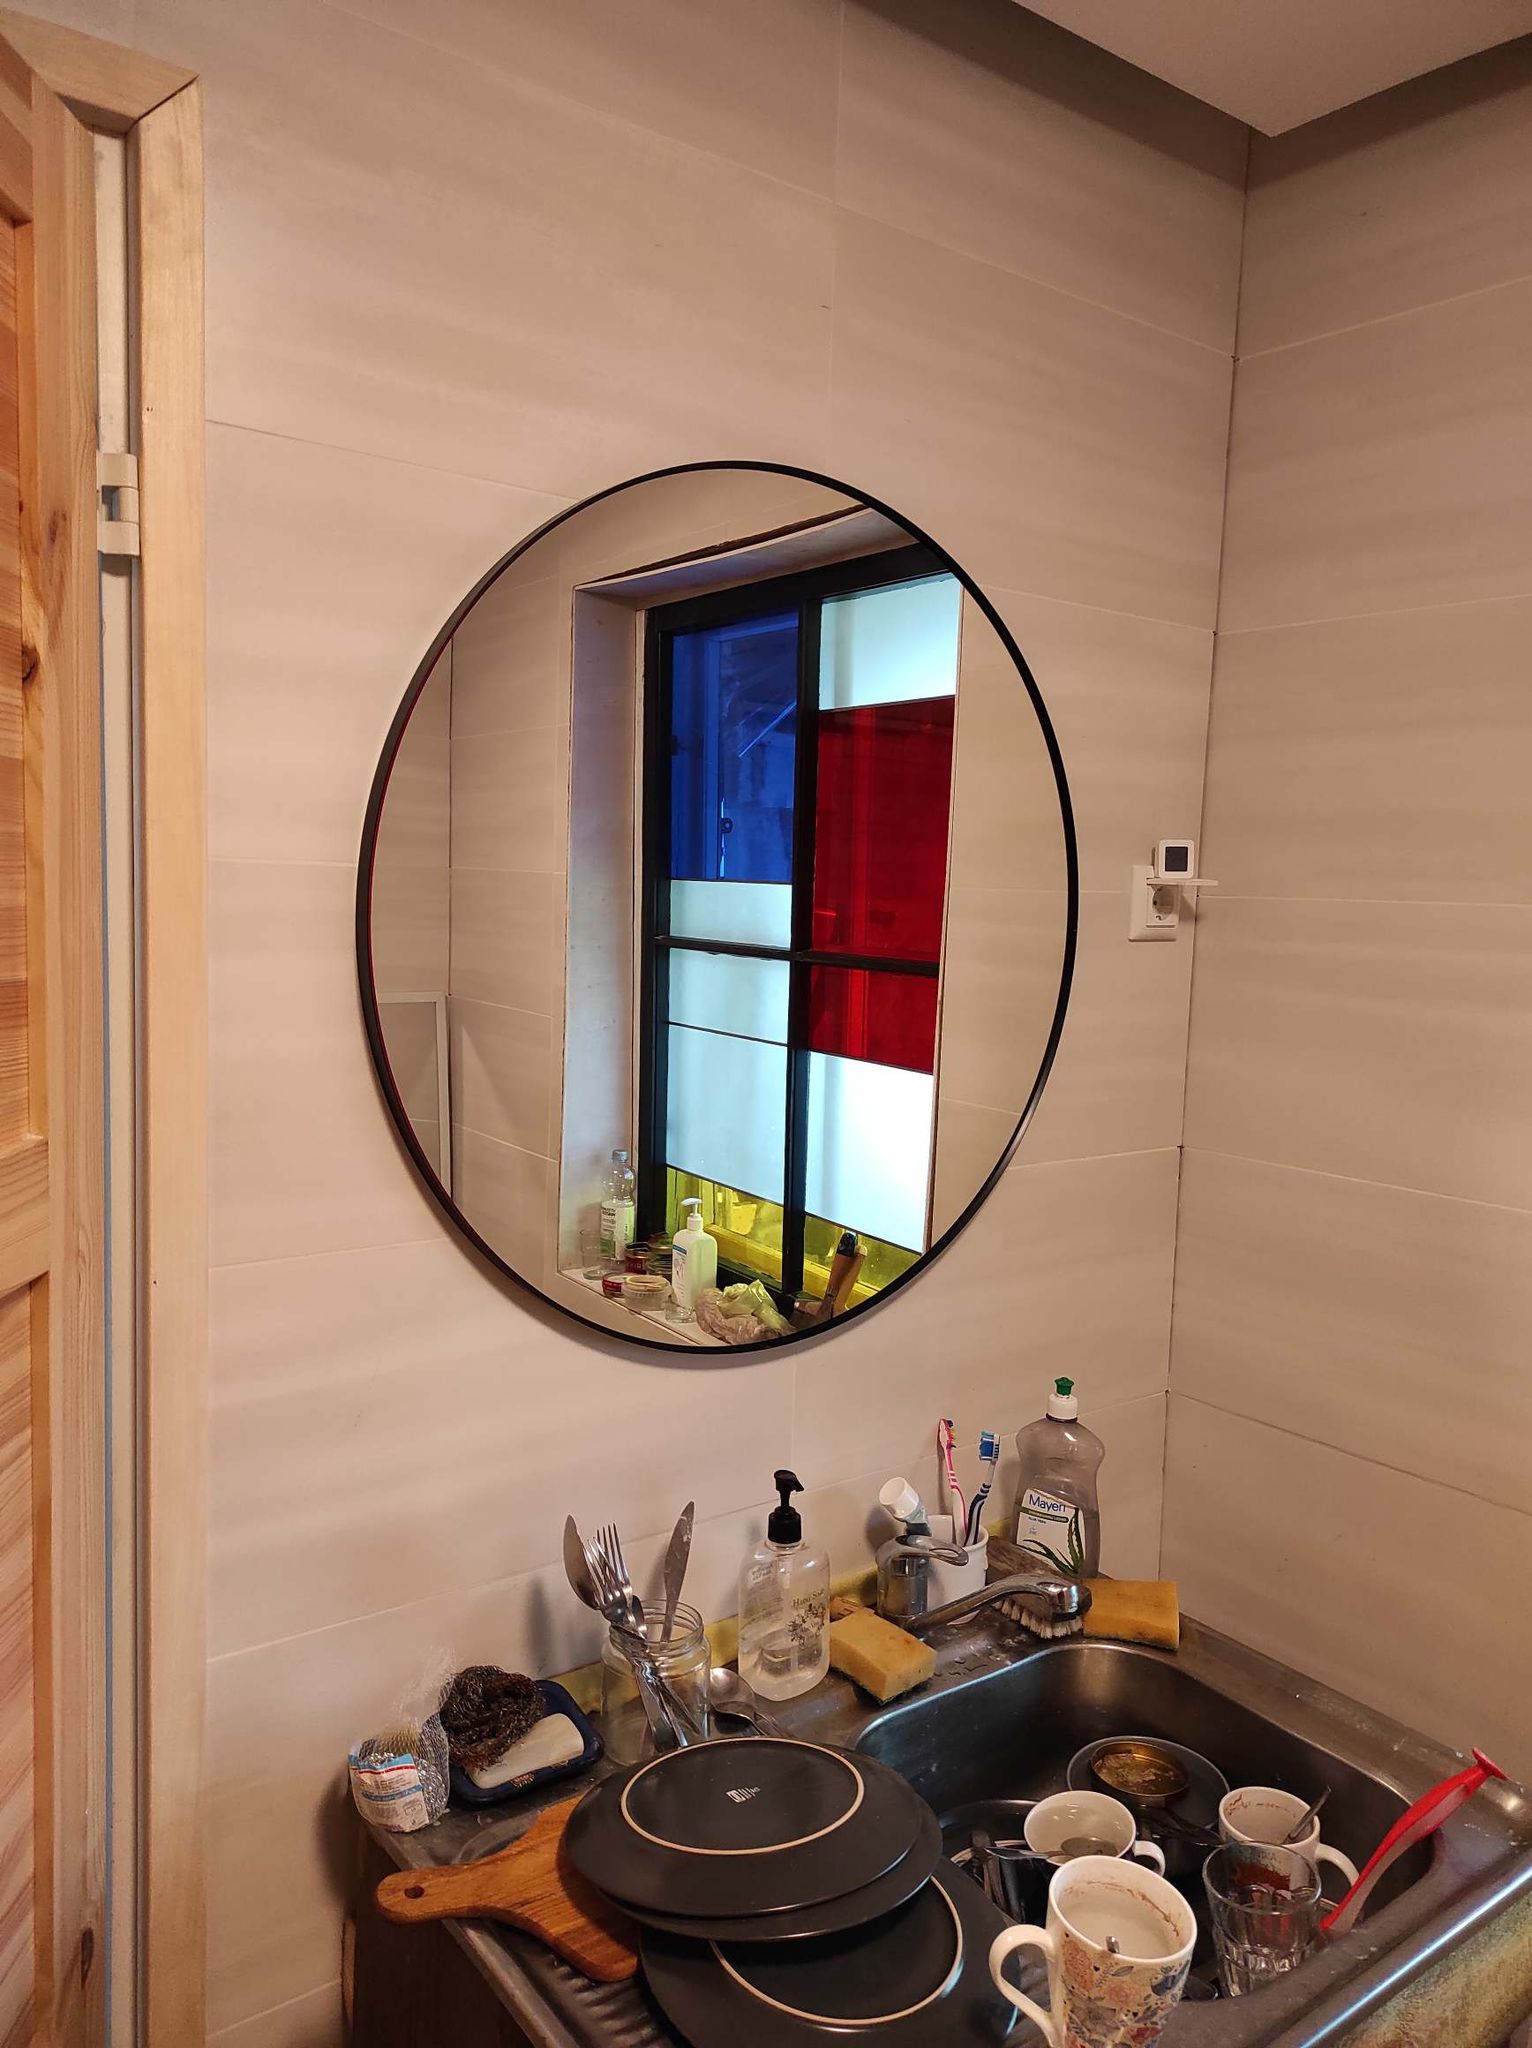
During the week we have visited Ikea to pick up some new kitchen parts and double check some stuff in the showroom. We also found a nice mirror for the bathroom, which is part of our temporary kitchen.
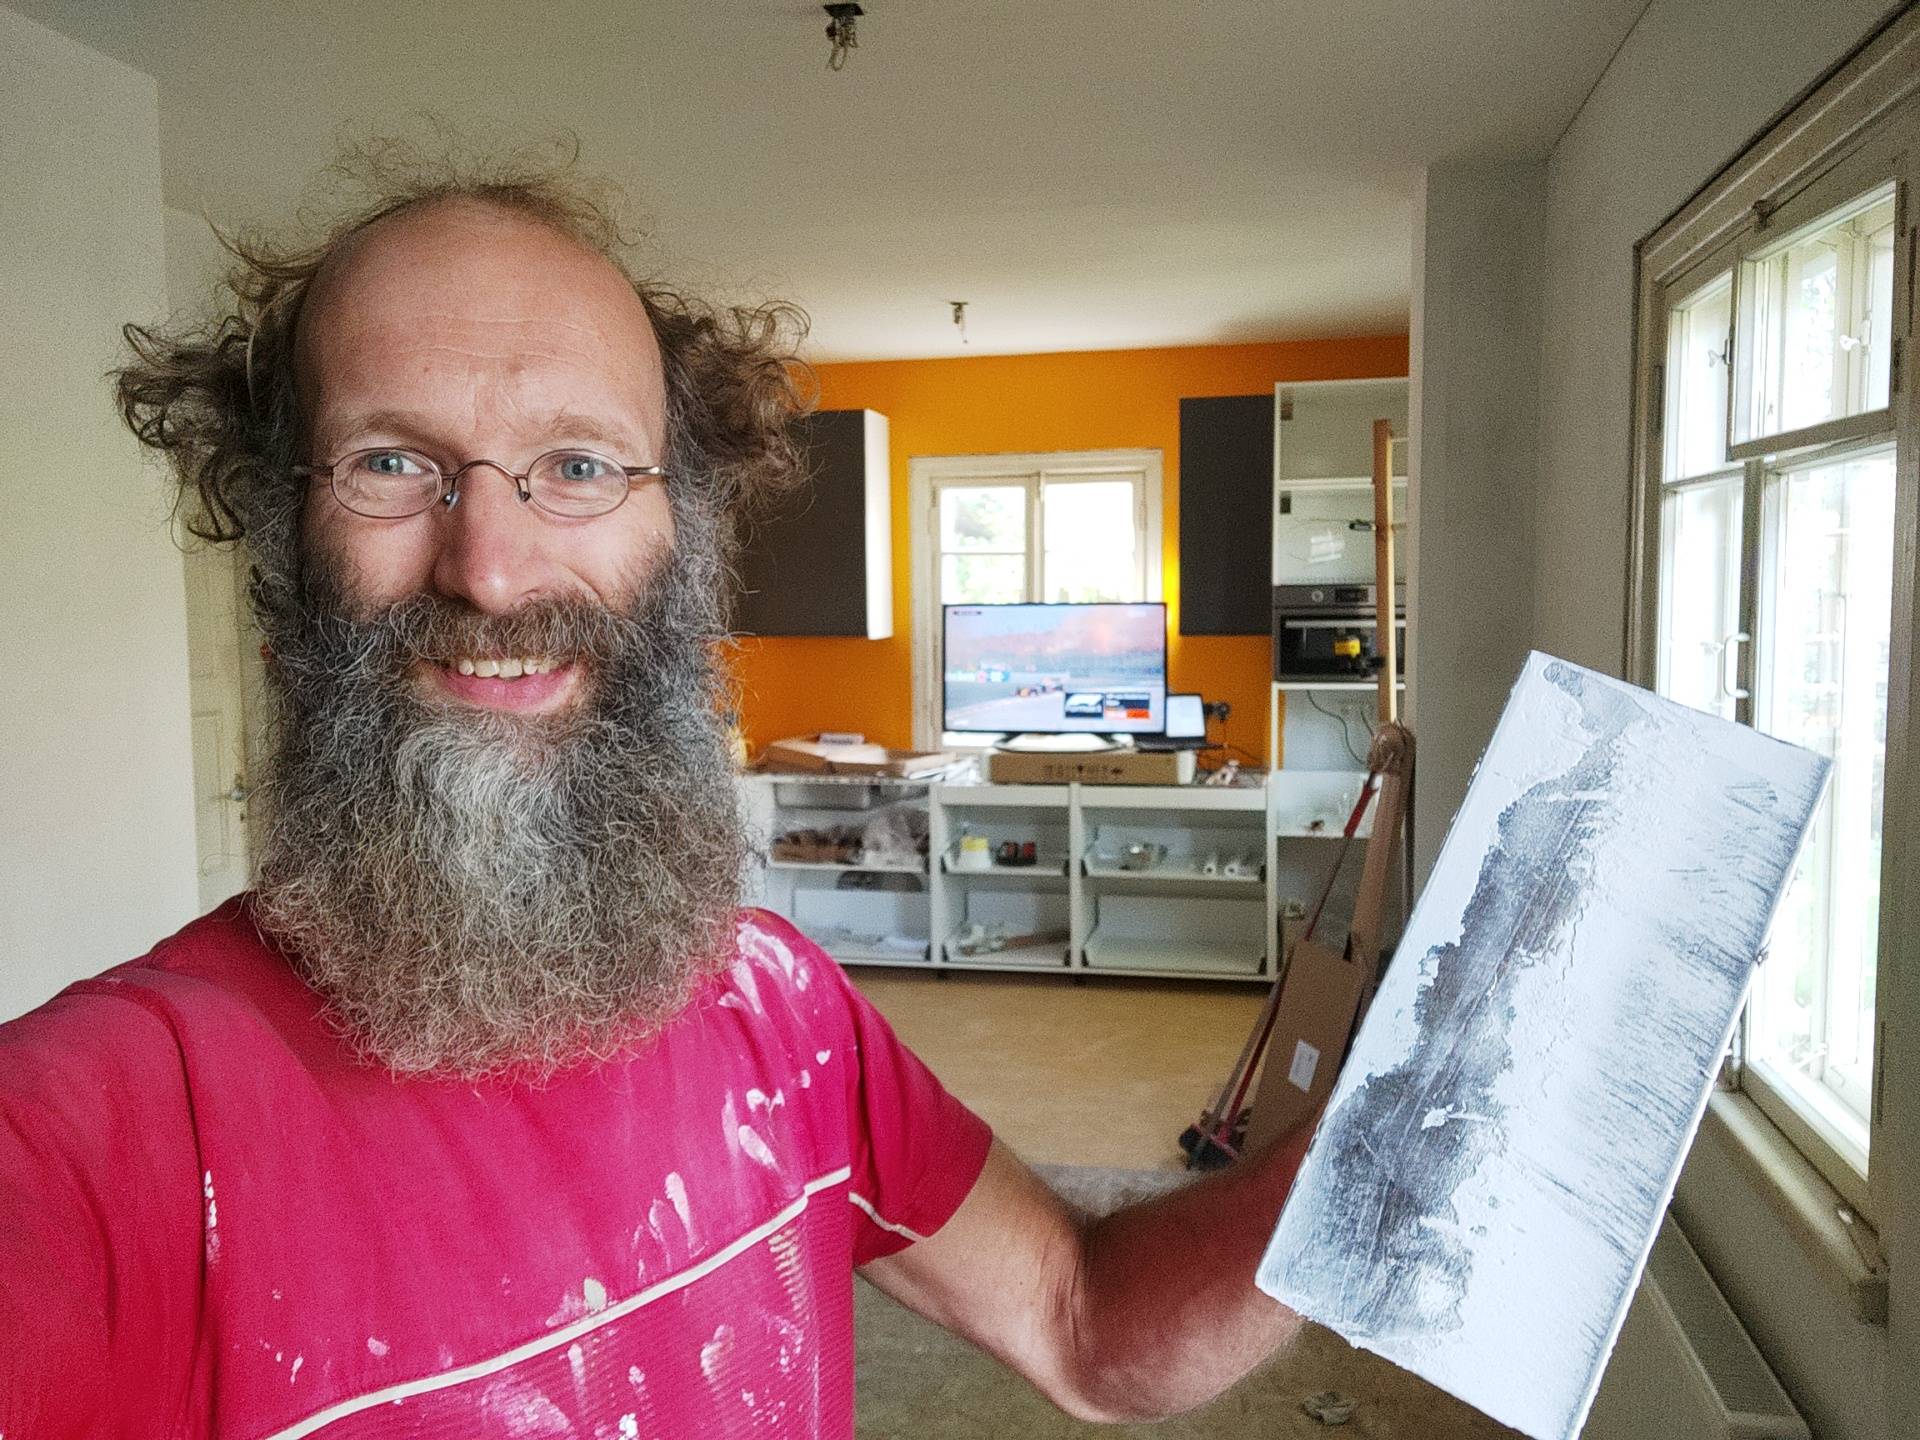
On Sunday put a thin layer of plaster on the walls in the living room to make sure the surface has the same structure as we decided not to put fiber glass wall paper on the walls here. As there was the first Formula 1 race in Zandvoort this century on, I connected my laptop to a TV screen so I could follow it while working.
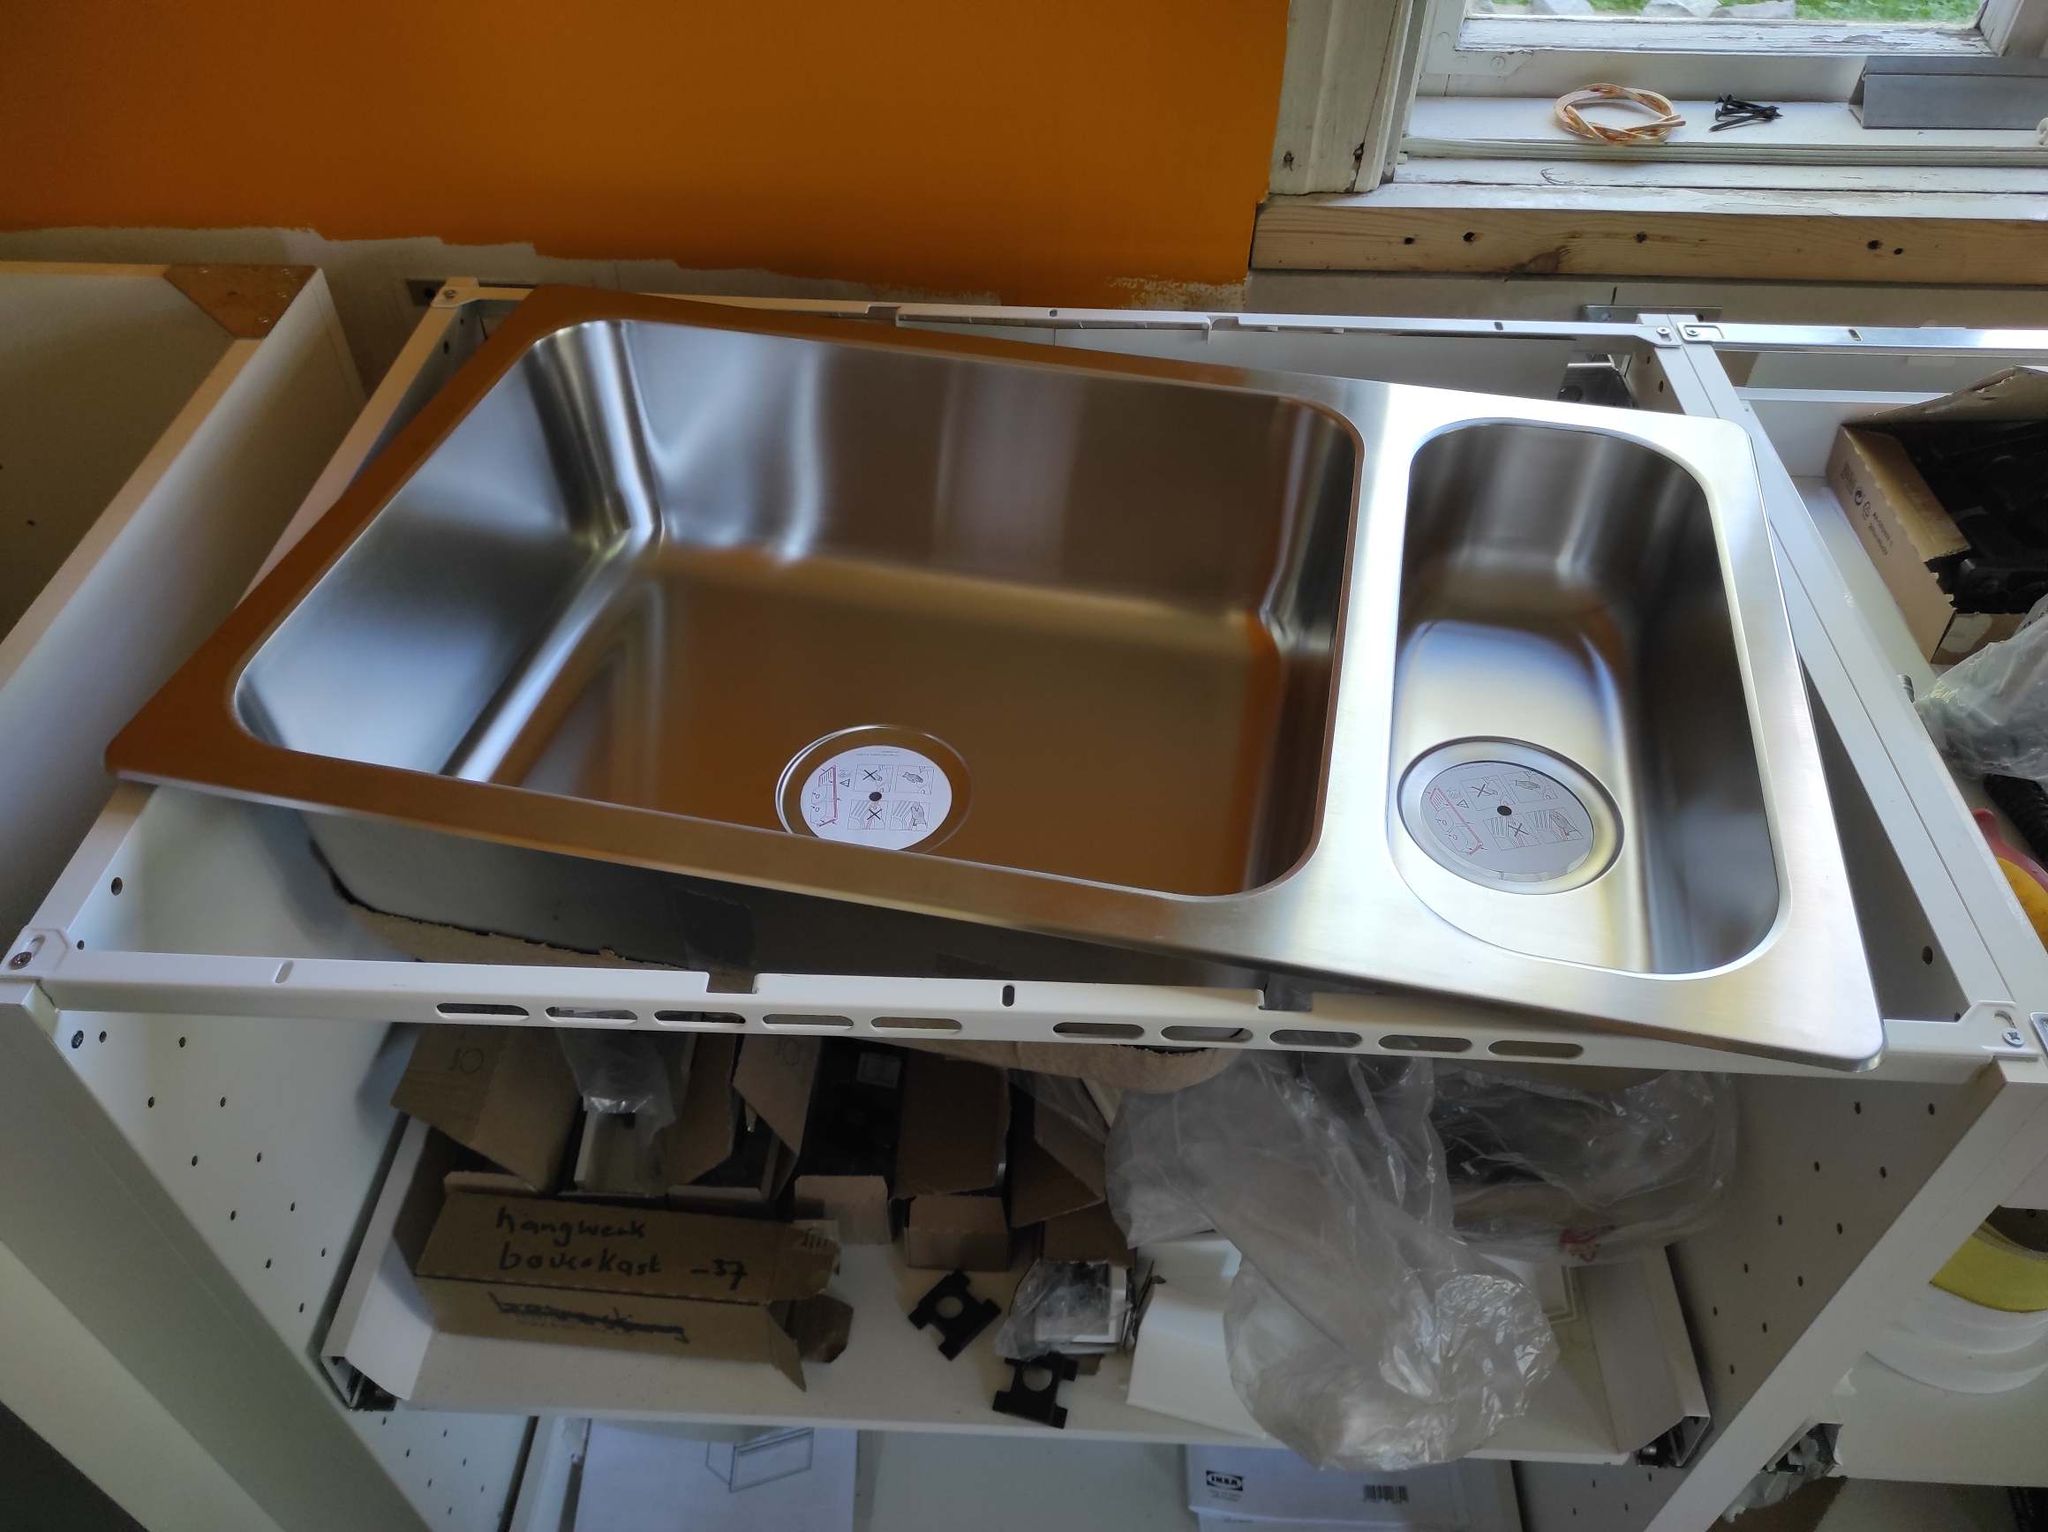
A box with a wireThe designThe sink needed to be measured as wellKitchen eh bathroom mirrorThe laser, one of the best investmentsPlastering with F1 on the background


Spelling error report
The following text will be sent to our editors: